Using MySQL Workbench to Execute SQL Queries and Create SQL Scripts
| Previous | Table of Contents | Next |
| Administering and Monitoring MySQL using the MySQL Workbench | Using MySQL Workbench to Create a Database Model |
| Purchase and download the full PDF and ePub versions of this MySQL eBook for only $9.99 |
As outlined in the previous chapter, the MySQL Workbench tool fulfills a number of different roles in terms of presenting a user friendly graphical interface to the MySQL database management system. One of those roles involves the creation and execution of SQL statements and scripts. The goal of this chapter is to cover this aspect of the workbench tool.
Connecting to a MySQL Database Server
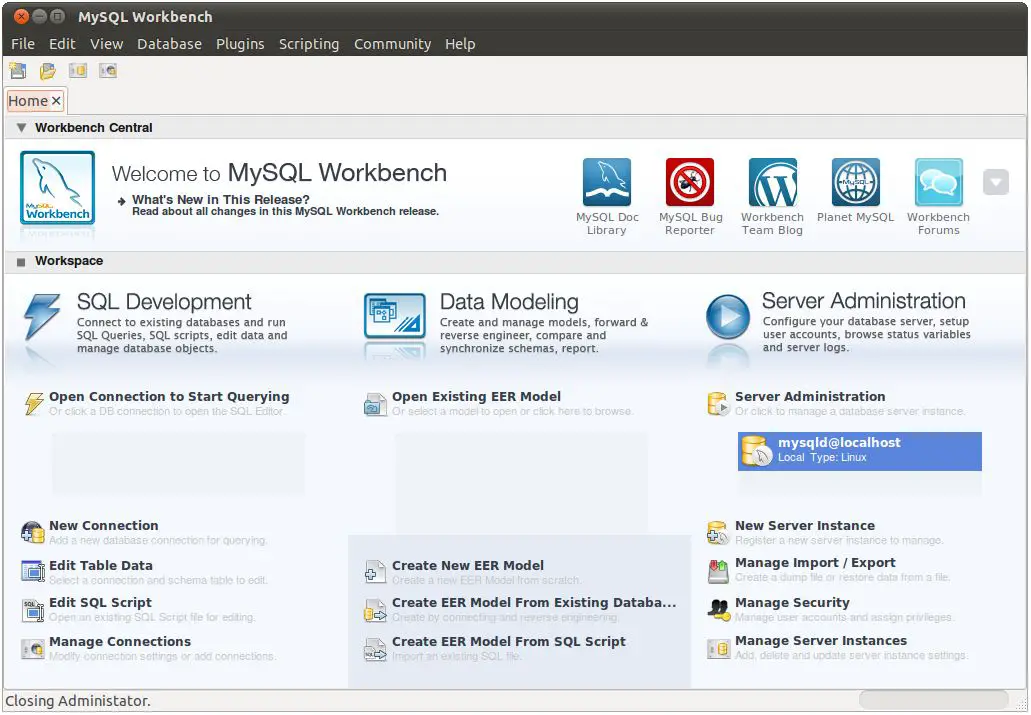
Before any SQL statements can be executed on a database, the MySQL Workbench tool must first establish a connection to the target database server. This may take the form of a local server that is running on the same host as the workbench, or a server running on a remote system. To establish such a connection, begin by launching the workbench tool. Once running, the home screen should appear as shown in the following figure:
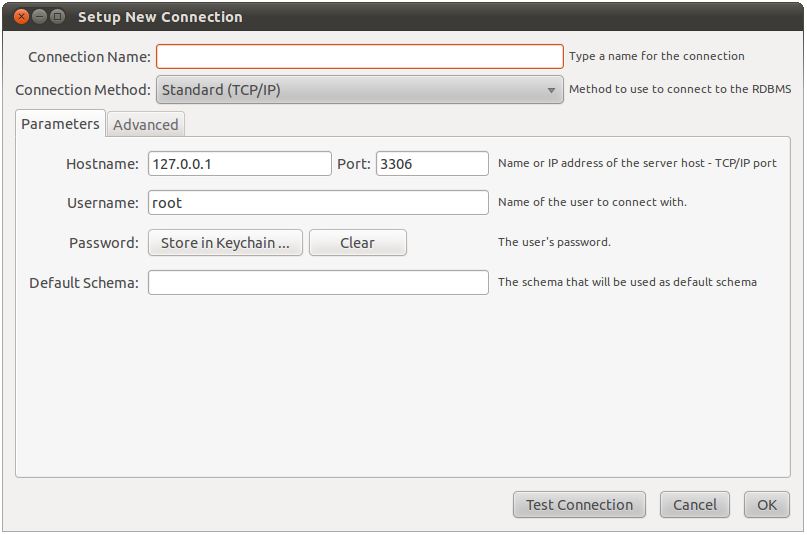
If the required connection is already listed in the SQL Development column of the workbench home page, simply double click on it to establish the connection and enter the corresponding password. Alternatively, click on New Connection to display the new connection dialog:
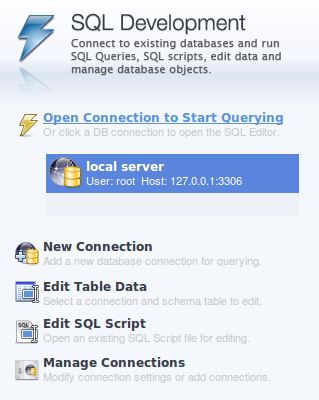
On the this screen, enter a descriptive name for the connection, indicate the connection type (TCP/IP, local socket or the more secure TCP/IP with SSH) and specify the name of the user and the port via which the database is to be accessed. Additional options are available by selecting the Advanced tab. Once the appropriate information has been provided, click on the Test Connection button to verify the information is correct and the database server is accessible. Assuming a successful test, click on OK to establish the connection profile. Once created, the connection will be listed in SQL Development column of the home screen:
To connect to the server, simply double click on the connection and enter the password for the specified user.
The MySQL Workbench SQL Editor
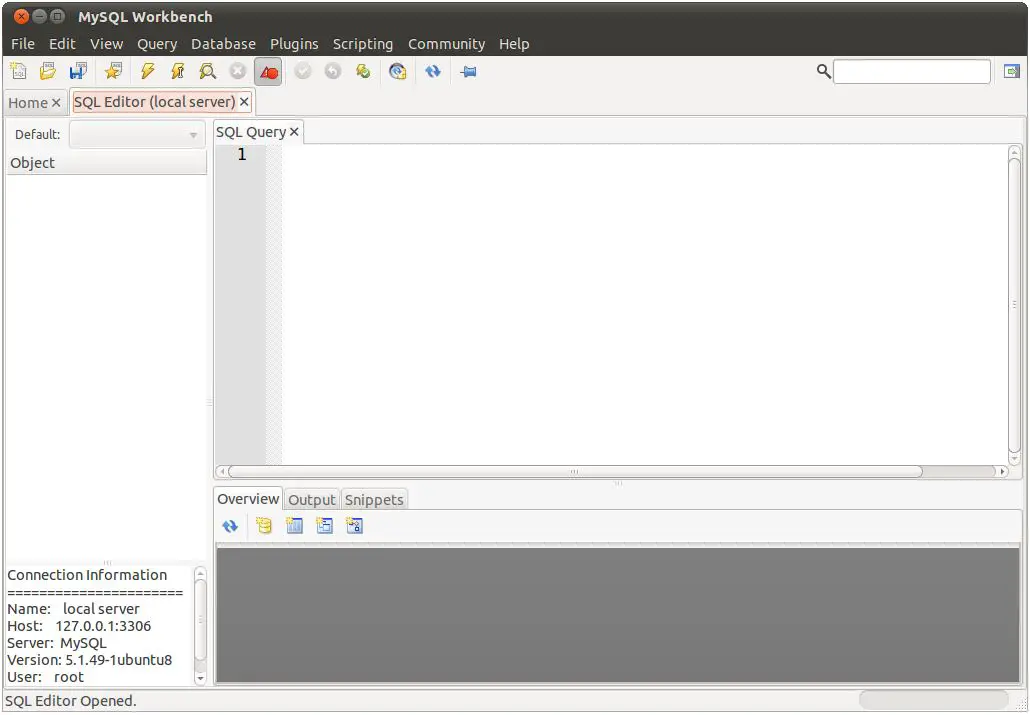
Once a connection has been established to a database server, the SQL Editor panel will appear as illustrated in the following figure:
It is possible to return to the workbench home screen at any time simply by selecting the Home tab. Multiple SQL Editor sessions to multiple servers may be established from the home screen, each with its own tab located beneath the toolbar.
The SQL Query panel allows SQL commands to be entered. These may then be executed using the buttons in the toolbar displaying lightning bolts. The leftmost “lightning” button is provided to execute the entire script contained within the SQL Query panel, whilst the second button executes only the currently selected statement.
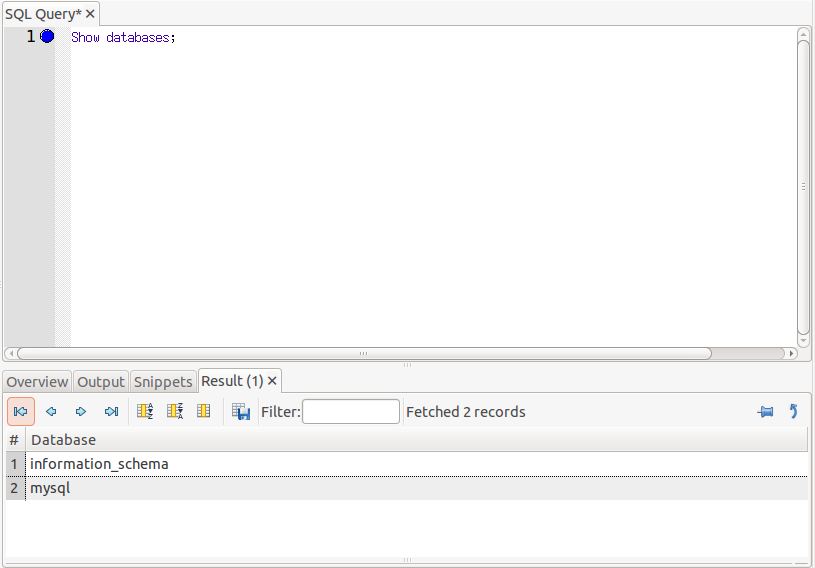
Output from SQL statement execution appears in a Results panel located beneath the SQL Query panel. In the following figure, a SQL SHOW DATABASES; statement has just been executed:
The sequence of SQL statements entered into the SQL Query panel may be saved in the form of a script by selecting the File -> Save Script menu option or clicking on the corresponding toolbar button. Saved scripts may similarly be loaded into the SQL Editor using the File -> Open SQL Script… menu option or the Open a SQL Script toolbar button.
| Purchase and download the full PDF and ePub versions of this MySQL eBook for only $9.99 |
| Previous | Table of Contents | Next |
| Administering and Monitoring MySQL using the MySQL Workbench | Using MySQL Workbench to Create a Database Model |


