Administering and Monitoring MySQL using the MySQL Workbench
| Previous | Table of Contents | Next |
| MySQL Users and Security | Using MySQL Workbench to Execute SQL Queries and Create SQL Scripts |
| Purchase and download the full PDF and ePub versions of this MySQL eBook for only $9.99 |
Whilst most MySQL tasks can be performed using command-line tools, many tasks can actually be made easier using the MySQL Workbench tool. This is a graphical user interface (GUI) tool that allows many tasks to be performed visually.
In this chapter of MySQL Essentials, the use of MySQL Workbench to administer and monitor MySQL will be covered. The workbench also includes features for creating and modifying database models, and a SQL Editor environment for interactively executing SQL statements and creating SQL scripts. These topics will be covered in subsequent chapters.
Getting and Installing MySQL Workbench
The MySQL Workbench tool is not installed by default along with the standard MySQL server and client software, nor is it included in the repositories of most Linux distributions. The MySQL Workbench package must, therefore, be downloaded independently from the MySQL web site at:
http://dev.mysql.com/downloads/workbench
The tool is provided pre-built for a number of platforms including Microsoft Windows, Mac OS X and popular Linux distributions including Red Hat, Fedora, Ubuntu and SuSE. The workbench is also available in source code form allowing the tool to be compiled on system for which pre-built binaries are not available.
Creating a Server Instance Profile
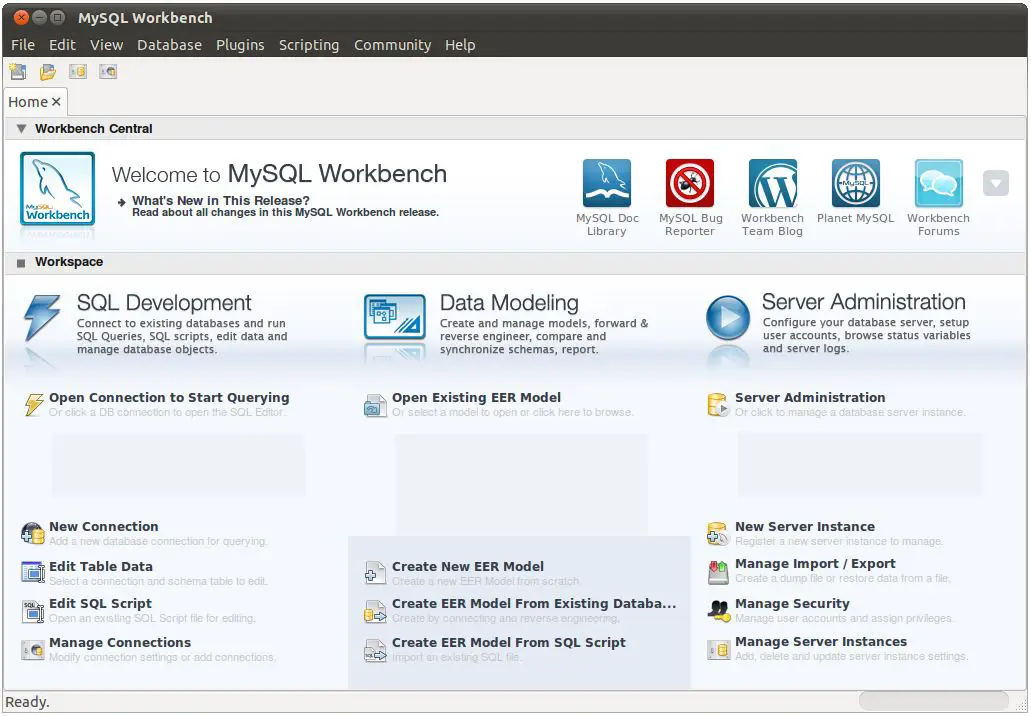
Once MySQL Workbench has been installed it is ready to be launched. On Windows system, look for MySQL Workbench within the Start menu structure. One Linux systems using the GNOME desktop, the application can usually be found in the Applications -> Programming menu. Once invoked, the initial screen will appear as illustrated in the following figure:
The workbench uses a “tabbed panel” approach to presenting information. On the initial startup, only the Home tab is displayed providing a range of options that may be performed such as creating and executing SQL queries and scripts and performing data modeling tasks. For the purposes of this chapter, however, we are interested solely in server administration.
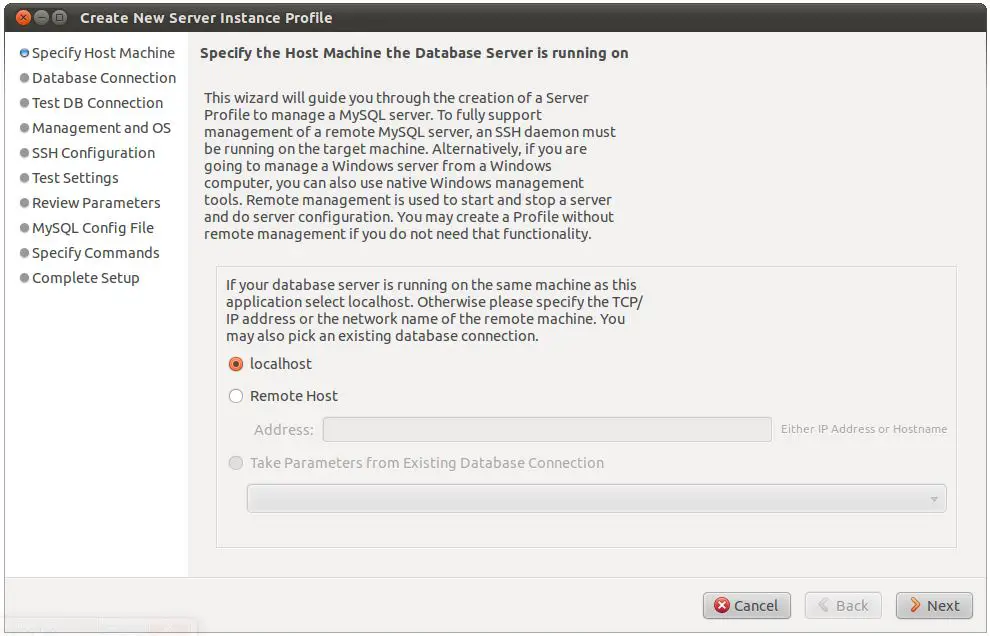
MySQL Workbench is able to administer both local and remote MySQL server instances. Before any administrative tasks can be performed, however, a connection to the target MySQL server must first be established. This is achieved by clicking on the New Server Instance option located in the Server Administration column of the home screen. Once selected, the Create New Server Instance Profile wizard will appear. The first screen provides the option to access either a local (i.e. a MySQL database server running on the same computer as the workbench tool) or remote database server. If the MySQL server is running on a remote system, make the appropriate selection and enter the hostname or IP address of that system:
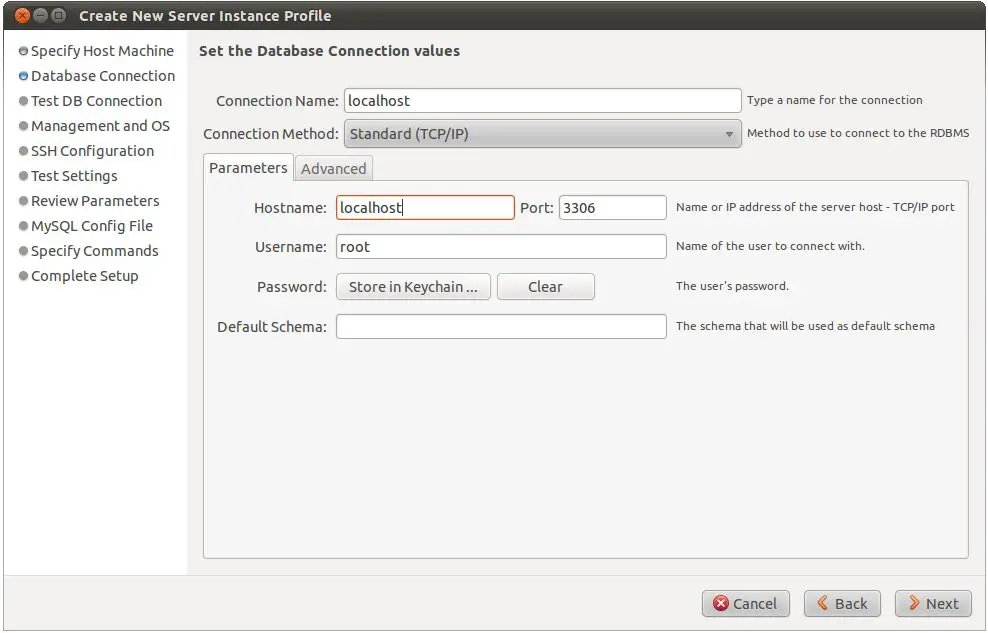
On the next screen, enter a descriptive name for the connection, indicate the connection type (TCP/IP, local socket or the more secure TCP/IP with SSH) and specify the name of the user and the port via which the database is to be accessed. Additional options are available by selecting the advanced tab:
After clicking the Next button, the wizard will request the password required to access the database using the user name specified and then attempt to test the connection. If a connection is successfully established a message indicating this will be displayed. If the test fails, return to the previous screen and verify that the connections settings are correct.
On the next screen, select the operating system and database type that are installed on the target system. If the wizard successfully detected these settings during the connection test, these values will most likely already be accurately configured. On the next screen, the wizard will check the connection to the host machine on which the workbench is running. Once again, the Next button may be pressed to proceed if the test passes successfully.
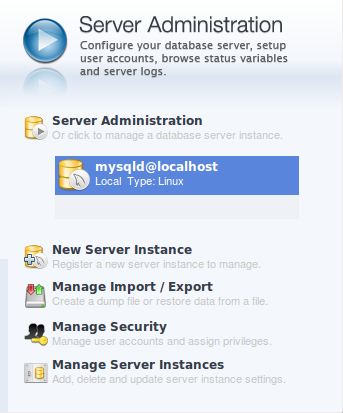
Finally, review the server instance name and click the Finish button to complete the instance creation process. The new server instance will now be listed in the Server Administration column of the home screen as illustrated in the following figure:
With a server instance profile created, the next step is to connect to the server.
Connecting to a MySQL Database Server
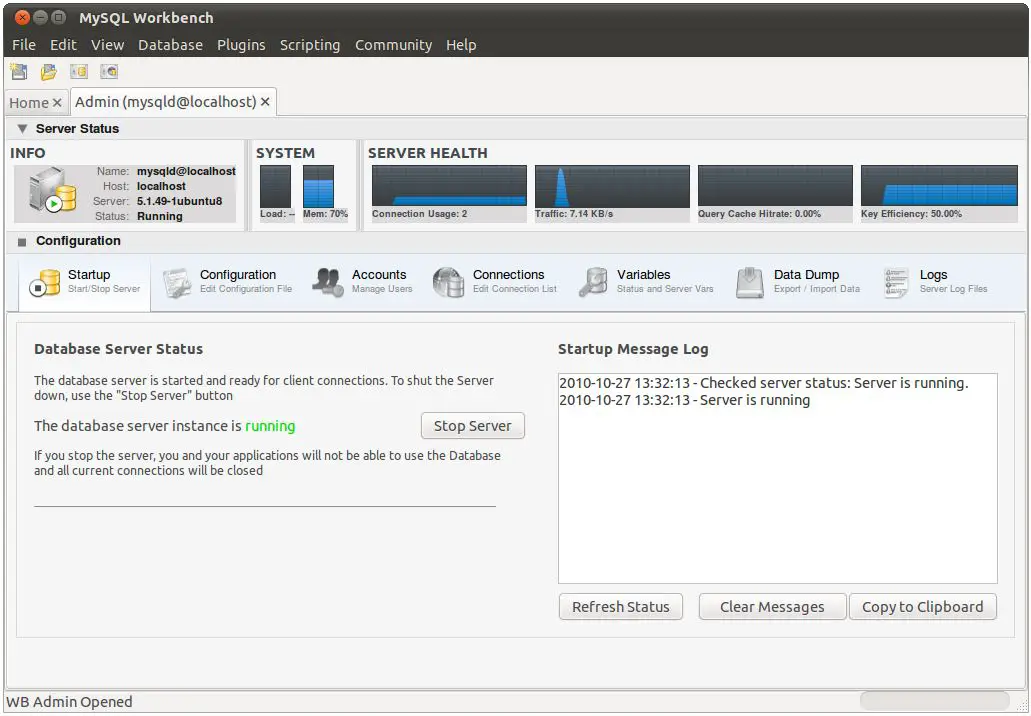
To connect to a database server to perform administrative tasks, simply double click on the server instance created in the previous section of this chapter. MySQL Workbench will prompt for the password associated with the user name contained in the profile and then display the Admin panel for the requested server instance:
Note that the Home panel is accessible at any time simply by clicking on the Home tab located beneath the toolbar. In addition, multiple administrator sessions, connected to different servers, may be establish concurrently from the home panel. Each administration session will appear with its own tab in the main window.
A Tour of the MySQL Workbench Admin Panel
The MySQL Workbench tool provides a wide range of monitoring and configuration options. For the remainder of this chapter we will provide an overview of the various options available.
Server Status
The topmost panel of the admin screen contains information about the server to which the workbench is currently connected:
The Server Status panel is further divided into three subsections:
- INFO - Displays information about the server (hostname, MySQL server version and current operational status).
- SYSTEM – The current load and memory usage of the system that is hosting the MySQL server to which the workbench is currently connected.
- SERVER HEALTH – Four gauges indicating the number of connections to the database, volume of traffic, rate of hits to the query cache and the database key efficiency percentage.
Configuration
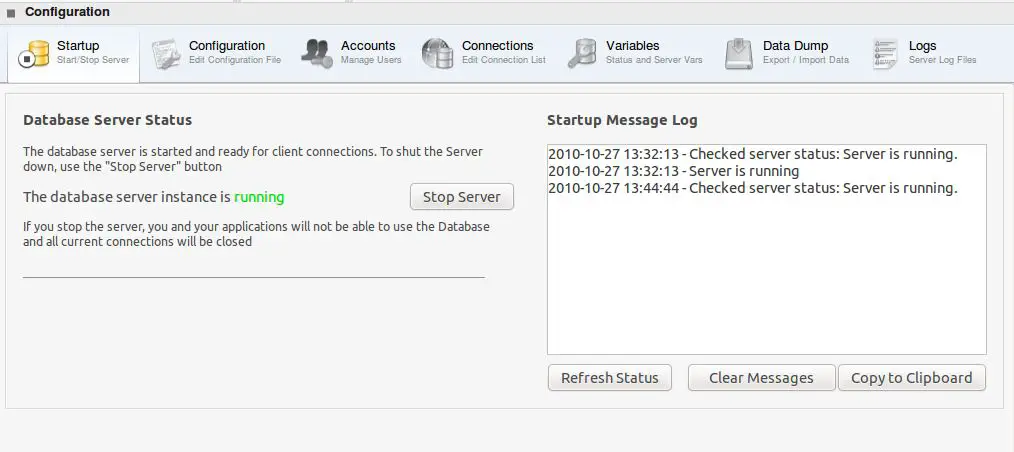
The Configuration panel, illustrated in the following figure, occupies the remainder of the Admin panel and provides a range of categories for accessing information and making configuration changes:
Configuration categories provided by the workbench are as follows:
- Startup – Allows the target database server to be stopped and started from within the administration panel. The startup message log also displays information about the success or otherwise of the most recent server startup.
- Configuration – Allows the settings contained in the my.cnf configuration file to be modified. Settings are categorized in this panel into related groups.
- Accounts – Allows user accounts to be added and deleted, and the privileges of existing accounts to be modified.
- Connections – Lists the current connections to the database server. To kill a connection or terminate a query, select the corresponding connection and click on the appropriate button at the bottom of the list.
- Variables – Provides access to a number of internal MySQL Server variables, such as the number of active connections, the number of failed connections and the number of SQL statements of a particular type that have been executed.
- Data Dump – Allows the data from specific databases and tables to be dump to or restored from file.
- Logs – Provides access to the log files of the MySQL server to which the workbench is connected. Note that for logs to be visible, the log-output configuration option must be set to TABLE. To make this change, select Configuration followed by the Log Files tab. Scroll down the list of options to log-output. If the check box next to this item is not selected, select it and change the value from File to Table and click the Apply button. Enter appropriate passwords when prompted to do so. After making the change, select the Startup panel and stop and restart the MySQL database server. Once restarted, the log files should be visible on the Logs tab.
Now that we have looked at the administrative aspects of MySQL Workbench the next step is to look at using the tool to execute SQL queries.
| Purchase and download the full PDF and ePub versions of this MySQL eBook for only $9.99 |
| Previous | Table of Contents | Next |
| MySQL Users and Security | Using MySQL Workbench to Execute SQL Queries and Create SQL Scripts |


