Difference between revisions of "Configuring Fedora GNOME Screen Resolution, Orientation and Multiple Monitors"
| Line 1: | Line 1: | ||
| + | <table border="0" cellspacing="0" width="100%"> | ||
| + | <tr> | ||
| + | <td width="20%">[[Allocating a Windows Disk Partition to Fedora Linux|Previous]]<td align="center">[[Fedora Linux Essentials|Table of Contents]]<td width="20%" align="right">[[#Configuring the Fedora GNOME Desktop Background and Themes|Next]]</td> | ||
| + | <tr> | ||
| + | <td width="20%">Allocating a Windows Disk Partition to Fedora Linux<td align="center"><td width="20%" align="right">Configuring the Fedora GNOME Desktop Background and Themes</td> | ||
| + | </table> | ||
| + | <hr> | ||
| + | |||
| + | |||
After Fedora Linux installs and boots for the first time you may find that the desktop is not using the entire screen space available, leaving a black border around the desktop. In this chapter of [[Fedora Linux Essentials]] we will cover the steps necessary to adjust the display device and resolution of the GNOME desktop. | After Fedora Linux installs and boots for the first time you may find that the desktop is not using the entire screen space available, leaving a black border around the desktop. In this chapter of [[Fedora Linux Essentials]] we will cover the steps necessary to adjust the display device and resolution of the GNOME desktop. | ||
Revision as of 19:28, 29 August 2007
| Previous | Table of Contents | Next |
| Allocating a Windows Disk Partition to Fedora Linux | Configuring the Fedora GNOME Desktop Background and Themes |
After Fedora Linux installs and boots for the first time you may find that the desktop is not using the entire screen space available, leaving a black border around the desktop. In this chapter of Fedora Linux Essentials we will cover the steps necessary to adjust the display device and resolution of the GNOME desktop.
Setting the Display Type
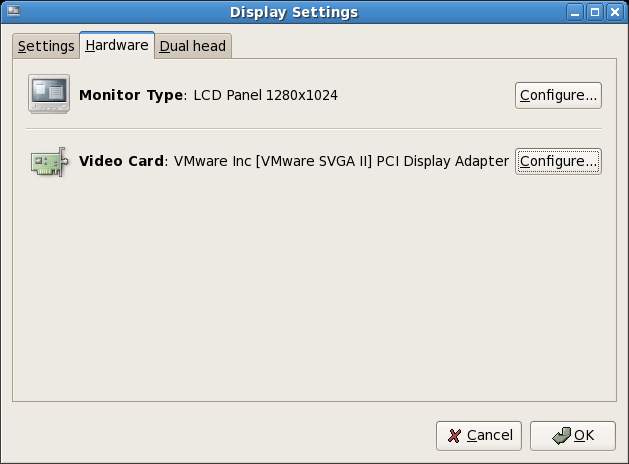
Configuring the display resolution is actually a two step process. The first step involves configuring the correct display hardware. This is achieved using Display Settings tool which may be accessed from the Desktop System->Administration->Display menu option. When tool appears, click on Hardware tab and click on the Configure button next to Monitor Type:
The resulting screen will display a list of CRT and LCD monitor types. Select the appropriate monitor and click on OK. Next, if the incorrect Video card is listed, click the Video Card configuration button and select your video card from the list and click OK.
Select the Settings tab Display Settings and change the Resolution value to the highest resolution supported by your display and graphics card.
Setting the Screen Resolution Preferences
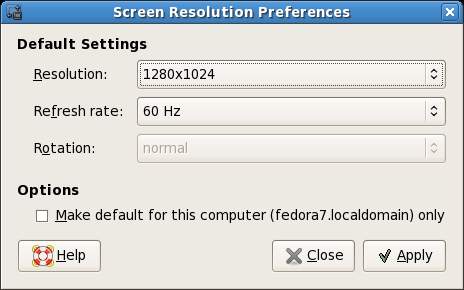
The next step is to set the screen resolution preferences. Begin by selecting System->Preferences->Screen Resolution from the desktop. The resulting dialog will appear as follows:
Increase the resolution value to match the resolution specified in the Display Settings above and click Apply. Log out from tyhe desktop and log back in again. The desktop should now fill the available screen space.


