Using gufw and ufw to Configure an Ubuntu 11.04 Firewall
| Previous | Table of Contents | Next |
| Ubuntu 11.04 Firewall Basics | Managing Ubuntu 11.04 Users and Groups |
In Ubuntu 11.04 Firewall Basics we looked at ports and services on an Ubuntu 11.04 system. We also briefly looked at iptables firewall rules on Ubuntu including the creation of a few very simple rules from the command line. In this chapter we will look at a more user friendly approach to iptables configuration using two tools named gufw and ufw. As we will see, gufw and ufw provide a high level of control over both inbound and outbound network traffic and connections without the need to understand the lower level iptables syntax.
Contents | ||
An Overview of gufw and ufw
Included with Ubuntu 11.04 is a package called ufw which is an acronym for Uncomplicated Firewall. This package provides a command line interface for managing and configuring rules for the Netfilter iptables based firewall. The gufw tool provides a user friendly graphical interface to ufw designed to make firewall management possible without the need to issue ufw commands at the command line.
Installing gufw on Ubuntu
Whilst ufw is installed on Ubuntu 11.04 by default, the gufw package is not. To install gufw, therefore, open a Terminal window (Ctrl-Alt-T) and enter the following command at the resulting prompt:
sudo apt-get install gufw
Enter your password when prompted to do so and wait while gufw is downloaded and installed.
Running, Unlocking and Enabling gufw
Once installed, launch gufw by pressing Alt-F2 and entering gufw into the Run a command text box. When invoked for the first time gufw will be locked and disabled as illustrated in the following figure:
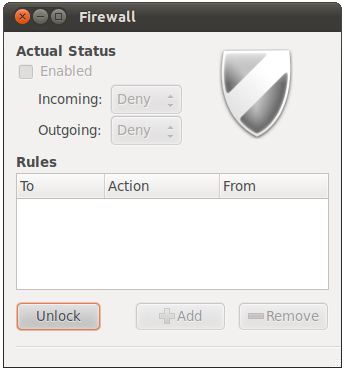
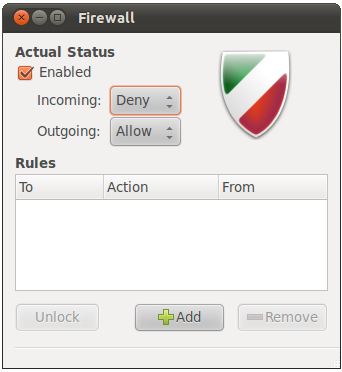
To unlock gufw simply click on the Unlock button and enter your password when prompted to do so. Having unlocked the tool set the Enabled checkbox to activate the tool. Once unlocked and enabled, the tool is ready for use:
The gufw Default Policy
The default policy dictates how the firewall handles traffic in the absence of any specific policy rules. By default the firewall is configured to deny all incoming traffic and allow all outgoing traffic. These policy settings are changed using the Incoming: and Outgoing: menus located in the main gufw dialog.
Exceptions to the default policy are defined through the creation of additional rules. With the default policy denying incoming traffic, for example, rules would need to be added to enable certain acceptable types of incoming connections. Such rules are referred to in the security community as a whitelist.
If, on the other hand, the incoming policy was changed to Allow all traffic then all incoming traffic would be permitted unless rules were created for specific types of connections that must be blocked. These rules, unsurprisingly, are referred to as a blacklist. The blacklist/whitelist approach applies equally to incoming and outgoing connections.
Adding Preconfigured Firewall Rules
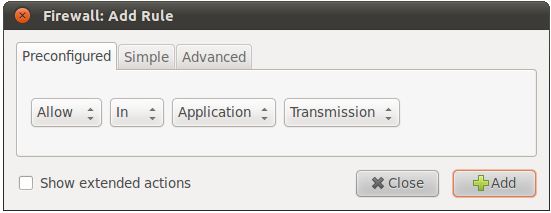
New rules are created by clicking on the Add button located at the bottom of the gufw dialog. Once selected the Add Rule dialog will appear with the Preconfigured tab selected:
The Preconfigured rule panel allows incoming and/or outgoing traffic to be blocked, allowed or limited by application or service. In the case of applications, traffic from such tools as Skype, and Bittorent may be controlled by selecting the application from the menu and setting the other menus accordingly to restrict or allow traffic.
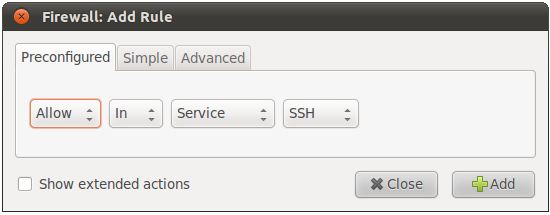
As outlined in the chapter entitled Ubuntu 11.04 Firewall Basics, there is range of services that can be run on an Ubuntu system, each of which is assigned to a specific TCP/IP port number. When the third menu is changed from Application to Service, the service for which traffic is to be controlled may be selected from the right hand menu and then the rules defined using the remaining menus. For example the following figure shows all inbound traffic for the SSH service (which corresponds to port 22) is to be allowed:
The actions menu (the far left menu) provides the following options for controlling traffic:
- Allow – Traffic is permitted on the port.
- Deny – Traffic is not permitted on the port. The requesting system is not notified of the denial. The data packet is simply dropped.
- Reject - Traffic is not permitted on the port. The data packet is dropped and the requesting system is notified of the rejection.
- Limit - Connections are denied if the same IP address has attempted to establish 6 or more connections over a 30 seconds timeframe.
Once a rule has been defined, clicking the Add button will implement the rule, dismiss the Add Rule dialog and the new rule will be listed in the main screen of the gufw tool.
Adding Simple Firewall Rules
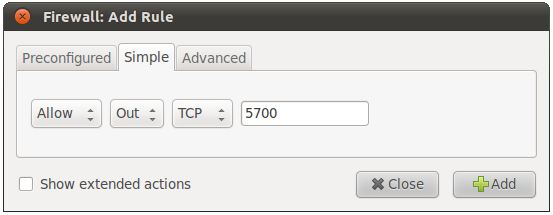
Whereas preconfigured rules allow the firewall to be configured based on well known services and applications, the Simple tab of the Add Rule dialog allows incoming and outgoing rules to be defined simply by referencing the corresponding TCP/IP port. The ports used by known application and services represent only a small subset of the ports available for use by applications and for which firewall rules may need to be defined. A third party application might for example use port 5700 to communicate with a remote server. That being the case, it may be necessary to allow traffic on this specific port using the Simple panel:
The rule may be configured to filter either TCP, UDP or both traffic types. In addition the port may be specified as a single port number, as multiple individual ports separated by commas (e.g. 22,45,66) or as a range of ports with the start and end ports separated by a colon (1000:1500, for example, would apply the rule to all ports between 1000 and 1500). Commas may also be used to declare a mixture of individual ports and ranges, for example 22,45,66,1000:1500.
Adding Advanced Rules
So far we have looked at rules to control only the type of traffic to block (incoming traffic on port 22 for example) regardless of the source or destination of the traffic. It is often the case, however, that rules will need to be defined to allow or deny traffic based an IP address or range of IP addresses.
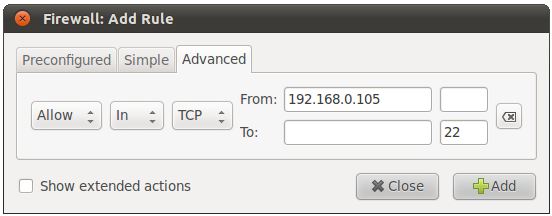
For the purposes of an example, assume that the local system has an IP address of 192.168.0.102. The firewall may be configured to only allow access on port 22 from a system with the IP address of, for example, 192.168.0.105. To achieve this, the From: field of the Advanced settings panel should be set to the IP address of the system from which the connection request is originating (in this case 192.168.0.105).
The To: fields provide the option to specify the IP address and port of the system to which the connection is being made. In this example this would be port 22 on the local system (192.168.0.102). The To: IP address is actually optional and may be left blank:
Assuming that the incoming default policy is still set to Deny or Reject on the main screen, the above rule will allow SSH access via port 22 to the local system only from the remote system with the IP address of 192.168.0.105. SSH access attempts from systems with other IP addresses will fail. Note that if the target system is the local system the To: IP address field may be left blank.
It is also possible to specify a range of addresses by using the IP address bitmask. For example, to create a rule for a range of IP addresses from 192.168.0.1 to 192.168.0.255 the IP address should be entered into the From: field as 192.168.0.0/24.
Similarly, to specify a rule covering IP address range 192.168.0.1 to 192.168.0.30, a bitmask of 27 would be used, i.e. 192.168.0.0/27.
A useful calculator for identifying the address range covered by each bit mask value is available online at http://subnet-calculator.com.
Enabling Logging
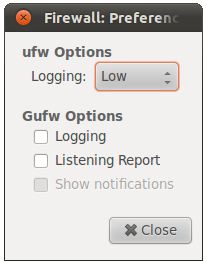
Logging may be enabled or disabled from the gufw preferences panel, accessed by moving the mouse pointer to the application menu area of the desktop top panel and selecting Edit -> Preferences:
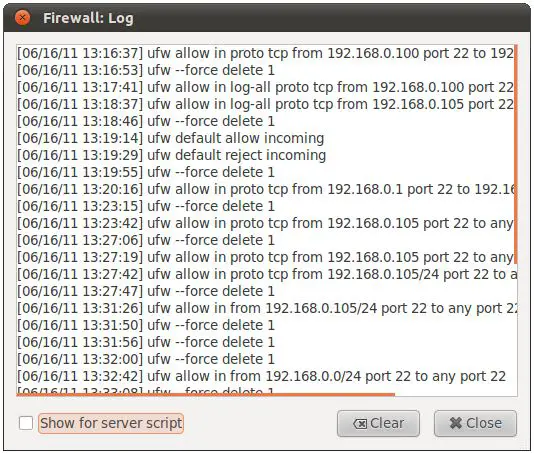
Enable logging by setting the toggle next to Logging under the Gufw Options heading. To review the log at any time simply select the File -> Logging… menu option:
Configuring the Firewall from the Command Line using ufw
All of the firewall configuration options available through the graphical gufw tool are also available from the underlying command line using ufw command.
To enable or disable the firewall:
sudo ufw enable
sudo ufw disable
To declare a default policy:
sudo ufw default <policy>
For example to set a default policy of rejecting data packets:
sudo ufw default reject
To display the current status of the firewall together with any currently active policy rules:
sudo ufw status
To block traffic on a specific port:
sudo ufw deny <port number>
To allow traffic on a specific port from a specific IP address or range of IP addresses:
sudo ufw allow from <ipaddress> to any port <port number>
To obtain a full listing of the capabilities of the ufw tool run the command with the –help argument:
ufw --help
The ufw log file can be found at:
/var/log/ufw.log
| Previous | Table of Contents | Next |
| Ubuntu 11.04 Firewall Basics | Managing Ubuntu 11.04 Users and Groups |


