Promoting your iOS Apps using iAd Workbench
| Previous | Table of Contents | |
| Preparing and Submitting an iOS 7 Application to the App Store |
Learn SwiftUI and take your iOS Development to the Next Level |
Once development is complete and an app has been accepted by Apple into the App Store, the focus needs to shift from app development to app marketing.
At the time of writing there are approximately 900,000 apps in the App Store with around 300,000 apps being added each year. The reality is that your app needs to find a way to stand out amongst the large number of other applications in the marketplace. Customers can, of course, find your app when they search on the App Store for specific application categories or keywords. Some apps are also fortunate enough to be picked by Apple for inclusion in one of the many “recommended” categories.
An alternative to letting customers find your app is to spend some money advertising your app. One of the more recent options in terms of advertising is to make use of the new iAd Workbench.
An Overview of iAd Workbench
The iAds network is an advertising network designed to allow iOS application developers to incorporate advertising into applications as a way to generate additional revenue. The iAd Workbench allows application developers to run ads for their applications through the iAds network so that they appear within other applications. The process of using iAd Workbench involves selecting the application to be advertised, deciding the target markets for the adverts to run and designing the advertisement banner and setting up a pricing model.
In terms of pricing, iAds Workbench works on a cost-per-click (CPC) basis. With CPC, you specify the maximum amount of money you are willing to pay each time a potential customer clicks on your banner ad. The workbench also allows a cost-per-acquisition (CPA) goal amount to be specified. This is the amount you are willing to pay in advertising costs on average for each successful download or sale as a result of an iAds campaign. If you specify a CPA goal, the iAds system will attempt to keep the CPC costs in line with the specified CPA goal. Whilst the CPA goal value is optional, it is worth specifying. If, for example, you only make 99 cents from an app sale with no other future revenues, you probably want to make sure you aren’t going to be spending more than that in advertising for each sale.
The service is based on a bidding system whereby the higher maximum CPC bid you are willing to pay for a click, the more frequently your ad is likely to run (up until your daily spending goal has been met). Once payment settings have been configured the workbench will provide an estimate of the number of times your ad will be displayed, the likely number of clicks and the estimated downloads.
The iAd Workbench also provides the option of manually specifying the target market for the advertising, or letting iAds automatically target potential customers. Manual targeting allows a campaign to be targeted by device type, gender, age, user preferences, geography, category, age group and even days of the week. If the automatic targeting option is selected, the iAds network will target users that it knows, amongst other factors, have downloaded similar applications in the past.
Once the campaign details have been defined, banner ad artwork may be uploaded, or a banner ad created within a few minutes using one of the Apple provided templates.
Creating a New iAds Campaign
The first step in creating a new iAds campaign for an iOS app is to log into iAd Workbench at:
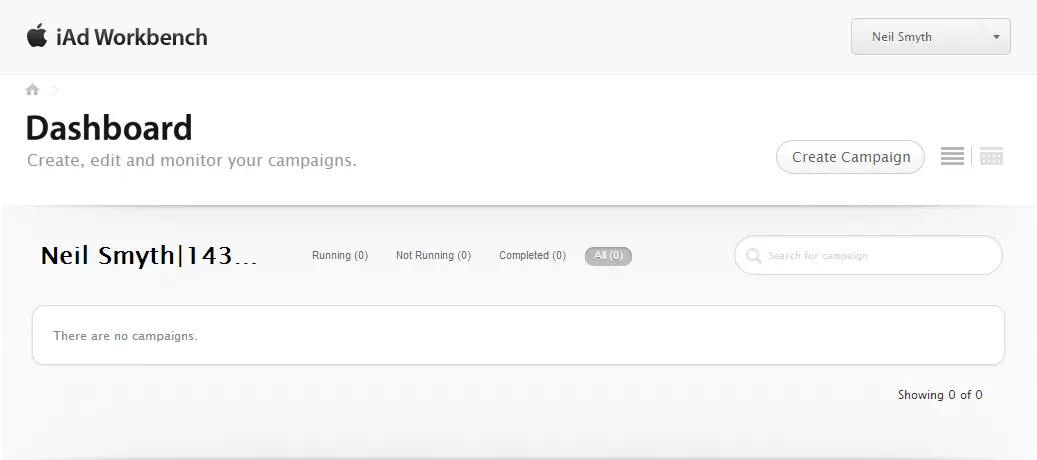
When prompted, enter your existing Apple ID and password to log into the workbench environment, at which point the Dashboard page shown in Figure 89 1 will appear listing any currently configured campaigns.
Figure 89-1
Each campaign is assigned to a specific app. After logging in for the first time, there will be no current campaigns listed. Begin the process of creating a new campaign, therefore, by clicking on the Create Campaign button located in the top right hand corner of the Dashboard.
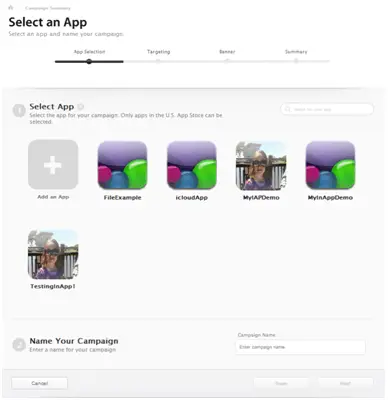
The first step in creating a campaign is to select the app which is to be promoted. Using the Apple ID information entered at login, the workbench will extract a list of applications currently configured in iTunes Connect for that ID. In the event that no apps are listed, make sure that the Apple ID used to log into the iAds Workbench matches that used for your iTunes Connect access. Assuming that the workbench has located the apps in iTunes Connect, a page similar to that illustrated in Figure 89-2 will appear:
Figure 89-2
Select the app for which the campaign is being created (alternatively, click on the Add an App entry to specify an app using either an App ID or App Store URL) and enter a name for the campaign in the Name Your Campaign field before clicking on the Next button.
Learn SwiftUI and take your iOS Development to the Next Level |
Campaign Targeting Options
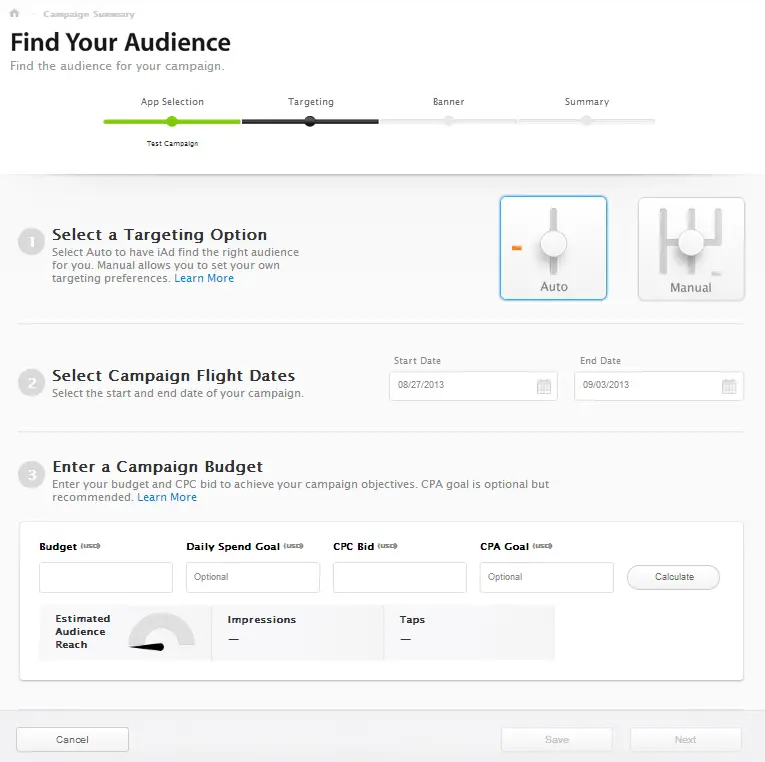
The next screen (Figure 89-3) provides a range of options relating to the target for the campaign, the duration for which the ad is to run and the budget information:
Figure 89-3
To leave the campaign targeting at the discretion of the iAds system, leave the Targeting Option set to Auto. To specify your own demographic settings, change the mode to Manual and work through the different categories listed to define how and where the ad campaign will be targeted.
Enter the start and end dates for the campaign into the flight date fields before entering the campaign budget information. The information to be entered here is as follows:
- Budget – The total amount budgeted to be spent over the entire life of the campaign.
- Daily Spend Goal – An optional value declaring the average total amount to be spent on the campaign per day. The minimum is $10.
- CPC Bid – The maximum amount you are willing to bid for each click.
- CPA Goal – An optional value indicating the average amount you are willing to pay for each successful download of your app as a result of the campaign. The iAds system will attempt to keep the average CPA for the campaign as close to this value as possible.
Once the budget information has been entered, click on the Calculate button to display an estimate of the number of times your ad is likely to appear (impressions) and receive click throughs (taps):
Figure 89-4
With the campaign targeting and budget information configured, click Next to design the banner.
Designing the Banner
On the Create a Banner screen, choose the devices on which the ad will run. Next, if you have a banner ad that was created outside of the workbench, click on the Upload Your Own option in the Select a Banner section of this screen to upload the banner image files for each of the different device formats.
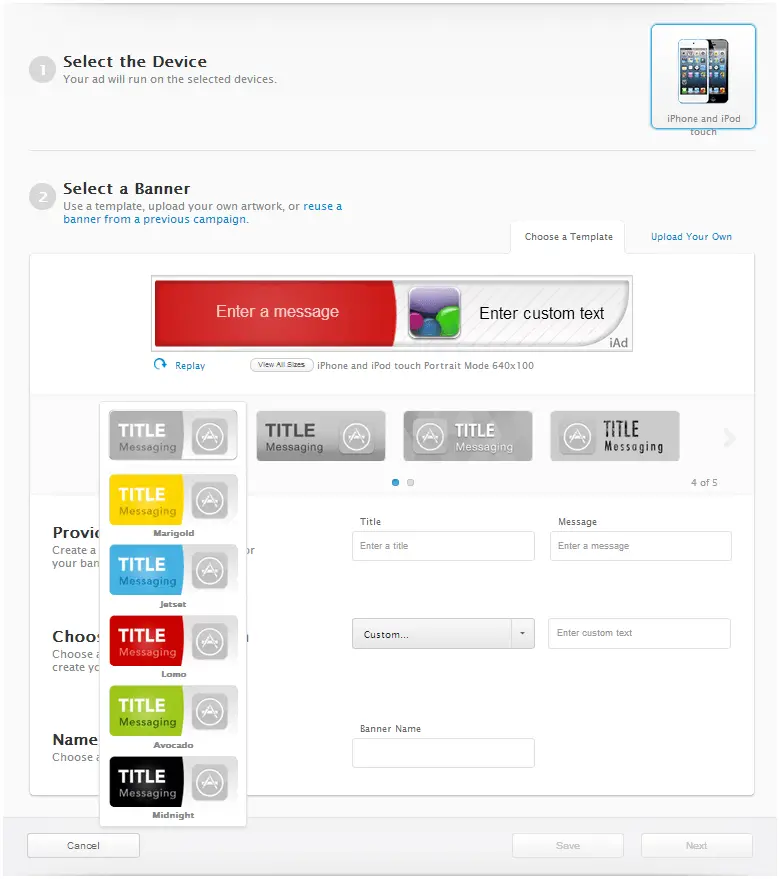
To use an iAds Workbench template on the other hand, simply select the desired template from those provided together with a corresponding color theme:
Figure 89-5
After a template and color theme has been selected, enter a title and message for the banner, a call to action statement (or select one from the menu) and give the banner a name. Once the information has been entered and the banner appears to your liking, click on Next followed by the View All Sizes button to preview the ad in the various device formats.
Finally, click on the Next button once again and scroll down to the Payment section. If the workbench reports that you do not have a credit card on file, click on the Account Management link and enter details of the credit card to which the ad costs will be billed.
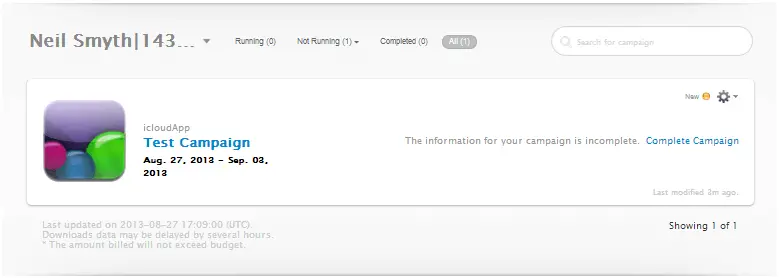
Once the billing information has been configured, return to the Dashboard home screen and note that the campaign is listed as incomplete:
Figure 89-6
Click on the Complete Campaign button, review the app selection and campaign name before clicking on Done. On the resulting Campaign Summary screen, scroll to the bottom of the page and click on the Submit button send the ad to Apple for review, during which time the campaign will be listed as Pending.
Once the campaign has been accepted and is running, return to the Dashboard to review a variety of reports on the number of impressions, clicks and downloads the campaign is generating.
Summary
With almost one million apps in the App Store it can be difficult for a new app to quickly gain users. One option for obtaining customers is to advertise the app using the iAds network. This can be achieved quickly and easily using the iAd Workbench environment. This involves creating a campaign, specifying the target market and budget information and, finally, creating the banner ad, either using existing graphics or one of a number of predefined templates. Once the campaign has been approved by Apple, the banner will be displayed to potential customers within other iOS applications subject to the targeting options selected and budgetary constraints declared during the campaign creation process.
Learn SwiftUI and take your iOS Development to the Next Level |
| Previous | Table of Contents | |
| Preparing and Submitting an iOS 7 Application to the App Store |


