Making Store Purchases in iOS with the SKStoreProductViewController Class
| Previous | Table of Contents | Next |
| An iOS 10 Twitter Integration Tutorial using SLRequest | Building In-App Purchasing into iOS 10 Applications |
Learn SwiftUI and take your iOS Development to the Next Level |
For quite some time, the iOS SDK has included the Store Kit Framework, the purpose of which is to enable applications to implement what are referred to as “in-app purchases”. This typically provides a mechanism for application developers to charge users for additional items and services over and above the initial purchase price of the application. Typical examples include purchasing access to higher levels in a game or a monthly subscription to premium content.
The Store Kit Framework has also traditionally provided the ability to enable users to purchase items from Apple’s iTunes, App and iBook stores. Prior to the introduction of iOS 6, the Store Kit Framework took the user out of the current application and into the iTunes application to initiate and complete an iTunes Store purchase. iOS 6, however, introduced a view controller class (SKStoreProductViewController) which presents the store product directly within the application using a pre-configured view.
This chapter will provide an overview of the SKStoreProductViewController class before working through an example implementation of this class in an iOS application.
The SKStoreProductViewController Class
The SKStoreProductViewController class makes it possible to integrate purchasing from Apple’s iTunes, App and iBooks stores directly into iOS applications with minimal coding work. The developer of a music review application, might, for example want to provide the user with the option to purchase an album from iTunes after reading a review in the application. The developer of multiple applications may want to encourage users of one of those applications to purchase related applications.
All that is required to implement the SKStoreProductViewController functionality is to initialize an instance of the class with an item ID for the product to be purchased from the store and then to load the product details. Once product details have been loaded, the view controller is presented to the user.
Learn SwiftUI and take your iOS Development to the Next Level |
http://itunes.apple.com/us/movie/the-pirates!-band-of-misfits/id527049179
Alternatively, searches may be performed on a variety of criteria using the Apple Search API, details of which can be found at the following URL:
When the user has finished in the store view, a delegate method is called to notify the application, at which point the store view controller can be dismissed.
The remainder of this chapter will work through the creation of a simple example application to demonstrate the use and implementation of the SKStoreProductViewController class.
Creating the Example Project
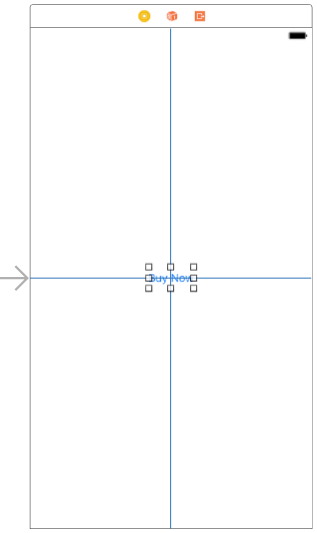
The example application created in this chapter will consist of a single button which, when touched, will display the store kit view controller primed with a specified product. Launch Xcode and create a new project by selecting the options to create a new iOS application based on the Single View Application template. Enter StoreKitDemo as the product name, choose Swift as the programming language and set the Devices menu to Universal.
Creating the User Interface
Display the Assistant Editor and make sure it is showing the code for the ViewController.swift file. Select the button in the view and then Ctrl-click on it and drag the resulting line to a location just beneath the viewDidLoad method in the Assistant Editor panel. Release the line and in the resulting panel change the connection type to Action and name the method showStoreView. Click on the Connect button and close the Assistant Editor panel.
Figure 106-1
Learn SwiftUI and take your iOS Development to the Next Level |
Displaying the Store Kit Product View Controller
When the user touches the Buy Now button, the SKStoreProductViewController instance needs to be created, configured and displayed. Before writing this code, however, it will be necessary to declare the StoreKitDemoViewController class as implementing the SKStoreProductViewControllerDelegate protocol. The StoreKit framework also needs to be imported. Both of these tasks need to be performed in the ViewController.swift file which should be modified to read as follows:
import UIKit
import StoreKit

class ViewController: UIViewController,
	SKStoreProductViewControllerDelegate {
.
.
.
Remaining within the ViewController.swift file, locate the stub showStoreView method and implement the code as outlined in the following listing:
@IBAction func showStoreView(_ sender: AnyObject) {
    let storeViewController = SKStoreProductViewController()
    storeViewController.delegate = self

    let parameters = [SKStoreProductParameterITunesItemIdentifier :
                        NSNumber(value: 676059878)]

    storeViewController.loadProduct(withParameters: parameters,
                completionBlock: {result, error in
        if result {
            self.present(storeViewController,
                        animated: true, completion: nil)
        }
    })
}
Learn SwiftUI and take your iOS Development to the Next Level |
let storeViewController = SKStoreProductViewController()
Next, the view controller class assigns itself as the delegate for the storeViewController instance:
storeViewController.delegate = self
A Dictionary is then created and initialized with a key of SKStoreProductParameterITunesItemIdentifier associated with an NSNumber value representing a product in a Store (in this case an album in the iTunes store).
let parameters = [SKStoreProductParameterITunesItemIdentifier :
                        NSNumber(value: 676059878)]
Finally, the product is loaded into the view controller and, in the event that the load was successful, the view controller is presented to the user:
storeViewController.loadProduct(withParameters: parameters,
            completionBlock: {result, error in
    if result {
        self.present(storeViewController,
                        animated: true, completion: nil)
    }
})
Implementing the Delegate Method
All that remains is to implement the delegate method that will be called when the user has either completed or cancelled the product purchase. Since the StoreKitDemoViewController class was designated as the delegate for the SKStoreProductViewController instance, the method needs to be implemented in the ViewController.swift file:
func productViewControllerDidFinish(_ viewController: SKStoreProductViewController) {
    viewController.dismiss(animated: true, completion: nil)
}
For the purposes of this example, all the method needs to do is to tell the view controller to dismiss itself.
Learn SwiftUI and take your iOS Development to the Next Level |
Testing the Application
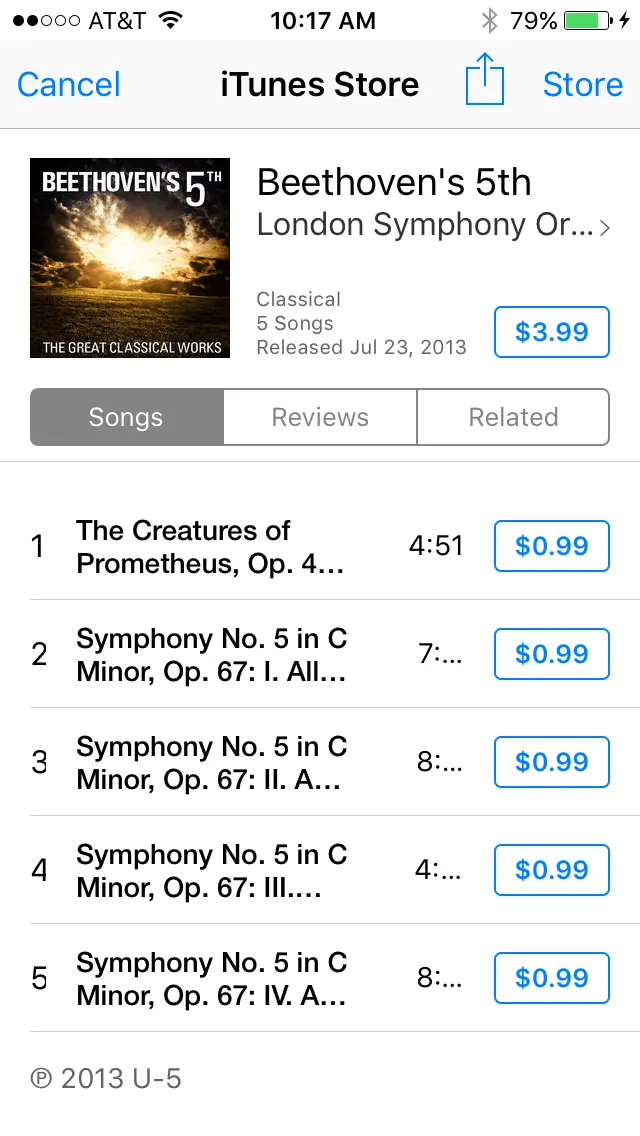
Build and run the application on a physical iOS device. Touch the button and wait until the store kit product view controller appears as illustrated in Figure 106-2. Note that there may be a short delay while the store kit contacts the iTunes store to request and download the product information.
Touching the Cancel button should trigger the delegate, dismissing the view controller and returning the user to the original view controller screen containing the button.
Figure 106-2
Summary
The SKStoreProductViewController class provides an easy and visually appealing interface for allowing Apple-based store purchases such as movies, books, music and apps to be made directly from within an iOS application. As demonstrated, this functionality can be added to an application with a minimal amount of code.
Learn SwiftUI and take your iOS Development to the Next Level |
| Previous | Table of Contents | Next |
| An iOS 10 Twitter Integration Tutorial using SLRequest | Building In-App Purchasing into iOS 10 Applications |


