Configuring the Ubuntu 10.x File Manager
| Previous | Table of Contents | Next |
| Browsing My Computer, Files and Folders on the Ubuntu 10.x Desktop | Ubuntu 10.x Desktop - Starting Applications on Login |
<google>BUY_UBUNTU_10</google>
In the previous chapter of Ubuntu Essentials we looked at some of the capabilities of the Nautilus file and folder manager. Nautilus also provides a number of options that can be used to configure what information is displayed and how it is displayed. In this chapter we will look at these options.
Changing the File Manager Background Pattern and Color
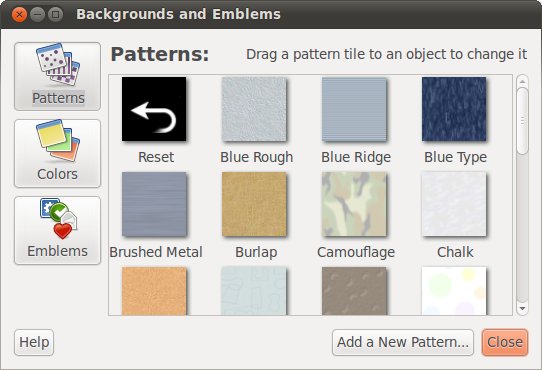
The area of the file manager where files and folders are displayed is presented with a plain white background by default. The color and pattern displayed can be changed using the Backgrounds and Emblems dialog, accessed by selecting Edit -> Backgrounds and Emblems:
To change the background color or pattern simply select the sample square of your choice and drag and drop it on to an open file manager window. The change will then be immediately applied to the file manager. Colors may be changed by selecting the Colors button and then dragging the desired color to the area of the file manager window and dropping it. That part of the file manager window will then change to reflect the new color choice.
Displaying Icons or Lists
By default, Nautilus displays items as icons, as shown in the following figure. Whilst this is a user friendly and intuitive way to present information more detail is often required.
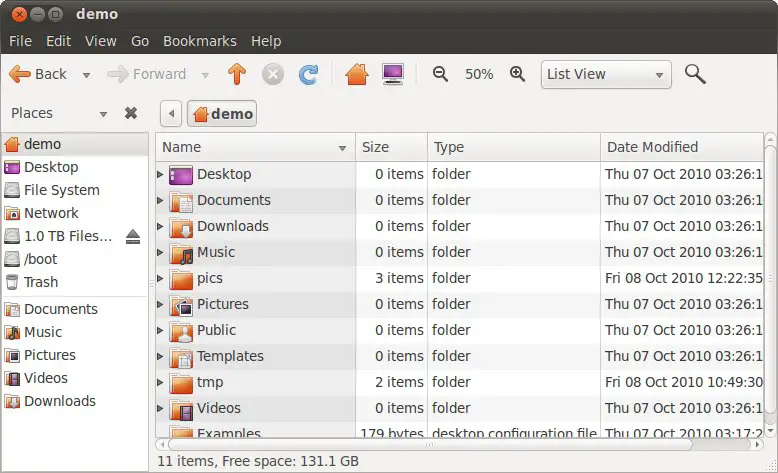
Nautilus provides the option to display files and folders in list form instead of using icons. This format allows additional information such as file size and last access time to be displayed. This setting is controlled through the View menu or the drop down menu located in the file manager toolbar.
Changing the View option to List will cause the files and folders to be displayed in list form. As shown in the following figure, this allows additional information about each item to be displayed:
Configuring the List View
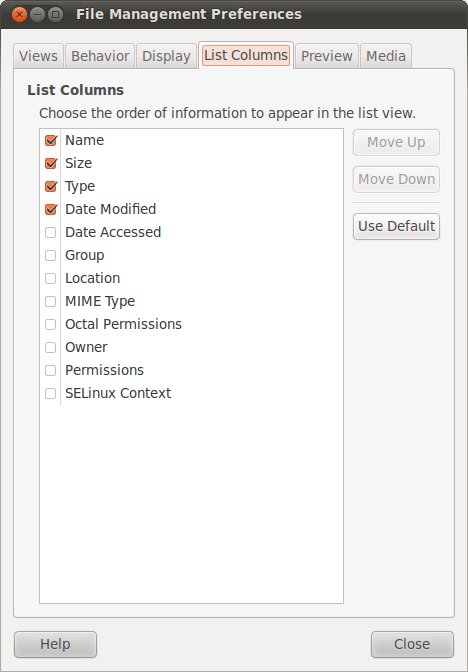
The List view may be further configured to specify which data fields are displayed. In the above figure only the Size, Type and Date Modified columns are displayed. These fields are configured via the List Columns page of the File Manager Preferences dialog, accessed via the file manager's Edit -> Preferences menu option: <google>ADSDAQBOX_FLOW</google>
Set the checkboxes next to the columns to be displayed, or move columns to different locations using the Move Up and Move Down buttons. Close the dialogs when the configuration changes are complete.
Configuring the Icon View
If you prefer the Icon view to the List view in the Nautilus File Manager windows it may be useful to know that the way icons are displayed can also be configured. As with previous settings described in this chapter, these adjustments are made via the Preferences dialog of the Nautilus manager:
The size of the icons can be changed using the Default Zoom Level selection box. The following figure shows the icons at 66% zoom:
It is also possible to zoom in and out in real-time by pressing the Ctrl and + keys simultaneously (to zoom in) and the Ctrl and - keys to zoom out.
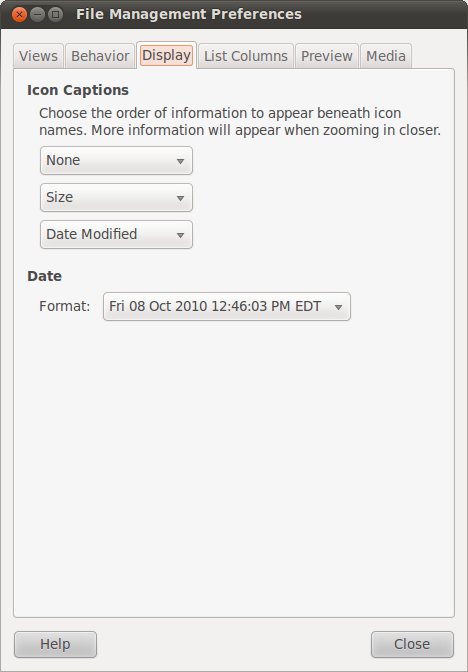
The option is also provided to define how the captions beneath an icon appear at different zoom levels. These settings are controlled from the Display page of the Preferences dialog:
The three selection boxes specify what is displayed at each zoom level. Configure these to your requirements. The following figure shows a folder with three captions at maximum zoom:
One very important thing to note about these settings is that they also impact the appearance of captions on icons on the desktop.
As shown in the above figure, the format of the date caption may be changed to one of three different options. The default value, however, is usually acceptable for most people.
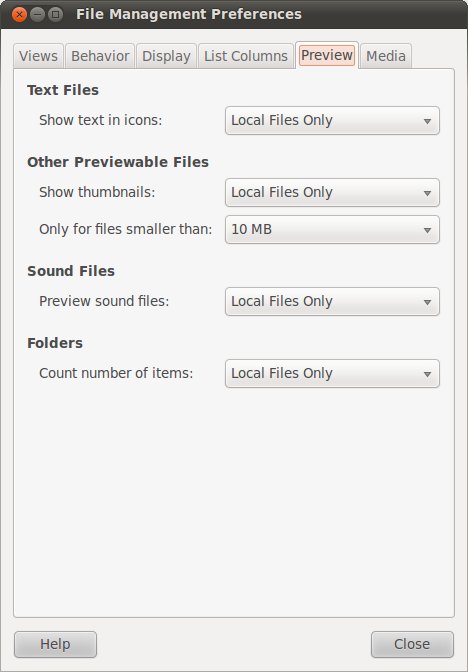
Finally, the icons can be used to preview the content in a file. For example, the first few words of a text file can be displayed on an icon, or in the case of an image a thumbnail of the image. These settings are controlled via the Preview page of the Preferences dialog:
For each thumbnail category you can elect to show thumbnails for all files, local files only (excluding files in a network server) or for no files.
Configuring Media Settings
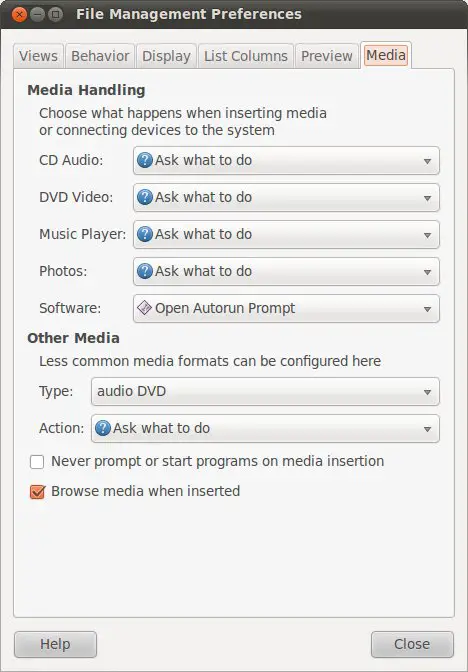
The final tab in the File Manager Preferences dialog controls how the desktop behaves when a new media item or device is detected on the system. For example, when a DVD is placed into a DVD drive, should the desktop do nothing, ask the user for direction or start up a DVD playing application so that the user can view the movie. As illustrated in the following figure, settings are available for just about every conceivable media type, with individual behavior settings for each one:
<google>BUY_UBUNTU_BOTTOM_10</google>
| Previous | Table of Contents | Next |
| Browsing My Computer, Files and Folders on the Ubuntu 10.x Desktop | Ubuntu 10.x Desktop - Starting Applications on Login |
