Installing and Configuring Ubuntu 10.x KVM Virtualization
| Previous | Table of Contents | Next |
| Adding and Managing Ubuntu 10.x Swap Space | Creating an Ubuntu 10.x KVM Networked Bridge Interface |
Virtualization is the ability to run multiple operating systems simultaneously on a single computer system. Virtualization has come to prominence in recent years because it provides a way to fully utilize CPU and resource capacity of a server system whilst providing stability (in that if one virtualized guest system crashes, the host and any other guest systems continue to run).
Virtualization is also useful in terms of trying out different operating systems without having to configure dual boot environments. For example, you can try out a different operating system without having to re-partition the disk, shut down Ubuntu and then boot from the new system. You simply start up a virtualized version of the new operating as a guest operating system. Similarly, virtualization allows you to run Windows operating systems from within an Ubuntu system, providing concurrent access to both operating systems.
There are a number of ways to implement virtualization on Ubuntu. Options include VMware, VirtualBox and KVM. In this and subsequent chapters we will look at KVM based virtualization hosted on an Ubuntu system.
Full Virtualization vs. Para-Virtualization
There are two common approaches to virtualization - full virtualization and para-virtualization. Full virtualization provides complete abstraction between the hardware and the guest operating system. In this scenario, the guest operating system is provided a complete virtual physical environment in which to run and, as such, is unaware that it is running inside a virtual machine. One advantage of full virtualization is that the operating system does not need to be modified in order to run in a virtualized environment. This means that proprietary operating systems such as Windows can be run on Linux systems.
Disadvantages of full virtualization are that performance is slightly reduced as compared to para-virtualization, and some virtualization platforms, such as Xen and KVM, require CPUs with special virtualization support built in (such as Intel-VT and AMD-V).
Para-virtualization requires that a guest operating system be modified to support virtualization. This typically means that guest operating systems are limited to open source systems such as Linux. It is also not possible to migrate a running guest OS from one server to another. The advantage to this approach, however, is that a para-virtualized guest system comes closer to native performance than a fully virtualized guest, and the latest virtualization CPU support is not needed.
For a more detailed explanation of virtualization techniques read Virtuatopia.com’s An Overview of Virtualization Techniques:
http://www.virtuatopia.com/index.php/An_Overview_of_Virtualization_Techniques
KVM Hardware Requirements
Before proceeding with this chapter we need to take a moment to discuss the hardware requirements for running virtual machines within a KVM environment. Firstly, KVM virtualization is only available on certain processor types. These processors include either Intel-VT or AMD-V technology.
To check for Intel-VT support, run the following command in a terminal window to check for the presence of vmx:
# grep vmx /proc/cpuinfo
flags: fpu tsc msr pae mce cx8 apic mtrr mca cmov pat pse36 clflush dts acpi mmx fxsr sse sse2 ss ht tm syscall nx lm constant_tsc pni monitor ds_cpl vmx est tm2 cx16 xtpr lahf_lm
To check for AMD-V support, run the following command which checks for the presence of svm:
# grep svm /proc/cpuinfo
flags: fpu tsc msr pae mce cx8 apic mtrr mca cmov pat pse36 clflush mmx fxsr sse sse2 ht syscall nx mmxext fxsr_opt rdtscp lm 3dnowext 3dnow pni cx16 lahf_lm cmp_legacy svm cr8_legacy
Note that the above commands only report whether the processor supports the respective feature, it does not indicate whether the feature is currently enabled in the BIOS. In practice virtualization support is typically disabled in the BIOS of most systems. It is recommended, therefore, that you check your BIOS settings to ensure the appropriate virtualization technology is enabled before proceeding with this tutorial.
If your processor does not have Intel-VT or AMD-V support you will still be able to install guest operating systems though this will be implemented using the QEMU environment instead of KVM virtualization. QEMU uses emulation to run guest operating systems and as such results in slower performance than the hardware assisted virtualization offered by KVM.
Unlike a dual booting environment a virtualized environment involves the running of two or more complete operating systems concurrently on a single computer system. This means that the system must have enough physical memory, disk space and CPU processing power to comfortably accommodate all these systems in parallel. Before beginning the configuration and installation process check on the minimum system requirements for both Ubuntu and your chosen guest operating systems and verify that your system has sufficient resources to handle the requirements of both systems.
Preparing Ubuntu for KVM Virtualization
KVM support does not require that the system boot from a special kernel. In fact, all that is required is that special kernel modules be loaded into the standard Ubuntu kernel. These modules and the tools necessary to maintain KVM are not, however, installed by default on a typical Ubuntu system installation.
To fully utilize the KVM support in Ubuntu the following command may be executed in a terminal window to install the basic packages:
sudo apt-get install qemu-kvm libvirt-bin ubuntu-vm-builder bridge-utils kvm virt-viewer virt-manager virt-top
This command will install all the required packages together with any package dependencies.
Once the installation of KVM is complete, close any applications that are running and reboot the system. Failure to reboot at this point may result in unpredictable behavior, such as virtual machines running very slowly.
Verifying the KVM Installation
Once the system has restarted after the reboot it is worthwhile checking that the installation worked correctly before moving forward. When KVM is installed and running two modules will have been loaded into the kernel. The presence or otherwise of these modules can be verified in a terminal window by running the following command:
lsmod | grep kvm
Assuming that the installation was successful the above command should generate output similar to the following:
lsmod | grep kvm
kvm_intel              49247  0
kvm                   298550  1 kvm_intel
Note that if the system contains an AMD processor the kvm module will likely read kvm_amd rather than kvm_intel. The installation process should also have configured the libvirt-bin service to run in the background. Once again using a terminal window with super user privileges, run the following command to ensure libvirtd is running:
service libvirt-bin status
libvirt-bin start/running, process 6443
If the process is not running, it may be started as follows:
sudo service libvirt-bin start
As part of the installation process a new user group named libvirtd has also been created and the current user added as a member. To ensure that this configuration has taken effect, log out and then back into the system before proceeding. After logging back into the system, open a terminal window and execute the following id command. Inspect the output and verify that libvirtd is listed amongst the groups to which the current user belongs:
id
uid=1000(demo) gid=1000(demo) groups=1000(demo),4(adm),20(dialout),24(cdrom),46(plugdev),111(lpadmin),
119(admin),122(sambashare),126(libvirtd)
Building an Ubuntu KVM Virtual System
Virtual systems can easily be configured using either the virt-install command-line tool, or the virt-manager GUI tool. For the purposes of this chapter we will use the virt-manager tool.
Begin by launching virt-manager either by selecting the Applications -> System Tools -> Virtual Machine Manager menu option, or from the command-line in a terminal window by running virt-manager.
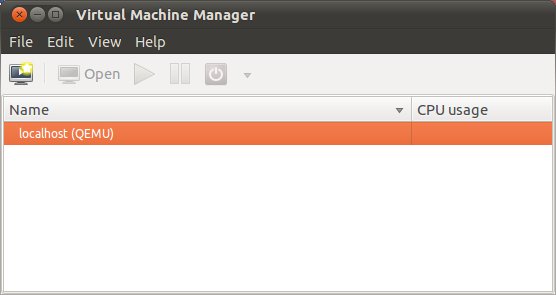
Once loaded, the virtual machine manager will display the following screen:
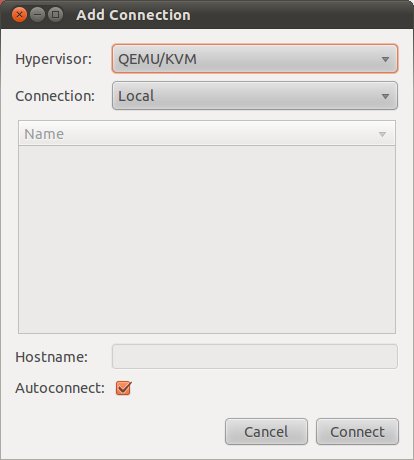
The main virt-manager screen lists the current virtual machines running on the system. At this point there should only be one, the host system (represented by localhost (QEMU)). If it is not listed, connect to the host system by selecting the File -> Add connection… menu option to display the Add Connection dialog:
Make sure that the Hypervisor is set to QEMU/KVM before clicking on the Connect button to establish the connection.
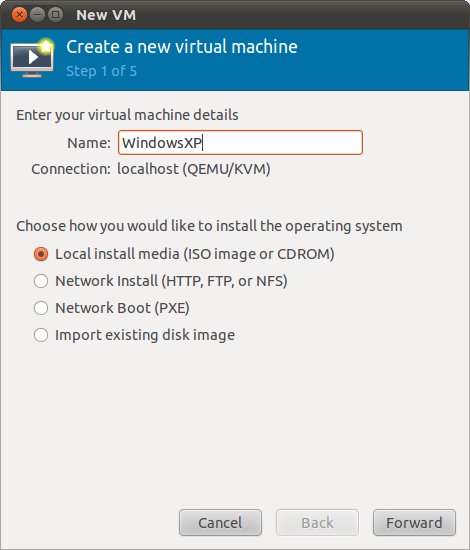
To create a new virtual system, click on the new virtual machine button (the far left button on the toolbar) to display the first screen of the New VM wizard. In the Name field enter a suitably descriptive name for the virtual system. On this screen, also select the location of the media from which the guest operating system will be installed. This can either be a CD or DVD drive, an ISO image file accessible to the local host, a network install using HTTP, FTP, NFS or PXE or the disk image from an existing virtual machine:
Note that beneath the Name field the dialog displays the connection type (QEMU/KVM in this case). If the connection on your system is displayed as QEMU your system either does not have Intel-VT or AMD-V support, or these features have been disabled in the BIOS. That being the case your guest operating system will run inside QEMU based emulation, and will not use the faster hardware based virtualization.
Configuring the KVM Virtual System
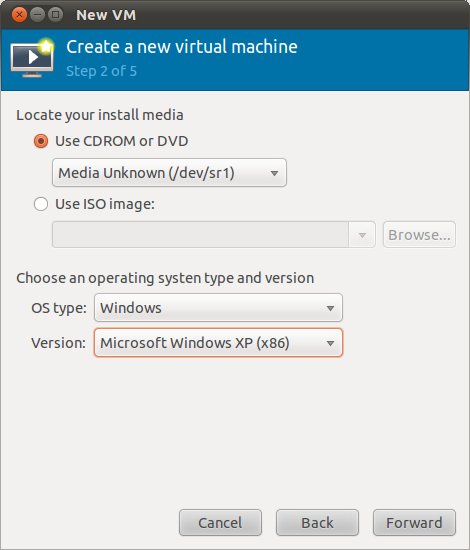
Clicking Forward once more will display a screen seeking additional information about the installation process. The screen displayed and information required will depend on selections made in the preceding screen. For example, if a CD, DVD or ISO was selected, this screen will ask for the specific location of the ISO file or physical device. This screen also asks that you specify the type and version of the guest operating system to be installed (for example Windows XP or Ubuntu):
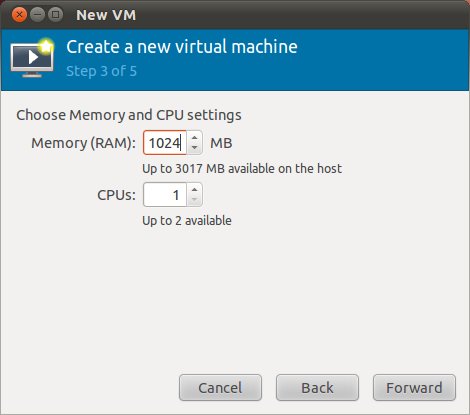
Once these settings are complete, click Forward to configure CPU and memory settings. The optimal settings will depend on the number of CPUs and amount of physical memory present in the host and the requirements of other applications and virtual machines that will run in parallel with the new virtual machine:
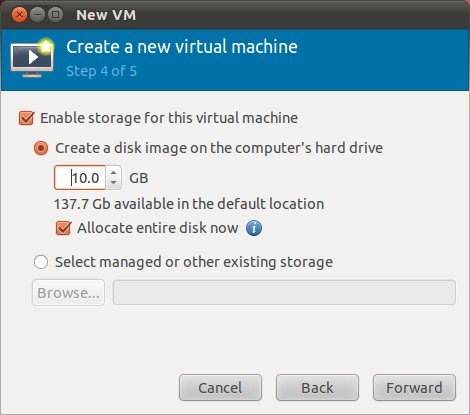
The last item to configure before creating the virtual machine is the storage space for the guest operating system and corresponding user data. This takes the form of a virtual disk image or pre-existing storage. A virtual disk drive is essentially an image file hosted on the file system of the host computer which is seen by the virtual machine as a physical disk drive.
Options are available to create an image disk of a specified size, select a pre-existing volume or to create a storage volume of a specified format (raw, vmdk, iso etc). Unless you have a specific need to use a particular format (for example you might need to use vmdk to migrate to a VMware based virtualization environment at a later date) or need to use a dedicated disk or partition, it is generally safe to simply specify a size on this screen. The option is also available to pre-allocate the space now. If you choose not to pre-allocate the space, space will be allocated up to the specified maximum only as it is needed by the guest operating system. This has the advantage that space on the host file system is not used until it is needed. Downsides are that performance may degrade as space is allocated in real-time and allocation will fail if another process uses up the free space on the host file system before it can be assigned to the virtual machine:
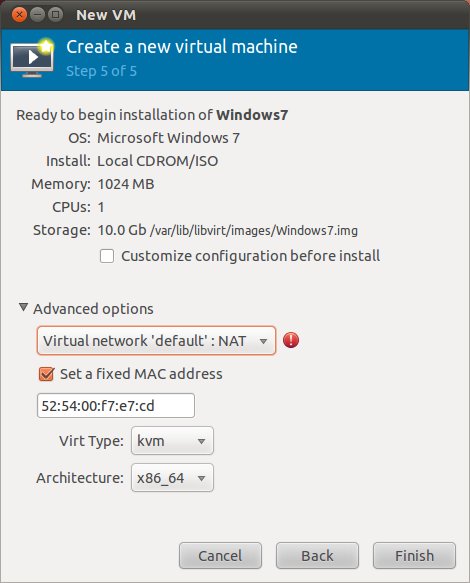
Once these settings are configured, click the Forward key once more. The final screen displays a summary of the configuration. Review the information displayed. Advanced options are also available to configure bridged networking (where the virtual machine has direct access to a host network adapter) and to configure a specific MAC address if required:
Starting the KVM Virtual System
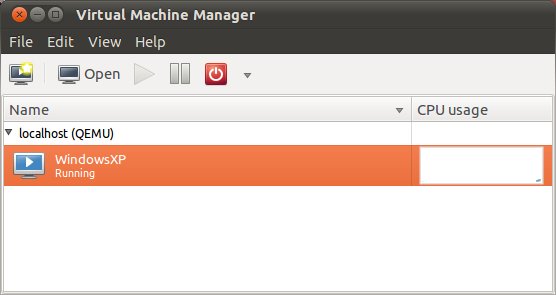
Click on the Finish button to begin the creation process. The virtualization manager will create the disk and configure the virtual machine before starting the system. The new virtual machine will appear in the main virt-manager window with the status set to Running as illustrated in the following figure:
By default, the console for the virtual machine should appear in the virtual machine viewer window. To view the console of the running machine at any future time, ensure that it is selected in the virtual machine list and select the Open button from the toolbar. The virtual machine viewer should be ready for the installation process to begin:
From this point on, simply follow the operating installation instructions to install the guest OS in the KVM virtual machine. During the installation process keep in mind that after you click in the virtual machine console window the mouse and keyboard focus will be contained within that window. If you wish to release the focus so that you can interact with the host desktop environment press the Ctrl and Alt keyboard keys simultaneously. To return focus to the virtual machine console simply click in the window with the mouse pointer.
For information on administering a virtual system read Managing and Monitoring Ubuntu 10.x based KVM Guest Systems.
| Previous | Table of Contents | Next |
| Adding and Managing Ubuntu 10.x Swap Space | Creating an Ubuntu 10.x KVM Networked Bridge Interface |


