Configuring a Windows Server 2008 Terminal Services License Server
| Previous | Table of Contents | Next |
| Deploying a Windows Server 2008 Terminal Server Farm using TS Session Broker | Managing Windows Server 2008 Disk Quotas |
| Purchase and download the full PDF and ePub versions of this eBook only $9.99 |
Unless licensing is configured during the initial installation of the Terminal Services role on Windows Server 2008, a 120 day grace period is provided before a license server needs to be installed and activated. The purpose of this chapter, therefore, is to provide details on installing and activating a Windows Server 2008 Terminal Services License Server and installing Client Access Licenses.
Installing the Terminal Services License Server
The first step is to install the Terminal Services License Services server role. The license server does not necessarily have to be installed on a system which is acting as a Terminal Server. The installation can be performed using by selecting Roles from the tree in the left hand panel of the Server Manager tool.
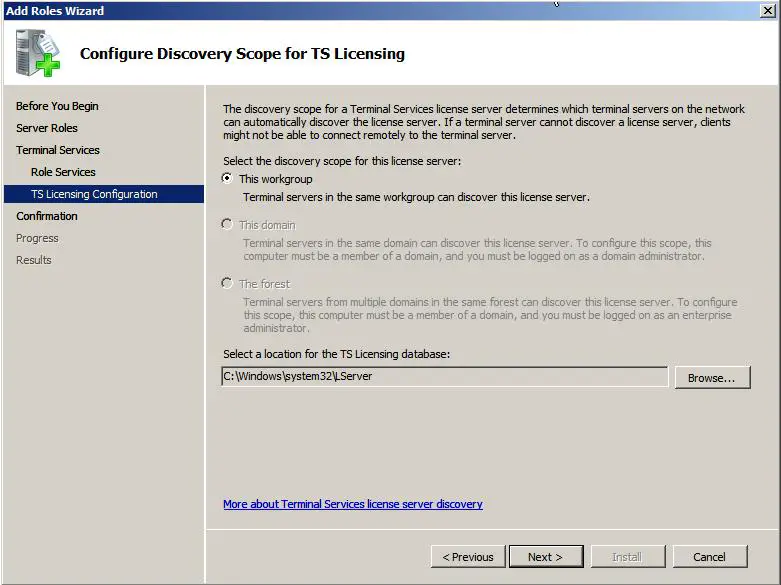
If the server is already configured with the Terminal Services role, click on the Add Role Services link. In the resulting dialog titled Select Role Services select the check box next to TS License Server and then click Next to proceed to the Configure discovery scope for TS licensing screen as illustrated in the following figure:
The selections on this screen define whether licenses are to be issued to systems in the same workgroup, domain or domain forest as the license server. The correct selection here will depend on your network configuration. Once the selection has been made click Next followed by Install on the subsequent confirmation screen.
On a server which is does not have the Terminal Services role installed, open the Server Manager, select Roles from the tree in the left hand panel and select Add Roles. Click Next on the initial screen if it appears so that the Select Server Roles screen is displayed. From the list of roles select the check box next to Terminal Services and click on the Next button. Read the information screen and then proceed to the Select Service Roles screen. Check the box next to TS Licensing and click next. As described above, choose whether the server is to be accessible to terminal servers in the same workgroup, domain or domain forest as the license server. Click Next followed by Install to initiate the installation process.
Activating the TS License Server
Once the TS License Server has been installed the next task is to activate it. This task is performed using the TS License Manager which may be launched by running tsconfig.exe or via Start -> All Programs -> Administrative Tools -> Terminal Services -> TS License Manager. Once started, the TS License Manager dialog will appear containing a list of detected license servers on the network. The only license server listed in the following figure is the one on the local server. Because this has yet to be activated it is listed with a red circle containing an X mark next to it:
To activate a license server, right click on the server in the list and select Activate Server. After reading the welcome screen click Next to proceed to the Connection Method screen. The activation process requires communication with Microsoft in one form or another. If the server has an internet connection then the activation can be performed over this connection. The default, recommended method, is to have the TS License Manager automatically connect to gather the information. Failing that, another option is go to the https://activate.microsoft.com web site using a browser and enter the product ID. Alternatively, if an internet connection is not available or a firewall prevents such access the activation may be performed over the telephone. If Automatic connection is selected, the following dialog will appear as the wizard attempts to contact Microsoft:
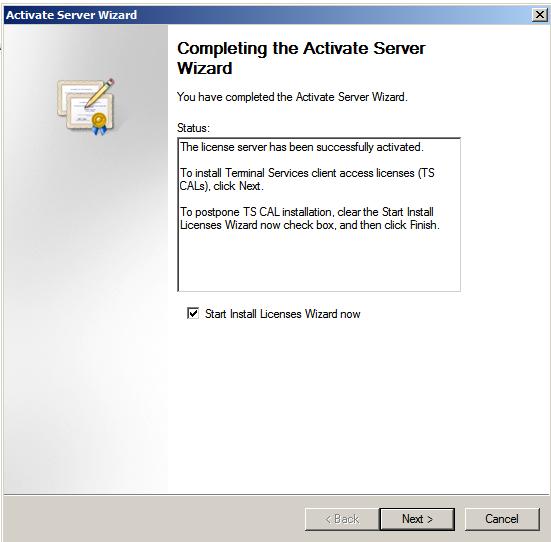
Once the Microsoft activation server has been located a new dialog will appear prompting for user, company and geographic location information. Complete these details and click Next to proceed. The second screen requests more detailed, but optional information. Either complete this information or click Next to skip to the activation process. Once again the wizard will contact Microsoft and complete the activation. Once completed, the following completion screen will appear:

Note that the Start Install Licenses Wizard now check box is selected by default. If you are ready to begin installing Client Access Licenses (CALs) now click on Next.
Installing Client Access Licenses (CAL)
A Client Access License (CAL) is required for each client requiring access to Windows Server 2008 Terminal Services. Once a TS License Server has been installed and activated the next step is to install the CALs. This can be performed as a continuation of the TS License Server activation process as outlined above, or at any other time by opening the TS Licensing Manager, right clicking on the appropriate license server in the list and choosing Install Licenses from the popup menu.
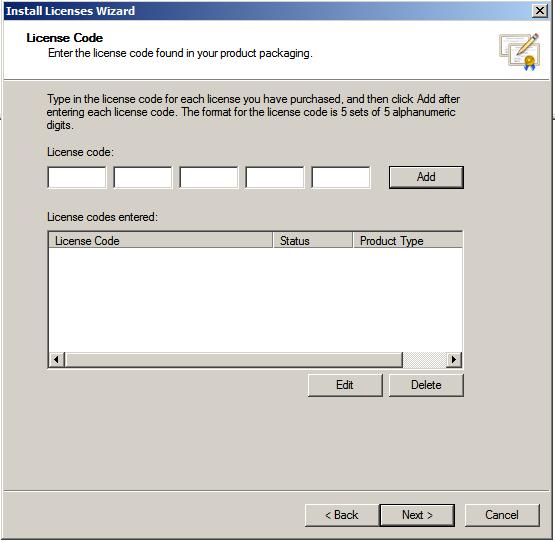
Once the Install Licenses wizard has started, click Next on the welcome screen to select the type of license program being used. Select the appropriate license type from the drop down list depending on how the licenses were acquired and then click Next to enter the license codes. On the License Code screen enter each code and press the Add button: <google>WIN28BOX</google>
Once all the codes have been added click on the Next button to complete the license installation process.
| Purchase and download the full PDF and ePub versions of this eBook only $9.99 |


