Difference between revisions of "Installing Xcode and Compiling Objective-C on Mac OS X"
(→Installing Xcode on Mac OS X) |
(→Starting xCode) |
||
| Line 30: | Line 30: | ||
== Starting xCode == | == Starting xCode == | ||
| + | |||
| + | Having successfully installed the SDK and Xcode, the next step is to launch it so that we can write and then compile a sample Objective-C application. To start up Xcode, open the Finder, click the ''Macintosh HD'' device in the left had panel then double click on the ''Developer'' folder, followed by the ''Applications'' folder. Within this folder you should see an icon for Xcode. Double click on this icon to launch the tool. Once Xcode has loaded, and assuming this is the first time you have used Xcode on this system, you will presented with the ''Welcome'' screen. On this screen, click on the option to ''Create your first Cocoa application'' to proceed to the developer documentation screen. | ||
| + | |||
| + | == Starting a New Project == | ||
| + | |||
| + | Each application created in Xcode is contained within a ''project''. The first step in developing application, therefore, is to create a new project. This is achieved by selecting the ''File -> New Project...'' menu option. The ''New Project'' window provides a range of different types of Mac OS applications that can be created. If you downloaded and installed the iPhone version of the SDK, options are also provided to create a new iPhone application: | ||
| + | |||
| + | |||
| + | [[Image:xcode_new_project.jpg|Creating a new Xcode project]] | ||
| + | |||
| + | |||
| + | Under the Mac OS X section, scroll down the list and select ''Command Line Utility''. In the main panel, choose Foundation Tool then click on the ''Choose..'' button. In the resulting panel, enter "SampleApp'' in the ''Save As:'' field. By default, Xcode will put the project files in your ''Documents'' folder so be sure to create and specify a specific folder for your Objective-C development work before proceeding by clicking the ''Save'' button. Xcode will subsequently create the new project and open the main Xcode window: | ||
| + | |||
| + | |||
| + | [[Image:xcode_main_window.jpg|The main Xcode window]] | ||
Revision as of 19:01, 25 September 2009
In later chapters we will look at how to install and use Objective-C on Windows and Linux systems for those that do not have access to Mac OS X. If you are planning to develop iPhone applications (or Mac OS X applications for that matter), however, you are going to need to use an Intel based Mac OS X system at some point in the future.
Perhaps the biggest advantage of using Mac OS X as your Objective-C learning platform (aside from the ability to develop iPhone and Mac OS X applications) is the fact that you get to use Apple's Xcode development tool. Xcode is a powerful and easy to use development environment that is available free of charge to anyone fortunate enough to own an Apple computer running Mac OS X.
In this chapter we will cover the steps involved in installing Xcode and writing and compiling a simple Objective-C program in this environment. For those readers that prefer to do their coding and compiling in at the command prompt we will then cover use of Objective-C in a terminal window.
Installing Xcode on Mac OS X
Xcode may or may not be pre-installed on your Mac OS X system. To find out if you already have it, open the Finder and look for it in the Developer subfolder of the Applications folder. If the Developer folder does not exist, or does not contain Xcode then you will need to install it.
The best way to obtain Xcode is to download it from the Apple web site. It can also be installed from the Developer Tools installation disk if you happen to have one, but most Mac systems do not ship with this. The URL to download Xcode is http://developer.apple.com/technology/xcode.html. there are two forms of Xcode, one for developing iPhone applications and the other for developing Mac OS X applications. in order to download Xcode, you will need either a Registered iPhone Developer account (in the case of the iphone Xcode) or an ADC membership (in the case of the MAC OS X Xcode). Fortunately, both of these memberships are free and can be activated using your existing Apple account (for example the one you use to buy music on iTunes).
Once you have registered, you will gain access to the Apple Developer Connection web site where download links are provided for Xcode on a variety of Mac OS X versions.
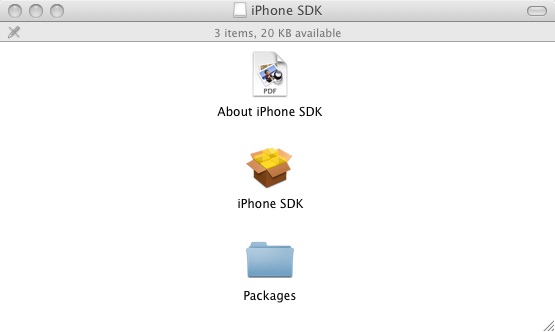
The download is over 2GB in size and will take a number of hours to complete depending on the speed of your internet connection and take the form of a disk image (.dmg) file. Once the download has completed, a new window will open as follows displaying the contents of the .dmg file:
If this window does not open by default, it can be opened by clicking on the SDK disk drive icon on the desktop.
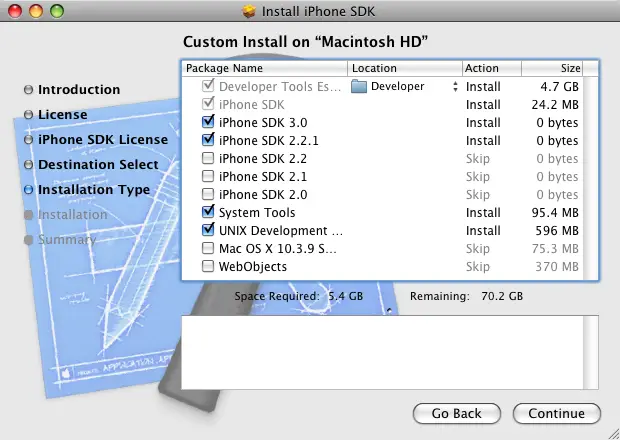
Initiate the installation by double clicking on the package icon (the one that looks like an opening box) and follow the instruction until you reach the Custom Install screen:
The default selections on this screen are adequate for most requirements so unless you have specific needs there is not need to alter these selections. Continue to the next screen, review the information and click Install to begin the installation. Note that may first be prompted to enter your password as a security precaution. the duration of the installation process will vary depending on the speed and current load on the computer, but typically completes in 15 - 30 minutes.
Starting xCode
Having successfully installed the SDK and Xcode, the next step is to launch it so that we can write and then compile a sample Objective-C application. To start up Xcode, open the Finder, click the Macintosh HD device in the left had panel then double click on the Developer folder, followed by the Applications folder. Within this folder you should see an icon for Xcode. Double click on this icon to launch the tool. Once Xcode has loaded, and assuming this is the first time you have used Xcode on this system, you will presented with the Welcome screen. On this screen, click on the option to Create your first Cocoa application to proceed to the developer documentation screen.
Starting a New Project
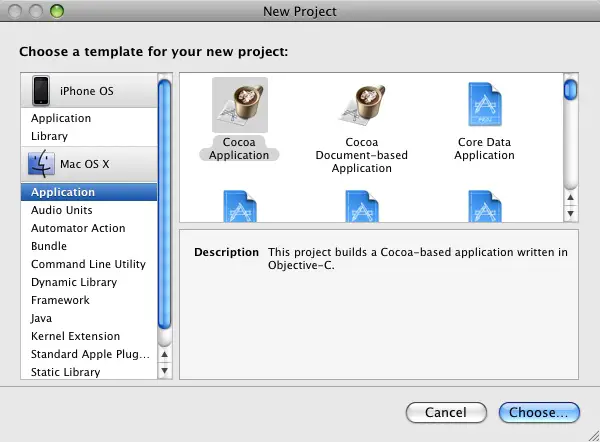
Each application created in Xcode is contained within a project. The first step in developing application, therefore, is to create a new project. This is achieved by selecting the File -> New Project... menu option. The New Project window provides a range of different types of Mac OS applications that can be created. If you downloaded and installed the iPhone version of the SDK, options are also provided to create a new iPhone application:
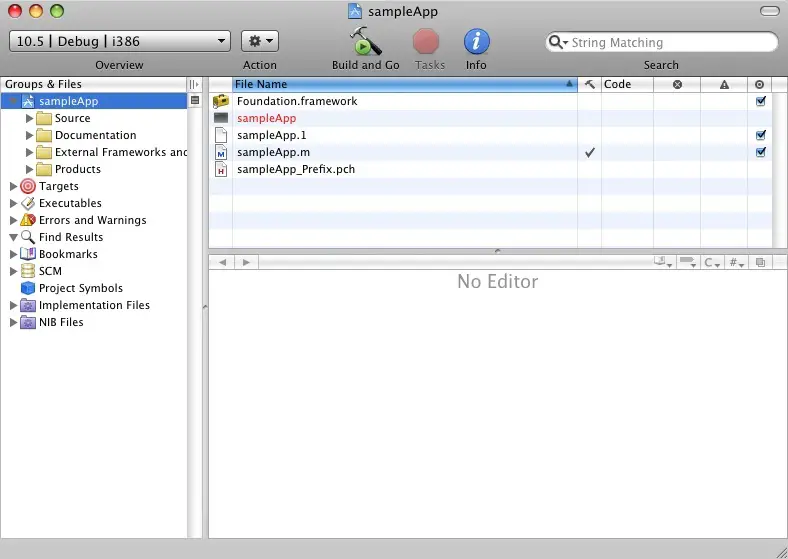
Under the Mac OS X section, scroll down the list and select Command Line Utility. In the main panel, choose Foundation Tool then click on the Choose.. button. In the resulting panel, enter "SampleApp in the Save As: field. By default, Xcode will put the project files in your Documents folder so be sure to create and specify a specific folder for your Objective-C development work before proceeding by clicking the Save button. Xcode will subsequently create the new project and open the main Xcode window:


