Configuring Ubuntu Linux Remote Access using SSH
SSH is a TCP/IP service that provides a secure mechamism for remotely logging into one system over either a local network or the internet into another system. SSH also provides the ability to transfer files between remote systems. When a user logs into a remote system using SSH, they receive a command prompt allowing them to enter commands on the remote system as if they were sitting at the remote system and had opened a terminal session.
In this chapoter we will cover the steps necessary to configure an Ubuntu Linuux system to accept SSH connections. This involves installing the SSH server on the local systems and configuring the firewall to allow SSH connections.
Installing SSH on an Ubuntu Linux System
In order for a system to accept SSH connections the system must first be running the SSH server. By default, Ubuntu Linux does not install the SSH server so the first step is to ensure that the server is installed. This can be performed using either the Synaptic Package Manager or the apt-get command-line tool.
To install using using the Synaptic Package Manager, select the System desktop menu and then click on Synaptic Package Manager in the Administration sub-menu. Enter your password when prompted to do so. Click on the Search button in the toolbar and search for openssh-server. After the search completes, you will see openssh-server in the package list. Simply click on the check box next to this item and follow the instructions to install the SSH server package.
To install from the command line, begin by opening a terminal window by selecting the Applications menu and selecting Konsole from the System Tools menu. In the terminal window enter the following command and press enter to execute it:
sudo apt-get install openssh-server
The installation process with download the SSH server, install it and start the service running in the background. You may now attempt to connect from a remote system (see below for details of how to do this). If you receive a "connection refused" message when you try to connect it you may need to configure the firewall to allow SSH connections to be established to this system.
Configuring the Ubuntu Linux Firewall to Allow SSH Connections
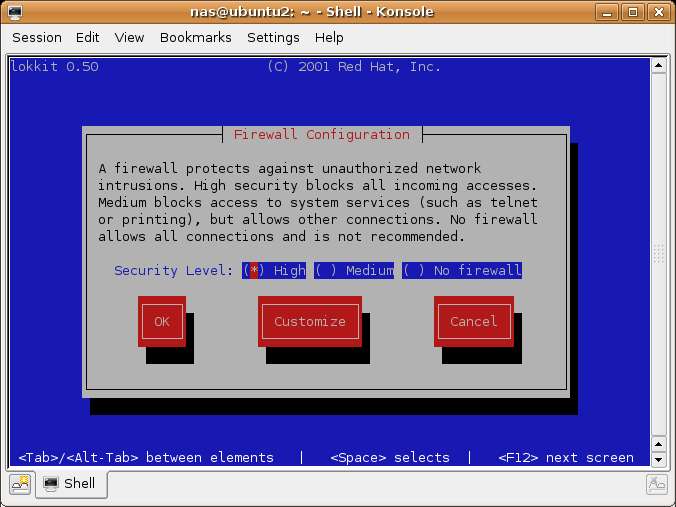
If you are using a firewall to protect your system you will need to allow SSH connections before you be able to connect from a remote system. If you are using the basic firewall configuration (see Basic Ubuntu Linux Firewall Configuration) you can allow SSH connections using the lokkit tool.
If you do not already have a terminal window open start one by selecting Konsole from the System Tools sub-menu of the desktop Applications menu. The lokkit screen will appear as follows:
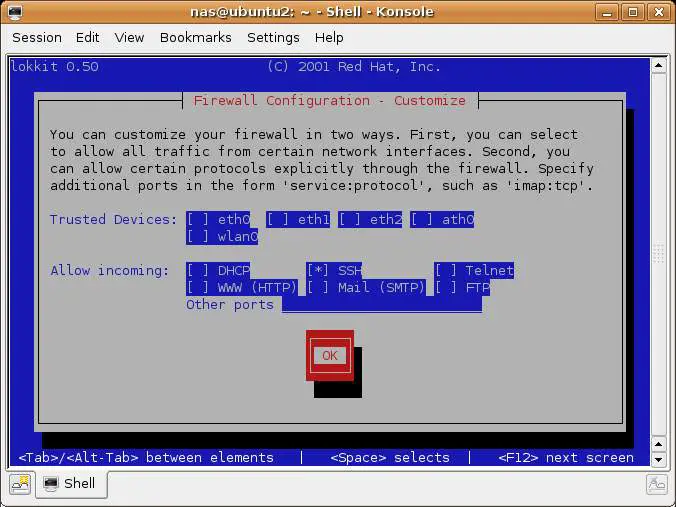
Use the Tab key to move the Customize button and press Enter. On the Customize screen Tab to the SSH entry and press space so that an asterisk (*) appears nextr to the setting to show it is enabled. The screen should now appear as follows:
Tab to the OK button and press Enter to return to the main screen. Tab once again to the OK button and press enter to exit lokkit.


