Using Bitmaps for Persistent Graphics in C Sharp
In the previous chapter we looked at the basics of drawing graphics in C# using the Graphics Object. In that chapter we dealt with the issue of making graphics persistent by performing all the drawing sequences in the Paint() method of a component. In this chapter we will look at using bitmaps to provide persistent graphics
Why Use Bitmaps for Graphics Persistence in C#?
In the previous chapter we explained that simply drawing graphics on a component in C# is not sufficient to ensure the graphics will remain if part or all of the window containing the graphics is obscured by another window. In such situations the application will not know to redraw the erased graphics once the obscured section of the window is uncovered. To address this problem we used the Paint() method of the component to ensure that the draw commands were executed again when the Paint() event was triggered. This approach works well for simple, pre-defined graphics but is not suitable for complex drawings or situations where different graphics are drawn each time the application runs (for example the graphics may be drawn based on interaction with the user).
To address such situations it is preferable to draw the graphics on a bitmap residing in memory which can be rendered on a component whenever the a Paint() event is triggered. This avoids the problem of having to call all the Draw methods or store and replay a complex sequence of draw commands each time the graphics need to refreshed.
Creating a Bitmap
The first step in this tutorial is to create a new Visual Studio Windows Form Application project named CSharpBitmap. Once the project is created double click on the Form to display the source code. Within the class declaration for the form we need to add a Bitmap declaration called myBitmap as follows:
namespace CSharpBitmap
{
    public partial class Form1 : Form
    {
        private System.Drawing.Bitmap myBitmap; // Our Bitmap declaration

        public Form1()
        {
            InitializeComponent();
        }

        private void Form1_Load(object sender, EventArgs e)
        {

        }
    }
}
This bitmap will be used to store the graphics image in memeory ready to be displayed to the user.
Instantiating a Bitmap and Creating a Graphics Object
Having declared a Bitmaps to store our graphics we now need to instantiate it. This can be performed in the Load() method of our form so that it is executed when the form is created:
      private void Form1_Load(object sender, EventArgs e)
      {

            myBitmap = new Bitmap(this.ClientRectangle.Width, this.ClientRectangle.Height,
                System.Drawing.Imaging.PixelFormat.Format24bppRgb);
      }
Having created a bitmap object the next step is create a Graphics Object for the bitmap so that we can draw graphics into the bitmap. This is achieved by calling the Graphics.FromImage() method, passing through the bitmap as the argument. Our Load() method should now appear as follows:
      private void Form1_Load(object sender, EventArgs e)
      {
            Graphics graphicsObj;
            myBitmap = new Bitmap(this.ClientRectangle.Width, this.ClientRectangle.Height,
                  System.Drawing.Imaging.PixelFormat.Format24bppRgb);

            graphicsObj = Graphics.FromImage(myBitmap);

            graphicsObj.Dispose()

      }
Note that it is important to dispose of the Graphics Object before we exit the method to free up resources.
Drawing onto the Bitmap
Now that we have our object we can draw onto it using the Graphics Object just as we would writing to any other graphics object (for details on drawing to a graphics objet read ???).
In this example we will create a Pen and a Rectangle and draw an ellipse:
        private void Form1_Load(object sender, EventArgs e)
        {
            Graphics graphicsObj;
            myBitmap = new Bitmap(this.ClientRectangle.Width, this.ClientRectangle.Height, System.Drawing.Imaging.PixelFormat.Format24bppRgb);

            graphicsObj = Graphics.FromImage(myBitmap);

            Pen myPen = new Pen(System.Drawing.Color.Plum, 3);

            Rectangle rectangleObj = new Rectangle(10, 10, 200, 200);

            graphicsObj.DrawEllipse(myPen, rectangleObj);

            graphicsObj.Dispose();
        }
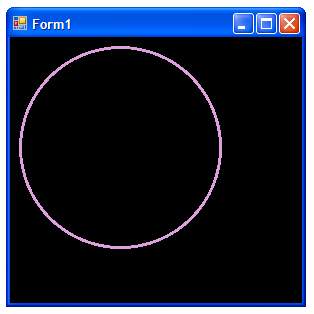
When compiled and executed the code will create the bitmap in memory, create a Graphics Object associated with the bitmap and draw an ellipse into the bitmap image. It will not, at this point, display anything to user because the bitmap is still just an image sitting in memory. The next task is to wire up the Paint() event to render the bitmap into the Graphics Object of our form.
Rendering a Bitmap Image on a C# Control
The next step is to write some code for the Paint() event of our form. Select the form in the Visual Studio design area and click on the lightning bolt button in the Properties dialog to display events. Double click on the Paint event to go to the code area. In the Paint() event enter the following code to draw the bitmap image onto the form:
        private void Form1_Paint(object sender, PaintEventArgs e)
        {
            Graphics graphicsObj = e.Graphics;

            graphicsObj.DrawImage(myBitmap, 0, 0, myBitmap.Width, myBitmap.Height);
        }
When compiled and executed the graphics created in the bitmap image will appear in the form area:


