Installing Xcode and the iPhone SDK
| Previous | Table of Contents | Next |
| The iPhone OS Core OS Layer | Creating a Simple iPhone App |
Learn SwiftUI and take your iOS Development to the Next Level |
iPhone apps are developed using the iPhone SDK in conjunction with Apple’s Xcode development environment. The iPhone SDK contains the development frameworks that were outlined in The iPhone OS Architecture and Frameworks. Xcode is an integrated development environment within which you will code, compile, test and debug your iPhone applications. The Xcode environment also includes a tool called Interface Builder that enables you to graphically design the user interface of your application using the components provided by the UIKit framework.
In this chapter we will cover the steps involved in installing both Xcode and the iPhone SDK on Mac OS X.
Identifying if you have an Intel or PowerPC based Mac
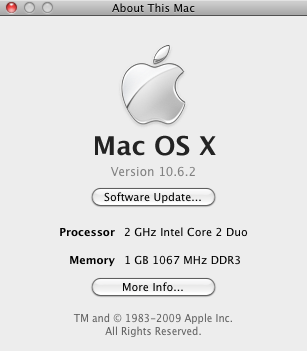
Only Intel based Mac OS X systems can be used to develop applications for the iPhone. If you have an older, PowerPC based Mac then you will need to purchase a new system before you can begin your iPhone app development adventure. If you are unsure of the processor type inside your Mac, you can find this information by opening the Finder and selecting the About This Mac from the Apple menu. In the resulting dialog check the Processor line. The following figure illustrates the results obtained on an Intel based system:
If the dialog on your Mac does not reflect the presence of an Intel based processor then your current system is, sadly, unsuitable as a platform for iPhone app development.
Installing Xcode and the iPhone SDK
The best way to obtain the latest versions of Xcode and the iPhone SDK is to download them from the Apple web site. The URL to download Xcode is:
http://developer.apple.com/technology/xcode.html
There are two forms of Xcode, one for developing both Mac OS X and iPhone applications and the other solely for developing Mac OS X applications. For the purposes of this book you will, of course, need the package that includes the iPhone SDK. In order to download Xcode with the iPhone SDK, you will need a Registered iPhone Developer account. Fortunately membership is free and can be activated using your existing Apple account (for example the one you use to buy music on iTunes).
Once you have registered, you will gain access to the Apple Developer Connection web site where download links are provided for Xcode and the SDK on a variety of Mac OS X versions.
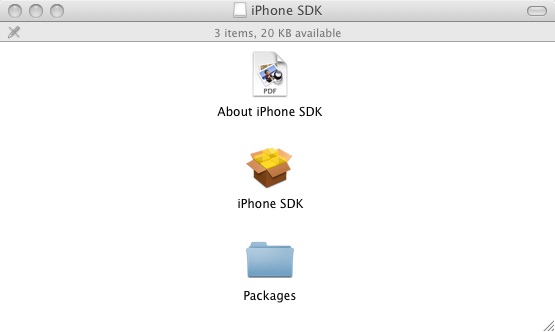
The download is over 2GB in size and will take a number of hours to complete depending on the speed of your internet connection. The package takes the form of a disk image (.dmg) file. Once the download has completed, a new window will open as follows displaying the contents of the .dmg file:

If this window does not open by default, it can be opened by clicking on the SDK disk drive icon on the desktop.
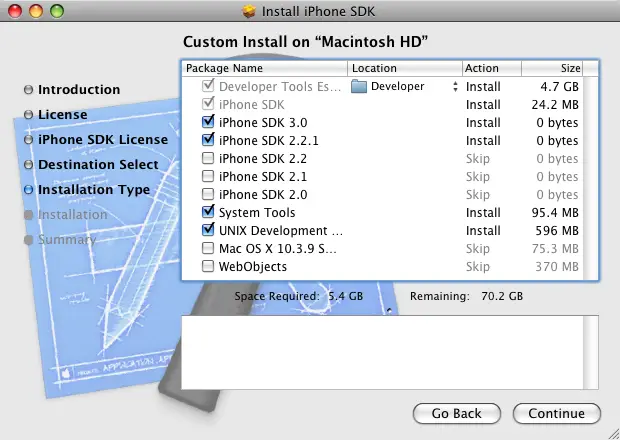
Initiate the installation by double clicking on the package icon (the one that looks like an opening box) and follow the instructions until you reach the Custom Install screen:
The default selections on this screen are adequate for most requirements so unless you have specific needs there is no necessity to alter these selections. Continue to the next screen, review the information and click Install to begin the installation. Note that you may first be prompted to enter your password as a security precaution. The duration of the installation process will vary depending on the speed and current load on the computer, but typically completes in 15 - 30 minutes.
Starting Xcode
Having successfully installed the SDK and Xcode, the next step is to launch it so that we can write and then create a sample iPhone application. To start up Xcode, open the Finder, click on the Macintosh HD device in the left hand panel then double click on the Developer folder, followed by the Applications folder. Within this folder you should see an icon for Xcode. Since you will be making frequent use of this tool take this opportunity to drag and drop it into your dock for easier access in the future. Click on the Xcode icon in the dock to launch the tool.
Once Xcode has loaded, and assuming this is the first time you have used Xcode on this system, you will be presented with the Welcome screen from which you are ready to proceed.
Having installed the iPhone SDK and successfully launched Xcode we can now look at Creating a Simple iPhone App.
Learn SwiftUI and take your iOS Development to the Next Level |
| Previous | Table of Contents | Next |
| The iPhone OS Core OS Layer | Creating a Simple iPhone App |


