Installing Ubuntu Linux on a Windows System (Dual booting)
Ubuntu Linux, just like most Linux distributions, will happily co-exist on a hard disk drive with just about any version of Windows. This is a concept known as dual-booting. Essentially, when you power up your PC you will be presented with a menu which provides the option to boot either Ubuntu Linux or Windows. Obviously you can only run one operating system at a time, but it is worth noting that the files on the Windows partition of your disk drive will be available to you from Ubuntu Linux regardless of whether your Windows partition was formatted using NTFS, FAT16 or FAT32.
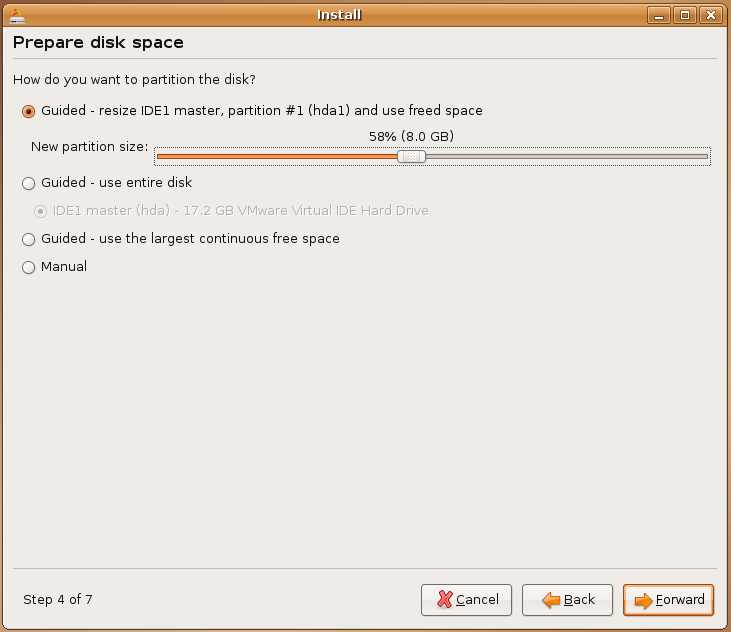
During the installation process the Ubuntu installer will detect the Windows installation on the drive and give you option of deleting it and using the entire disk for Ubuntu, or sharing the disk with Windows. In the latter case you will be able to specify the percentage of the disk to be used for Ubuntu Linux. Remember that you need a minimum of 2Gb of disk space for a full Ubuntu Linux installation and more space to store any files you may subsequently create. The installer will then resize the Windows partition (without destroying any data) and use the remainder of the disk for Ubuntu Linux.
In addition, the Ubuntu Linux installer provides the option to copy over files and settings for all users of the Windows system to the Ubuntu Linux partition.
Beginning the Ubuntu Linux Installation
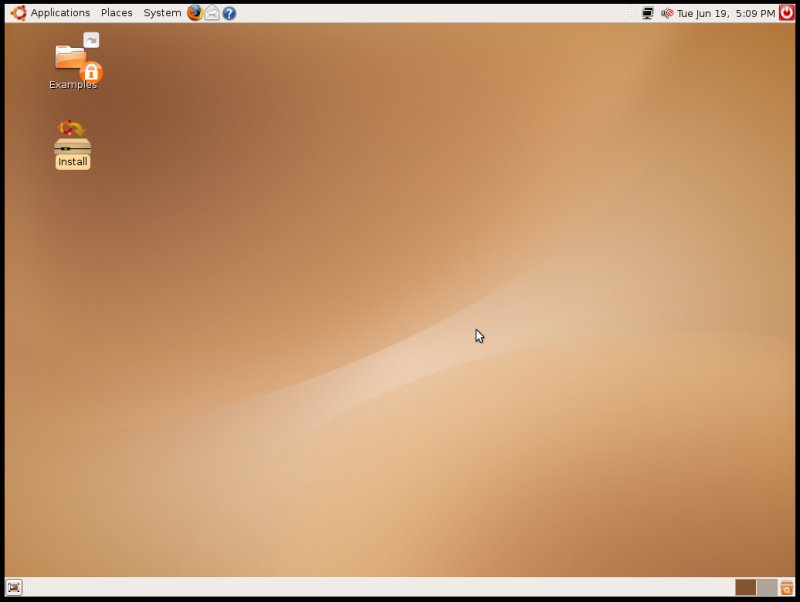
To start the installation, place the Ubuntu Linux CD into the CD-ROM or DVD drive and reboot your computer system. If the system loads Windows again you will need to change the boot order in your system BIOS. To do this reboot again. Early in the boot process the BIOS will display a message indicating which key should be pressed to enter Setup. Press the key indicated so that the BIOS Setup menu appears. Navigate the menu system until you find the setting which indicates the boot order used by the BIOS. Change the order so that the drive containing the Ubuntu Linux CDROM is listed before the hard disk drive, then exit and save the settings. Reboot once more and you should find that Ubuntu Linux loads from the CDROM. Oncer Ubuntu has loaded will be presented with the following screen:
To begin the installation double click on the "Install" icon in the top left hand corner of the desktop. The installer will begin and prompt for keyboard and locale information. Enter the appropriate keyboard and timezone information. After entering this information the installer will ask for information about allocating the disk space:
When configuring a dual boot environment it is best to select the "Guided" option from the above dialog. At this point it is necessary to decide how much of your Windows partition you wish to donate to the Ubuntu Linux installation. Move the slider until the Ubuntu partition allocation is a size you are comfortable with (the guided option will not let you create an Ubuntu partition smaller than 3Gb - this ensures you have enough space for the operating system together with approximately 1Gb remaining for your data files).
When you have selected the size of the Ubuntu partition click the Forward button to proceed with the installation. When the warning dialog appears read it carefully and click continue if you are sure you wish to proceed.
Migrating Windows Files and Settings
The next screen that appears will give you the option to migrate files and settings from your Windows installation to your new Ubuntu Installation. For each user account on your Windows system you will be able to specify whether or not to migrate the files, and create a matching user account and password on the Ubuntu system.
Creating an Ubuntu Linux User Account/Computer Name
Once you have performed the Windows file migration you will be asked to create a user account on the Ubuntu Linux system for yourself. If you already have an account on the Windows system and created an Ubuntu account during the file migration you can simply select the account from the What name do you want to use to log in? drop-down menu. The installer will then populate the password and full name fields with the data you entered during the migration phase.
At this point it is also necessary to provide a name for the system. This is primarily for networking purposes and is the name that will be used to access the Ubuntu Linux system from other computers on a network. Whnem you have enetred the required information press the Forward button to begin the installation.
Performing the Ubuntu Linux Disk Partitioning and Operating System Installation
The final screen to appear lists the settings chosen in the preceeding steps. Review the settings listed and, assuming they are acceptable, press the Install button to initiate the installation process.
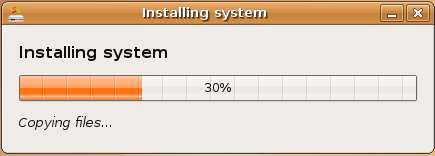
A progress dialog (shown below) will appear displaying the installation progress and describing each task as it is performed by the installer. The installer will repartition the disk to make space for the Ubuntu Linux distribution, format the Ubuntu partitions, create Linux filesystems on those partitions and then install the Ubuntu Linux packages onto the hard drive.
Depending on the speed of your system this process can take some time. Unless you feel compelled to sit and watch the progress bar now is good time to find something else to do for a while.
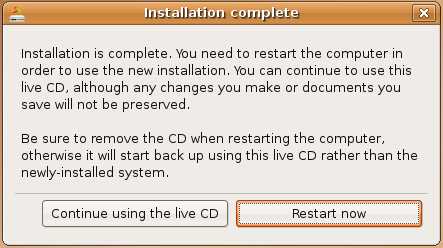
Whne the installation is complete the following dialog will appear to inform you the system is ready to be restarted.


