An Android HTML and Web Content Printing Example
As outlined in the previous chapter, entitled Printing with the Android Printing Framework, the Android Printing framework can be used to print both web pages and dynamically created HTML content. Whilst there is much similarity in these two approaches to printing, there are also some subtle differences that need to be taken into consideration. This chapter will work through the creation of two example applications in order to bring some clarity to these two printing options.
Creating the HTML Printing Example Application
Begin this example by launching the Eclipse environment and selecting the File -> New -> Android Application Project… menu option. Name the application and project HTMLPrint, enter a suitable package name (or com.example.htmlprint if you do not yet have a domain name) and select API 19 or later for the SDK settings. As with previous examples, request the creation of a blank activity and the use of the default launcher icons. On the New Blank Activity screen of the New Android Application wizard, set the Activity Name to HTMLPrintActivity and the Layout Name to activity_html_print.
Printing Dynamic HTML Content
The first stage of this tutorial is to add code to the project to create some HTML content and send it to the Printing framework in the form of a print job.
Begin by locating the HTMLPrintActivity.java file and loading it into the editing panel. Once loaded, modify the code so that it reads as outlined in the following listing:
package com.example.htmlprint;

import android.os.Bundle;
import android.app.Activity;
import android.view.Menu;
import android.webkit.WebView;
import android.webkit.WebViewClient;
import android.print.PrintAttributes;
import android.print.PrintDocumentAdapter;
import android.print.PrintManager;
import android.content.Context;

public class HTMLPrintActivity extends Activity {

	private WebView myWebView;

	@Override
	protected void onCreate(Bundle savedInstanceState) {
		super.onCreate(savedInstanceState);
		setContentView(R.layout.activity_html_print);

	    	WebView webView = new WebView(this);
	    	webView.setWebViewClient(new WebViewClient() {

	           public boolean shouldOverrideUrlLoading(WebView view,
                              String url)
		   {
	                return false;
	           }

	           @Override
	           public void onPageFinished(WebView view, String url) {
	                createWebPrintJob(view);
	                myWebView = null;
	            }
	    });

	    String htmlDocument =
                   "<html><body>== Designing the User Interface Layout ==

Load the activity_web_print.xml layout resource file into the Graphical Layout editor if it has not already been loaded and select and delete the “Hello World!” TextView object.
Switch to the XML view by clicking on the activity_web_print.xml tab located along the lower edge of the editor panel and remove the padding properties from the file so that the WebView will extend to the edges of the display when added to the layout:

<pre>
<RelativeLayout xmlns:android="http://schemas.android.com/apk/res/android"
    xmlns:tools="http://schemas.android.com/tools"
    android:layout_width="match_parent"
    android:layout_height="match_parent"
    tools:context=".WebPrintActivity" >

</RelativeLayout>
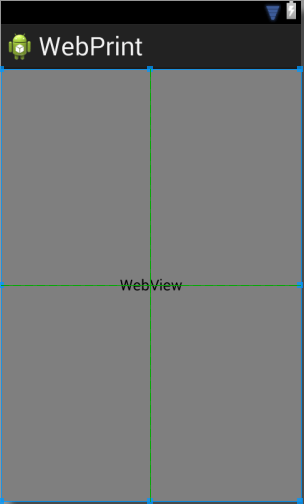
Switch back to the graphical layout view and, from the Composite section of the palette, drag and drop a WebView object so that it fills the entire layout canvas as outlined in Figure 50-3:
Figure 50-3
Right-click on the newly added WebView instance, select the Edit ID… menu option and change the name of the view to myWebView before clicking on OK to commit the change.
Before proceeding to the next step of this tutorial, an additional permission needs to be added to the project to enable the WebView object to access the internet and download a web page for printing. Add this permission by locating the AndroidManifest.xml file in the Project Explorer panel and double clicking on it to load it into the editing panel. Once loaded, directly edit the XML content by clicking on the AndroidManifest.xml tab located along the bottom edge of the manifest editor panel. Within the XML, add the appropriate permission line as shown in the following listing:
<?xml version="1.0" encoding="utf-8"?>
<manifest xmlns:android="http://schemas.android.com/apk/res/android"
    package="com.example.webprint"
    android:versionCode="1"
    android:versionName="1.0" >

    <uses-permission android:name="android.permission.INTERNET" />

    <uses-sdk
        android:minSdkVersion="19"
        android:targetSdkVersion="19" />
.
.
.
</manifest>
Save both layout and manifest files before proceeding.


