An Android HTML and Web Content Printing Example
| Previous | Table of Contents | Next |
| Printing with the Android Printing Framework | A Guide to Android Custom Document Printing |
As outlined in the previous chapter, entitled Printing with the Android Printing Framework, the Android Printing framework can be used to print both web pages and dynamically created HTML content. While there is much similarity in these two approaches to printing, there are also some subtle differences that need to be taken into consideration. This chapter will work through the creation of two example applications in order to bring some clarity to these two printing options.
Creating the HTML Printing Example Application
Begin this example by launching the Android Studio environment and creating a new project, entering HTMLPrint into the Application name field and ebookfrenzy.com as the Company Domain setting before clicking on the Next button.
On the form factors screen, enable the Phone and Tablet option and set the minimum SDK setting to API 26: Android 8.0 (Oreo). Continue to proceed through the screens, requesting the creation of an Empty Activity named HTMLPrintActivity with a corresponding layout named activity_html_print.
Printing Dynamic HTML Content
The first stage of this tutorial is to add code to the project to create some HTML content and send it to the Printing framework in the form of a print job.
Begin by locating the HTMLPrintActivity.java file (located in the Project tool window under app -> java -> com.ebookfrenzy.htmlprint) and loading it into the editing panel. Once loaded, modify the code so that it reads as outlined in the following listing:
package com.ebookfrenzy.htmlprint;

android.support.v7.app.AppCompatActivity;
import android.os.Bundle;
import android.webkit.WebView;
import android.webkit.WebViewClient;
import android.webkit.WebResourceRequest;
import android.print.PrintAttributes;
import android.print.PrintDocumentAdapter;
import android.print.PrintManager;
import android.content.Context;

public class HTMLPrintActivity extends AppCompatActivity {

   private WebView myWebView;

   @Override
    protected void onCreate(Bundle savedInstanceState) {
        super.onCreate(savedInstanceState);
        setContentView(R.layout.activity_htmlprint);

        printWebView();
    }

    private void printWebView() {

        WebView webView = new WebView(this);
        webView.setWebViewClient(new WebViewClient() {

            public boolean shouldOverrideUrlLoading(WebView view,
                                  WebResourceRequest request)
            {
                return false;
            }

            @Override
            public void onPageFinished(WebView view, String url)
            {
                createWebPrintJob(view);
                myWebView = null;
            }
        });

        String htmlDocument =
           "<html><body><h1>Android Print Test</h1><p>"
             + "This is some sample content.</p></body></html>";

        webView.loadDataWithBaseURL(null, htmlDocument,
                "text/HTML", "UTF-8", null);

        myWebView = webView;
    }
}
The code changes begin by declaring a variable named myWebView in which will be stored a reference to the WebView instance used for the printing operation. Within the onCreate() method, an instance of the WebView class is created to which a WebViewClient instance is then assigned.
The WebViewClient assigned to the web view object is configured to indicate that loading of the HTML content is to be handled by the WebView instance (by returning false from the shouldOverrideUrlLoading() method). More importantly, an onPageFinished() handler method is declared and implemented to call a method named createWebPrintJob(). The onPageFinished() method will be called automatically when all of the HTML content has been loaded into the web view. As outlined in the previous chapter, this step is necessary when printing dynamically created HTML content to ensure that the print job is not started until the content has fully loaded into the WebView.
Next, a String object is created containing some HTML to serve as the content and subsequently loaded into the web view. Once the HTML is loaded, the onPageFinished() callback method will trigger. Finally, the method stores a reference to the web view object in the previously declared myWebView variable. Without this vital step, there is a significant risk that the Java runtime system will assume that the application no longer needs the web view object and will discard it to free up memory resulting in the print job terminating before completion.
All that remains in this example is to implement the createWebPrintJob() method which is currently configured to be called by the onPageFinished() callback method. Remaining within the HTMLPrintActivity.java file, therefore, implement this method so that it reads as follows:
private void createWebPrintJob(WebView webView) {

       PrintManager printManager = (PrintManager) this
                .getSystemService(Context.PRINT_SERVICE);

       PrintDocumentAdapter printAdapter =
                webView.createPrintDocumentAdapter("MyDocument");

       String jobName = getString(R.string.app_name) + " Print Test";

       printManager.print(jobName, printAdapter,
                 new PrintAttributes.Builder().build());
}
This method obtains a reference to the PrintManager service and instructs the web view instance to create a print adapter. A new string is created to store the name of the print job (in this case based on the name of the application and the word “Print Test”).
Finally, the print job is started by calling the print() method of the print manager, passing through the job name, print adapter and a set of default print attributes.
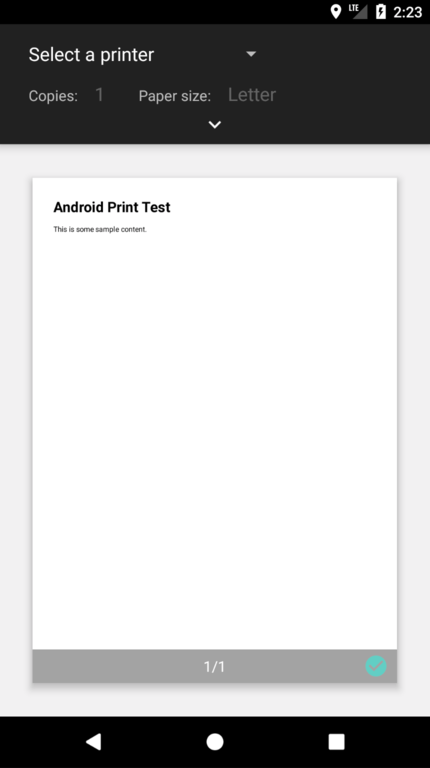
Compile and run the application on a device or emulator running Android 5.0 or later. Once launched, the standard Android printing page should appear as illustrated in Figure 79-1.
Print to a physical printer if you have one configured, save to Google Drive or, alternatively, select the option to save to a PDF file. Once the print job has been initiated, check the generated output on your chosen destination. Note that when using the Save to PDF option, the system will request a name and location for the PDF file. The Downloads folder makes a good option, the contents of which can be viewed by selecting the Downloads icon (renamed Files on Android 8) located amongst the other app icons on the device.
Creating the Web Page Printing Example
The second example application to be created in this chapter will provide the user with an Overflow menu option to print the web page currently displayed within a WebView instance. Create a new project in Android Studio, entering WebPrint into the Application name field and ebookfrenzy.com as the Company Domain setting before clicking on the Next button.
On the form factors screen, enable the Phone and Tablet option and set the minimum SDK setting to API 26: Android 8.0 (Oreo). Continue to proceed through the screens, requesting the creation of a Basic Activity (since we will be making use of the context menu provided by the Basic Activity template) named WebPrintActivity with the remaining properties set to the default values.
Removing the Floating Action Button
Selecting the Basic Activity template provided a context menu and a floating action button. Since the floating action button is not required by the app it can be removed before proceeding. Load the activity_web_print.xml layout file into the Layout Editor, select the floating action button and tap the keyboard Delete key to remove the object from the layout. Edit the WebPrintActivity.java file and remove the floating action button code from the onCreate method as follows:
@Override
protected void onCreate(Bundle savedInstanceState) {
    super.onCreate(savedInstanceState);
    setContentView(R.layout.activity_web_print);
    Toolbar toolbar = (Toolbar) findViewById(R.id.toolbar);
    setSupportActionBar(toolbar);

    FloatingActionButton fab =
        (FloatingActionButton) findViewById(R.id.fab);
    fab.setOnClickListener(new View.OnClickListener() {
        @Override
        public void onClick(View view) {
            Snackbar.make(view, "Replace with your own action",
                      Snackbar.LENGTH_LONG)
                        .setAction("Action", null).show();
        }
    });
}
Designing the User Interface Layout
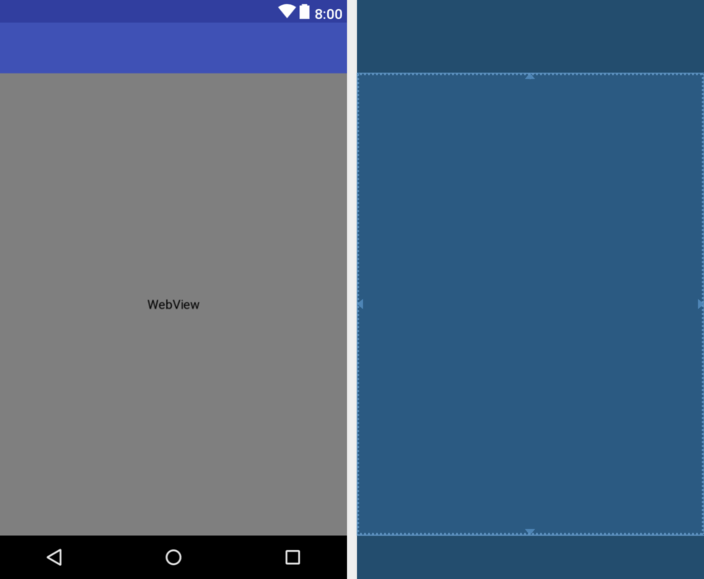
Load the content_web_print.xml layout resource file into the Layout Editor tool if it has not already been loaded and, in Design mode, select and delete the “Hello World!” TextView object. From the Widgets section of the palette, drag and drop a WebView object onto the center of the device screen layout. Using the Attributes tool window, change the layout_width and layout_height properties of the WebView to match_constraint so that it fills the entire layout canvas as outlined in Figure 79-2:
Select the newly added WebView instance and change the ID of the view to myWebView.
Before proceeding to the next step of this tutorial, an additional permission needs to be added to the project to enable the WebView object to access the internet and download a web page for printing. Add this permission by locating the AndroidManifest.xml file in the Project tool window and double-clicking on it to load it into the editing panel. Once loaded, edit the XML content to add the appropriate permission line as shown in the following listing:
<?xml version="1.0" encoding="utf-8"?>
<manifest xmlns:android="http://schemas.android.com/apk/res/android"
    package="com.ebookfrenzy.webprint" >

    <uses-permission android:name="android.permission.INTERNET" />

    <application
        android:allowBackup="true"
        android:icon="@mipmap/ic_launcher"
        android:label="@string/app_name"
        android:supportsRtl="true"
        android:theme="@style/AppTheme" >
        <activity
            android:name=".WebPrintActivity"
            android:label="@string/app_name"
            android:theme="@style/AppTheme.NoActionBar" >
            <intent-filter>
                <action android:name="android.intent.action.MAIN" />

                <category android:name=
                        "android.intent.category.LAUNCHER" />
            </intent-filter>
        </activity>
    </application>

</manifest>
Loading the Web Page into the WebView
Before the web page can be printed, it needs to be loaded into the WebView instance. For the purposes of this tutorial, this will be performed by a call to the loadUrl() method of the WebView instance, which will be placed in a method named configureWebView() and called from within the onCreate() method of the WebPrintActivity class. Edit the WebPrintActivity.java file, therefore, and modify it as follows:
package com.ebookfrenzy.webprint;

import android.os.Bundle;

android.support.v7.app.AppCompatActivity;
import android.support.v7.widget.Toolbar;

import android.view.Menu;
import android.view.MenuItem;
import android.webkit.WebView;
import android.webkit.WebViewClient;
import android.webkit.WebResourceRequest;

public class WebPrintActivity extends AppCompatActivity {

    private WebView myWebView;

    @Override
    protected void onCreate(Bundle savedInstanceState) {
        super.onCreate(savedInstanceState);
        setContentView(R.layout.activity_web_print);
        Toolbar toolbar = (Toolbar) findViewById(R.id.toolbar);
        setSupportActionBar(toolbar);

        configureWebView();
    }

    private void configureWebView() {

        myWebView = (WebView) findViewById(R.id.myWebView);
        myWebView.setWebViewClient(new WebViewClient(){
            @Override
            public boolean shouldOverrideUrlLoading(
                    WebView view, WebResourceRequest request) {
                return super.shouldOverrideUrlLoading(
                        view, request);
            }
        });
        myWebView.getSettings().setJavaScriptEnabled(true);
        myWebView.loadUrl(
                "https://developer.android.com/google/index.html");
    }
.
.
}
Adding the Print Menu Option
The option to print the web page will now be added to the Overflow menu using the techniques outlined in the chapter entitled Creating and Managing Overflow Menus on Android.
The first requirement is a string resource with which to label the menu option. Within the Project tool window, locate the app -> res -> values -> strings.xml file, double-click on it to load it into the editor and modify it to add a new string resource:
<resources>
    <string name="app_name">WebPrint</string>
    <string name="action_settings">Settings</string>
    <string name="print_string">Print</string>
</resources>
Next, load the app -> res -> menu -> menu_web_print.xml file into the menu editor, switch to Text mode and replace the Settings menu option with the print option:
<menu xmlns:android="http://schemas.android.com/apk/res/android"
    xmlns:tools="http://schemas.android.com/tools"
    tools:context="com.ebookfrenzy.webprint.WebPrintActivity" >
    <item android:id="@+id/action_settings"
        android:title="@string/action_settings"
        android:orderInCategory="100"
        app:showAsAction="never" />

    <item
        android:id="@+id/action_print"
        android:orderInCategory="100"
        app:showAsAction="never"
        android:title="@string/print_string"/>

</menu>
All that remains in terms of configuring the menu option is to modify the onOptionsItemSelected() handler method within the WebPrintActivity.java file:
@Override
public boolean onOptionsItemSelected(MenuItem item) {
    int id = item.getItemId();
    if (id == R.id.action_print) {
        createWebPrintJob(myWebView);
        return true;
    }
    return super.onOptionsItemSelected(item);
}
With the onOptionsItemSelected() method implemented, the activity will call a method named createWebPrintJob() when the print menu option is selected from the overflow menu. The implementation of this method is identical to that used in the previous HTMLPrint project and may now be added to the WebPrintActivity.java file such that it reads as follows:
package com.ebookfrenzy.webprint;
.
.
.
import android.print.PrintAttributes;
import android.print.PrintDocumentAdapter;
import android.print.PrintManager;
import android.content.Context;

public class WebPrintActivity extends AppCompatActivity {

    private WebView myWebView;
.
.
    private void createWebPrintJob(WebView webView) {

        PrintManager printManager = (PrintManager) this
                .getSystemService(Context.PRINT_SERVICE);

        PrintDocumentAdapter printAdapter =
                webView.createPrintDocumentAdapter("MyDocument");

        String jobName = getString(R.string.app_name) +
                " Print Test";

        printManager.print(jobName, printAdapter,
                new PrintAttributes.Builder().build());
    }
.
.
}
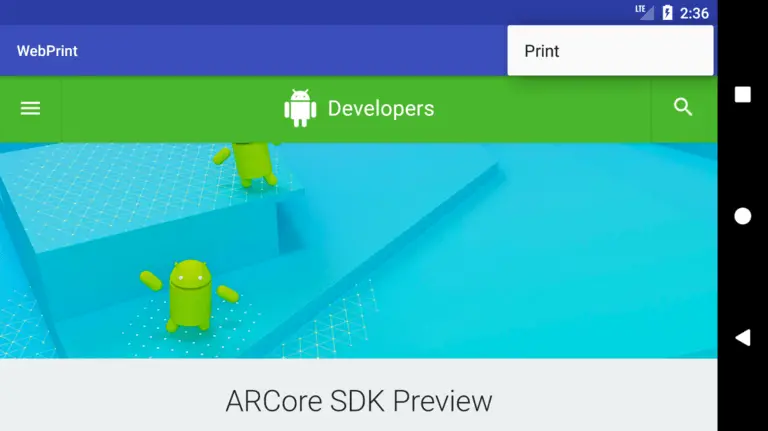
With the code changes complete, run the application on a physical Android device or emulator running Android version 5.0 or later. Once successfully launched, the WebView should be visible with the designated web page loaded. Once the page has loaded, select the Print option from the Overflow menu (Figure 79-3) and use the resulting print panel to print the web page to a suitable destination.
Summary
The Android Printing framework includes extensions to the WebView class that make it possible to print HTML based content from within an Android application. This content can be in the form of HTML created dynamically within the application at runtime, or a pre-existing web page loaded into a WebView instance. In the case of dynamically created HTML, it is important to use a WebViewClient instance to ensure that printing does not start until the HTML has been fully loaded into the WebView.
| Previous | Table of Contents | Next |
| Printing with the Android Printing Framework | A Guide to Android Custom Document Printing |


