Installing Ubuntu Linux on a Windows System (Dual booting)
| Previous | Table of Contents | Next |
| Performing a Clean Ubuntu Linux Installation | Installing Ubuntu on a Windows Disk with Wubi |
Ubuntu Linux, just like most Linux distributions, will happily co-exist on a hard disk drive with just about any version of Windows. This is a concept known as dual-booting. Essentially, when you power up your PC you will be presented with a menu which provides the option to boot either Ubuntu Linux or Windows. Obviously you can only run one operating system at a time, but it is worth noting that the files on the Windows partition of your disk drive will be available to you from Ubuntu Linux regardless of whether your Windows partition was formatted using NTFS, FAT16 or FAT32.
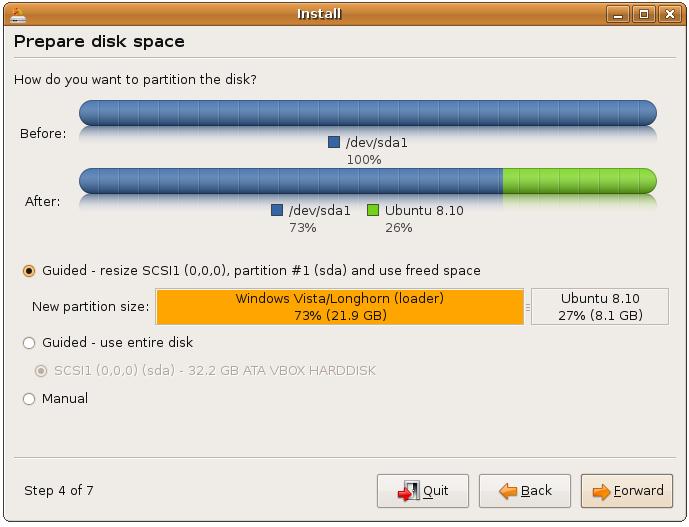
During the installation process the Ubuntu installer will detect the Windows installation on the drive and give you the option of deleting it and using the entire disk for Ubuntu, or sharing the disk with Windows. In the latter case you will be able to specify the percentage of the disk to be used for Ubuntu Linux. According to the Ubuntu documentation, a minimum of 2 GB of disk space is required for a full Ubuntu Linux installation, and more space to store any files you may subsequently create. Experience suggests, however, that even with 3 GB of space allocated you will probably run out disk space during your first system update. Ideally, at least 8 GB of disk space should be allocated to the Ubuntu installation to avoid later problems. Once the disk space for Ubuntu has been selected, the installer will resize the Windows partition (without destroying any data) and use the remainder of the disk for Ubuntu.
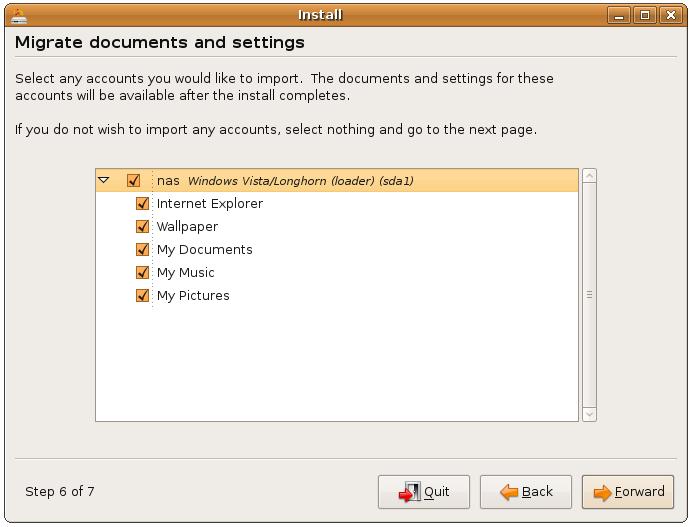
In addition, the Ubuntu Linux installer provides the option to copy over files and settings for all users of the Windows system to the Ubuntu Linux partition. The migration tool will copy over all the files in My Documents directory for any users you choose to migrate together with the desktop background image and any bookmarks you have defined in your Windows web browsers.
Beginning the Ubuntu Linux Installation
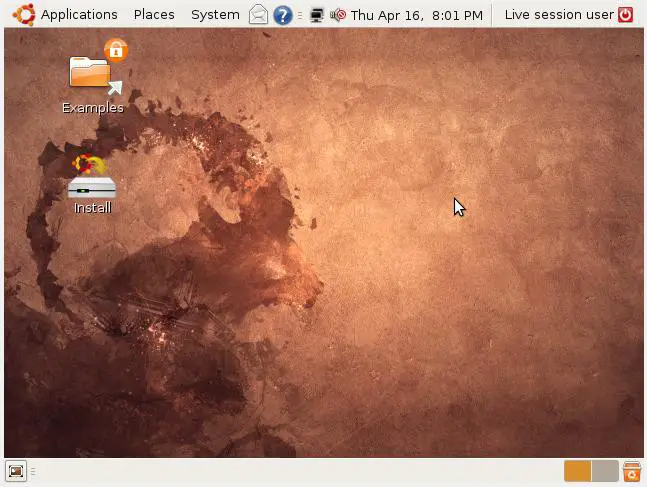
To start the installation, place the Ubuntu Linux CD into the CD-ROM or DVD drive and reboot your computer system. If the system loads Windows again you will need to change the boot order in your system BIOS so that the CD or DVD drive is checked for bootable media before the primary hard disk drive. To do this reboot again. Early in the boot process the BIOS will display a message indicating which key should be pressed to enter Setup. Press the key indicated so that the BIOS Setup menu appears. Navigate the menu system until you find the setting which indicates the boot order used by the BIOS. Change the order so that the drive containing the Ubuntu CDROM is listed before the hard disk drive, then exit and save the settings. Reboot once more and you should find that Ubuntu Linux loads from the CDROM. Once Ubuntu has loaded you will be presented with the following screen:
To begin the installation, double click on the "Install" icon in the top left hand corner of the desktop. The installer will begin and prompt for keyboard and locale information. Enter the appropriate keyboard and time zone information. After entering this information the installer will ask for information about allocating the disk space:
When you have selected the size of the Ubuntu partition, click the Forward button to proceed with the installation. When the warning dialog appears read it carefully and click Continue if you are sure you wish to proceed.
Creating an Ubuntu Linux User Account/Computer Name
Once you have performed the Windows file migration you will be asked to create a user account and password on the Ubuntu system for yourself. At this point it is also necessary to provide a name for the system. This is primarily for networking purposes and is the name that will be used to access the Ubuntu Linux system from other computers on a network.
If you do not want to have to enter your user name and password each time you restart Ubuntu, set the Log in automatically check box.
When you have entered the required information press the Forward button to begin the installation.
Migrating Windows Files and Settings
The next screen that appears will give you the option to migrate files and settings from your Windows installation to your new Ubuntu Installation. For each user account on your Windows system you will be able to specify whether or not to migrate the files and settings. Individual settings may be accessed configured by clicking on the small arrow next to the user name as illustrated in the following figure:
Performing the Ubuntu Linux Disk Partitioning and Operating System Installation
The final screen to appear lists the settings chosen in the preceding steps. Review the settings listed and, assuming they are acceptable, press the Install button to initiate the installation process.
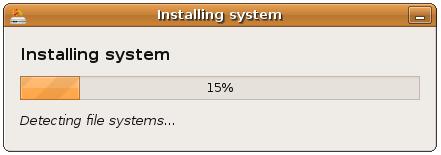
A progress dialog (shown below) will appear displaying the installation progress and describing each task as it is performed by the installer. The installer formats the Ubuntu partitions, creates Linux file systems on those partitions and then installs the Ubuntu Linux packages onto the hard drive.
Depending on the speed of your system this process can take some time. Unless you feel compelled to sit and watch the progress bar now is good time to find something else to do for a while.
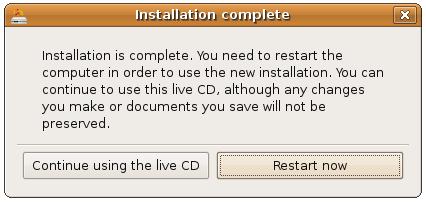
When the installation is complete, the following dialog will appear to inform you the system is ready to be restarted.
When you are ready to reboot, press the Restart now button. The system while take a few moments to shut down. After a while the Ubuntu CDROM will eject and a message prompting you to remove the CDROM and press Enter will be displayed. Remove the CDROM and press Enter as instructed.
Booting Ubuntu Linux for the First Time
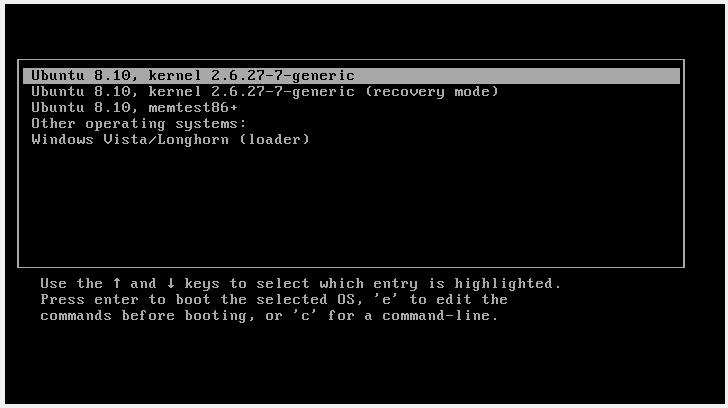
When the system reboots the screen below will appear providing the option to boot either Windows or Ubuntu Linux:
Press Enter to boot Ubuntu. If you wish to boot Windows use the keyboard arrow keys to select the Windows option. If you choose to boot Ubuntu Linux the operating system will load and the Ubuntu login screen will appear (unless the automatic login option was selected). Enter the user name and password you set up during the installation process and you will be logged into the Ubuntu Desktop environment.
Finding the Migrated Windows Files and Settings
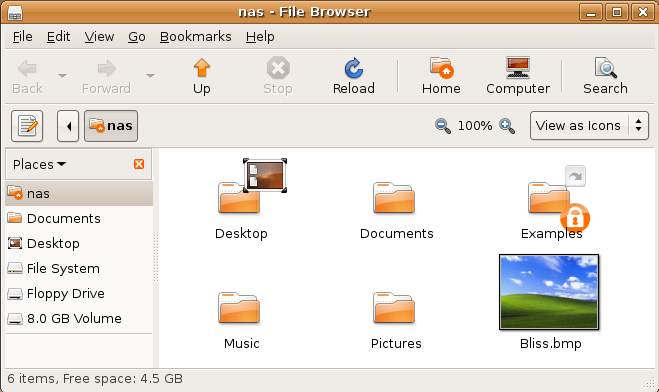
If you chose to migrate your Windows files and settings then it is time to find them. Under Linux you have what is known as a home directory or home folder where you will store all your files. To visit your home directory click on the Places menu option at the top of the desktop and select Home Folder. The File Browser will now appear listing all the files and directories in your home folder. You should see that all the files and folders from your Windows My Documents folder are present in your Linux home folder, together with the image file that was used for your Windows desktop wallpaper. The File Browser window should look similar to the following screenshot:
Any bookmarks set up in your Windows browser will also be available in the Firefox browser under Ubuntu. Launch Firefox by clicking on the Firefox logo next to the System menu on the top toolbar. When Firefox has loaded, click on the Bookmarks menu to locate your bookmarks.


