Configuring Fedora Desktop Fonts
The days of the green on black character based terminal with fixed type face and font size are, thankfully, a thing of the very distance past. These days we get to choose the font type, style and size of the words we view on our screens. This ability is of particular importance to those who may have difficulty reading smaller text on a screen.
The Fedora GNOME desktop, just like other desktops, allows the user to select the font type and size used to display text. The objective of this chapter, therefore, is to provide a brief overview of configuring these settings on the Fedora desktop.
Font Options on Fedora
Thew Fedora GNOME desktop allows fonts to be specified for a number of different display categories:
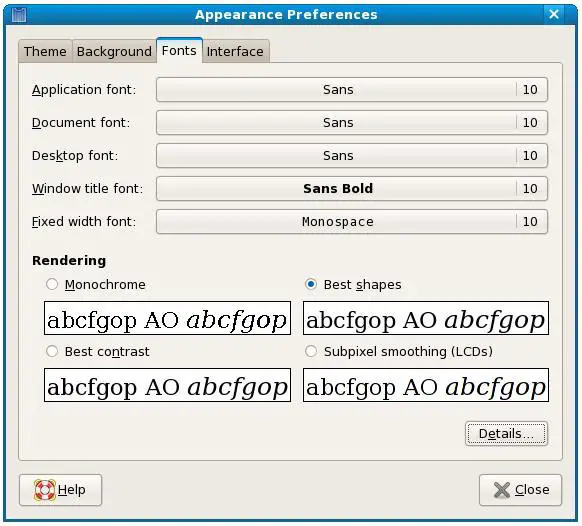
- Application font - The font used to display text in application windows. This also changes the font used to display items such as the menus in the desktop panel.
- Document font - Specifies the font that is to be used when displaying document text in an application.
- Desktop font - The font used to display text under the icons on the desktop (such as folder names).'
- Window title font - The font used on the text in window titles.
- Fixed width font - Specifies the font to be used when the system needs to display fixed width font. I prime example of this is the text that is rendered in a Terminal window.
In terms of font selection options, fonts may be specified by type (Utopia, Serif, Monospace etc), style (Regular, Bold, Italic) and size (10pt, 11pt etc).
Changing Font Settings
Font settings are controlled via the Fonts page of the Desktop Appeearance dialog (accessed via the System->Preferences->Look & Feel->Appearance menu option). When invoked, the Font page should appear as follows:
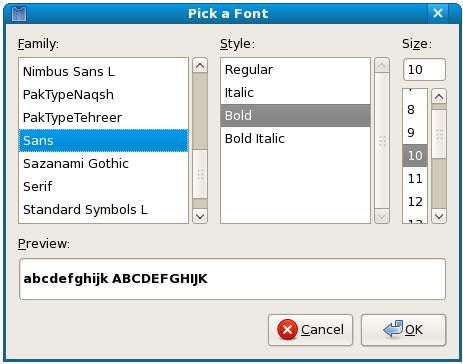
Click on the button next to the font category you wish to change to invoke the Pick a Font dialog. This dialog allows the selection of a font based on family, point size and style. The Preview area allows you to see how the font looks before applying it to the desktop:
Once you have selected a suitable font, click on the OK button to apply the selection to the desktop settings.
Font Rendering Settings
The Font settings page provides four font rendering options:
- Monochrome - Displays text in black and white. This invariably results in characters having jagged edges.
- Best Shapes - Uses antialiasing to smooth the edges of the characters where possible. This is typically the preferred option when using a CRT based monitor.
- Best Contrast - The preferred option for visually impaired users. Uses antialiasing combined with adjustments to maximize the contrasts between the characters and the background.
- Subpixel Smoothing - Uses the spahpe of LCD pixels to render the smoothest possible fonts on LCD screens.
Advanced Font Rendering
For more advanced font rendering options, click on the details button in the lower right hand corner of the Font dialog:
[Image:fedora_font_details.jpg|Fedora Desktop Font Rendering Detail Screen]
Each of the categories shown in the dialog provides a more detailed level of control over the rendering of fonts on the Fedora desktop:
Resolution - Allows the resolution at which fonts are rendered to be defined in dots per inch.
Smoothing - Defines how fonts are rendered when antialiasing is used. Available options are None, Subpixel and Grayscale.
Hinting - A form of font rendering designed to improve the appearance of small sizes and low screen resolutions. Options available are None, Slight, Medium and Full.
Subpixel Order - Specifies the pixel order for fonts. Meaningful only on LCD displays. Options are RGB, VRGB, BGR and VBGR.
Viewing Fonts in the Font Folder
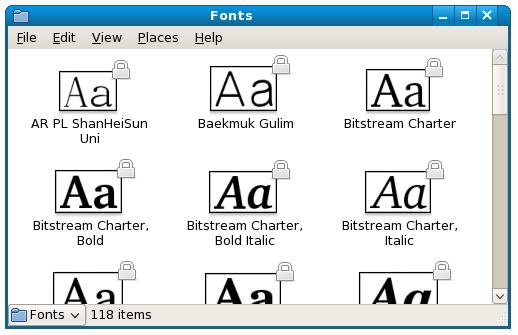
The fonts currently installed on the system are stored in the Fonts Folder. From with the Font Details' dialog. Begin by clicking on the Go To Fonts Folder to open the folder containing the fonts. The folder should appear as follows:
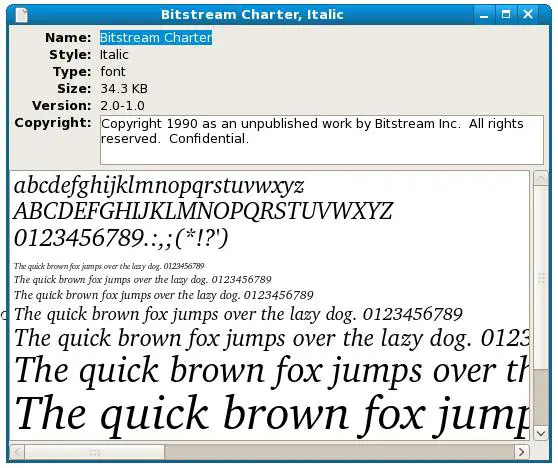
To preview the fonts in any particualr font family, select the font and click with the right mouse button. From the resulting popup menu, select the Open with GNOME Font Viewer option. A new window will then appear containing the selected font set:
Adding New Fonts
If you have a TrueType font which you would like to add to the list of available desktop fonts begin by openning the Fonts folder as outline above. Once the Fonts folder is displayed, open a second file manage window and navigate to the folder containing the new font and copy the new font to the Font folder. Once the font is installed in the Fonts folder it will be necessary to log out and then back in again before the font becomes available for selection.


