Creating Context Menus in C Sharp
| Previous | Table of Contents | Next |
| Creating Top-Level Menus in C# | Building a Toolbar with C# and Visual Studio |
| Purchase and download the full PDF and ePub versions of this Visual C# eBook for only $9.99 |
C# context menus are the menus that pop up when the user clicks with the right hand mouse button over a control or area in a Windows based form. They are called context menus because the menu is usually specific to the object over which the mouse was clicked. Context menus are also sometimes referred to as Popup menus or Shortcut menus.
This chapter will provide an overview of the steps necessary to create and program Context menus in C#. For information on creating Top-level menus see the Creating Top-Level Menus in C# chapter of this book.
Adding Context Menus to a C# Form
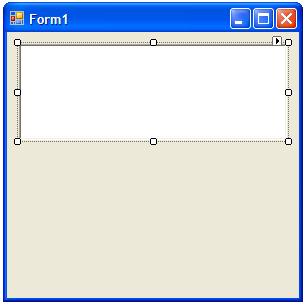
Context menus are added to a form in C# using the ContextMenuStrip object and associating it with a particular control. Begin by creating a new Windows Application project in Visual Studio. Next, add a RichTextBox component to the form so that the form appears as follows and name it MyTextBox:

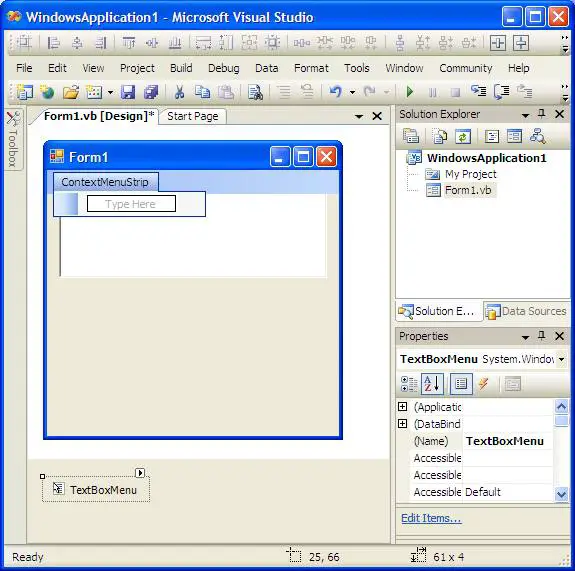
The purpose of this example is to create a context menu on the form which will contain options to hide and show the MyTextBox object. From the Visual Studio Toolbox, double click on the ContextMenuStrip object. The object will be added to the form. You will notice, however, that since the menu is not located at any specific position in the form, it is located in the panel beneath the form. To display the menu in the form, or edit properties of the object, simply click on this instance of the object. With the object selected, change the name to TextBoxMenu by changing the Name property in the Properties panel. You will notice also, that a representation of the context appears in the form area:
Add items to the menu simply by typing in the Type Here fields. Each time you enter a new item a new Type Here field will appear. To add an item other than a menu option, click on the small down arrow which appears in the text box. It is possible to add ComboBoxes, Separators, TextBoxes and MenuItems to a context menu. With the exception of separators and MenuItems, these items should not be placed in menus because they violate the rules of good GUI design.
Once an item has been added to the menu, right clicking on the item provides a list of properties which may be changed, such as making an item checkable, or disabling an item so that it cannot be selected by the user. It is also possible to define an image to be displayed for the menu option.
To complete this phase of the tutorial, add menu items labeled Hide and Show.
Associating a Component with a Context Menu
Now that we have designed our context menu we need to associate it with the form object. To do this, select the form in Visual Studio and scroll through the properties in the Properties panel until you find the ContextMenuStrip property. Click on the down arrow in the value field and select TextBoxMenu to associate this menu with the form.
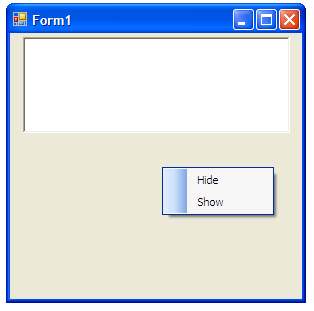
Press F5 to build and run the application. When the application loads, right click with the mouse on any part of the form to display the context menu.
Programming C# Context Menu Options
Now that we have designed the context menu, and associated it with the form object, we need to write some C# code to cause the MyTextBox object to hide and show depending on the menu selection. This is achieved by implementing Click event procedures for the hide and show menu items. In Visual Studio, select the TextBoxMenu object in the panel beneath the form. Once selected, a representation of the context menu will appear in the form. Double click on the Hide menu option to display the Click event procedure code for this menu option. We now need to write some C# code to call the Hide() method of the MyTextBox object as follows:
        private void hideToolStripMenuItem_Click(object sender, EventArgs e)
        {
            MyTextBox.Hide();
        }
Similarly, the Click event of the Show menu option can be implemented to call the Show() method of the MyTextBox object. Double click on the Show item of the context menu in the form to display the event procedure and add the call to the Show() method as follows:
       private void showToolStripMenuItem_Click(object sender, EventArgs e)
       {
            MyTextBox.Show();
       }
Compiling and Running the Application
Compile and run the application by pressing the F5 key. Right click anywhere on the form to invoke the context menu and select Hide. The TextBox will disappear from the form. Right click again and select Show to once again display the TextBox:
| Purchase and download the full PDF and ePub versions of this Visual C# eBook for only $9.99 |
| Previous | Table of Contents | Next |
| Creating Top-Level Menus in C# | Building a Toolbar with C# and Visual Studio |


