Difference between revisions of "Configuring a New CentOS Xen Virtual Network"
m (Text replacement - "<google>BUY_CENTOS_BOTTOM</google>" to "<htmlet>centos5</htmlet>") |
m (Text replacement - "<table border="0" cellspacing="0" width="100%">" to "<table border="0" cellspacing="0">") |
||
| Line 1: | Line 1: | ||
| − | <table border="0" cellspacing="0 | + | <table border="0" cellspacing="0"> |
<tr> | <tr> | ||
<td width="20%">[[Managing and Monitoring CentOS based Xen Guest Systems|Previous]]<td align="center">[[CentOS Essentials|Table of Contents]]<td width="20%" align="right">[[Managing Xen on CentOS using the xm and virsh Command-line Tools|Next]]</td> | <td width="20%">[[Managing and Monitoring CentOS based Xen Guest Systems|Previous]]<td align="center">[[CentOS Essentials|Table of Contents]]<td width="20%" align="right">[[Managing Xen on CentOS using the xm and virsh Command-line Tools|Next]]</td> | ||
| Line 91: | Line 91: | ||
<hr> | <hr> | ||
| − | <table border="0" cellspacing="0 | + | <table border="0" cellspacing="0"> |
<tr> | <tr> | ||
<td width="20%">[[Managing and Monitoring CentOS based Xen Guest Systems|Previous]]<td align="center">[[CentOS Essentials|Table of Contents]]<td width="20%" align="right">[[Managing Xen on CentOS using the xm and virsh Command-line Tools|Next]]</td> | <td width="20%">[[Managing and Monitoring CentOS based Xen Guest Systems|Previous]]<td align="center">[[CentOS Essentials|Table of Contents]]<td width="20%" align="right">[[Managing Xen on CentOS using the xm and virsh Command-line Tools|Next]]</td> | ||
Revision as of 14:31, 5 May 2016
| Previous | Table of Contents | Next |
| Managing and Monitoring CentOS based Xen Guest Systems | Managing Xen on CentOS using the xm and virsh Command-line Tools |
|
You are reading a sample chapter from the CentOS 5 Essentials Essentials book. Purchase a copy of the fully updated CentOS 8 edition in eBook ($24.99) or Print ($36.99) format CentOS 8 Essentials Print and eBook (ePub/PDF/Kindle) editions contain 31 chapters and over 260 pages. Learn more... |
When Xen virtualization is installed on CentOS 5 a single virtual network is created by default. The goal of this chapter is to provide an overview of virtual networks in the context and CentOS and Xen and to explain the steps involved in adding additional virtual networks to the host environment.
Contents | ||
CentOS Xen Guest Networking Options
Xen based virtual machines running on a CentOS 5 host are provided two choices in terms of network connectivity. One option is to use a network bridge that essentially allows the guest operating system to share one of the host system’s network connections. This connection option is also referred to as a shared physical device since both the host operating system and guest OS are both utilizing a physical network adaptor to gain network access. By default, Xen creates a single bridge named xenbr1 for this purpose.
In this shared physical device scenario, the guest operating system appears on the external network in the same way as any other systems directly connected to the network. It will need, for example, an IP address within the address space of the external network, or will be assigned an IP address from a DHCP server in the same way as all other systems on the network.
The second option involves connecting the virtual machine to a virtual network. A virtual network is essentially a software based network that runs within the host CentOS operating system. The virtual network has its own range of IP addresses and operates a DHCP server to assign IP addresses to connected virtual machines. Connection to the external network, if enabled, is typically provided using Network Address Translation (NAT), whereby the guest OS connects using the IP address of the host system. By default a single virtual network is created when Xen is installed on an CentOS system. It is named default and uses a virtual networking device called virbr0.
Identifying the Settings of an Existing CentOS Xen Virtual Network
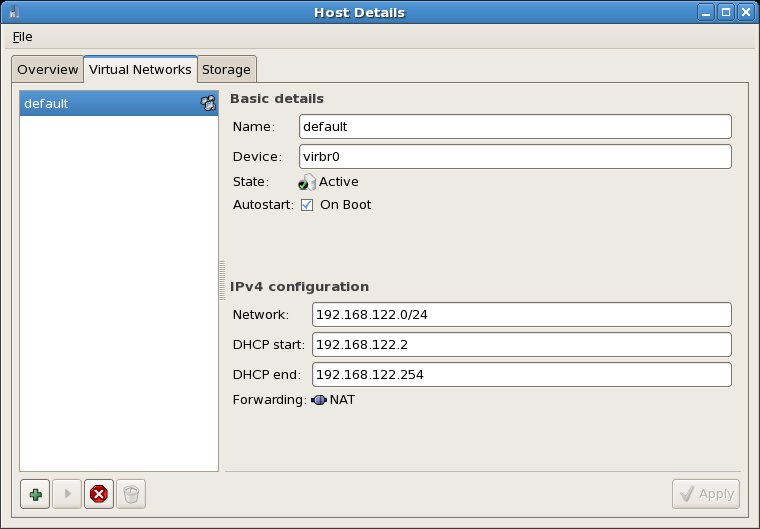
The best way to identify the settings of a Xen virtual network is to use the virt-manager tool. This tool may be launched by selecting the Applications -> System Tools -> Virtual Machine Manager desktop menu item. Once loaded, select the Edit -> Host Details menu option and on the resulting dialog, select the Virtual Networks tab as illustrated in the following figure:
As we can see from the information provided by virt-manager, the only virtual network currently available is named default. It uses the virtual device named virbr0, has an IP address space defined by 192.168.122.0 with a subnet mask of 24. The DHCP server is configured to allocated IP addresses between 192.168.122.2 and 192.168.122.254. Forwarding to the external network is handled using NAT. The virtual network is currently active and is configured to start on system boot.
The buttons beneath the list of networks can be used to start, stop or delete the currently selected network. In addition, the button displaying the + sign can be used to create a new virtual network, a topic that will be covered in the next section of this chapter.
Creating a New Xen Virtual Network on an CentOS Host
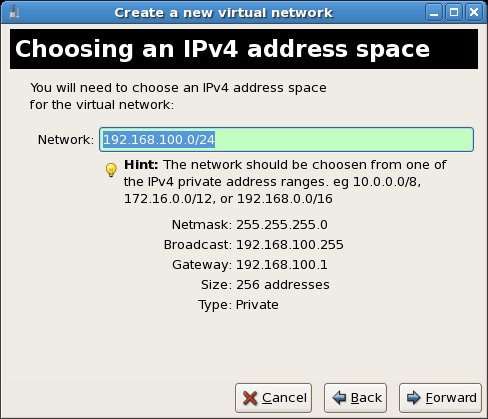
To create a new Xen virtual network on an CentOS host, click on the + button located beneath the list of virtual networks on the Virtual Networks details screen outlined in the previous section. The Create a new virtual network wizard will appear. After reading the introductory screen, click on the Forward button and enter a name for the new virtual network. For the purposes of this example we will use the name virtualnet1. Having defined the name, click the Forward button to proceed to the address space configuration screen:
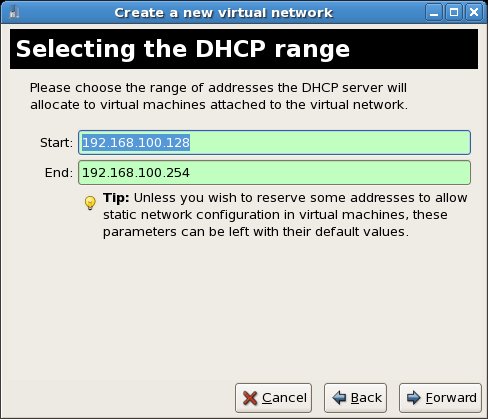
Either select the default setting, or specify an alternative if a specific address space is required before proceeding to the next screen where the DHCP address range must be defined:
The wizard will pre-populate start and end address for the DHCP server based on the IP address space specified on the preceding screen. Unless a guest OS is configured with a static IP address, it will be assigned an IP address from the range specified on this screen when it is started up.
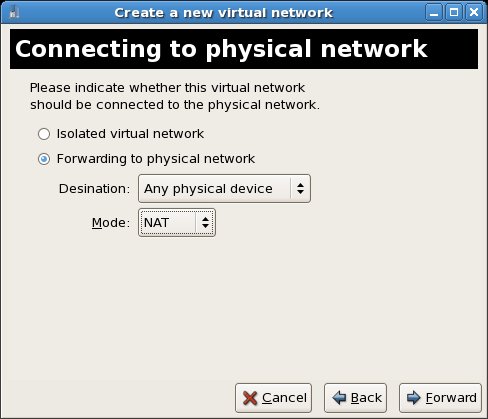
On the next screen the network may be configured to be an isolated network or for data to be forwarded to a physical network. In the case of an isolated network, guests connected to this virtual network can see each other but have absolutely no connectivity to the external physical network.
If the Forwarding to a physical network option is selected a specific physical network device on the host system may be selected, or the system can be left to select any available networking device. Lastly, the forwarding mode may be configured to use NAT or Routed forwarding:
After the network connectivity options have been defined, the final screen displays a summary of the selections made on the preceding screens. Review the information provided and, assuming the settings match your requirements, click on Finish to create the new virtual network.
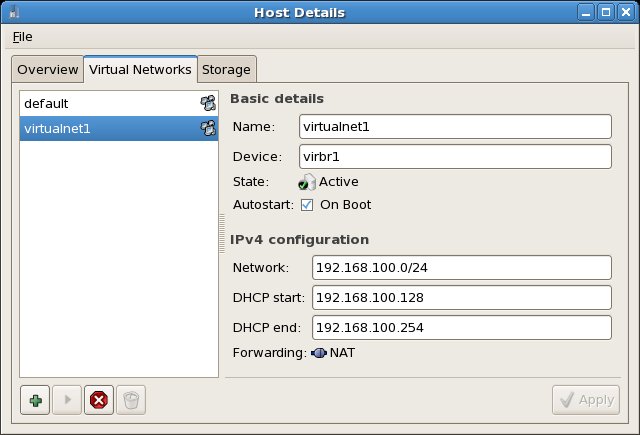
On returning to the main Host Details screen, select the new virtual network from the list to view the settings:
The new virtual network should reflect the specified configuration options. In addition we can see that it has been assigned virtual device virbr1, is already active and is configured to start when the host system boots.
Assigning the New Virtual Bridge during Virtual Machine Creation
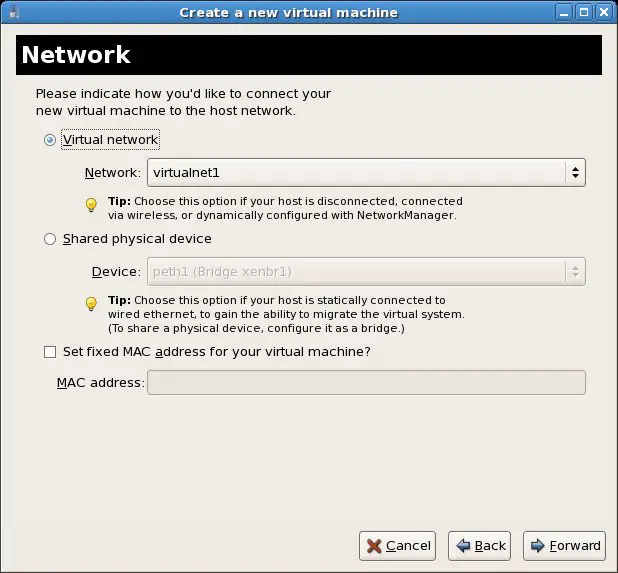
During the virtual machine creation process (as outlined in the chapter entitled Using Xen Full Virtualization to Run Windows on CentOS) the creation wizard will display a network configuration screen. In order to connect the virtual machine to the newly created virtual network simply ensure that the Virtual Network option is selected and then choose the new network by name from the drop down menu. The following figure shows the network configuration screen configured to use the virtualnet1 network created in the preceding section:
Changing an Existing Virtual Machine to Use a new Virtual Network
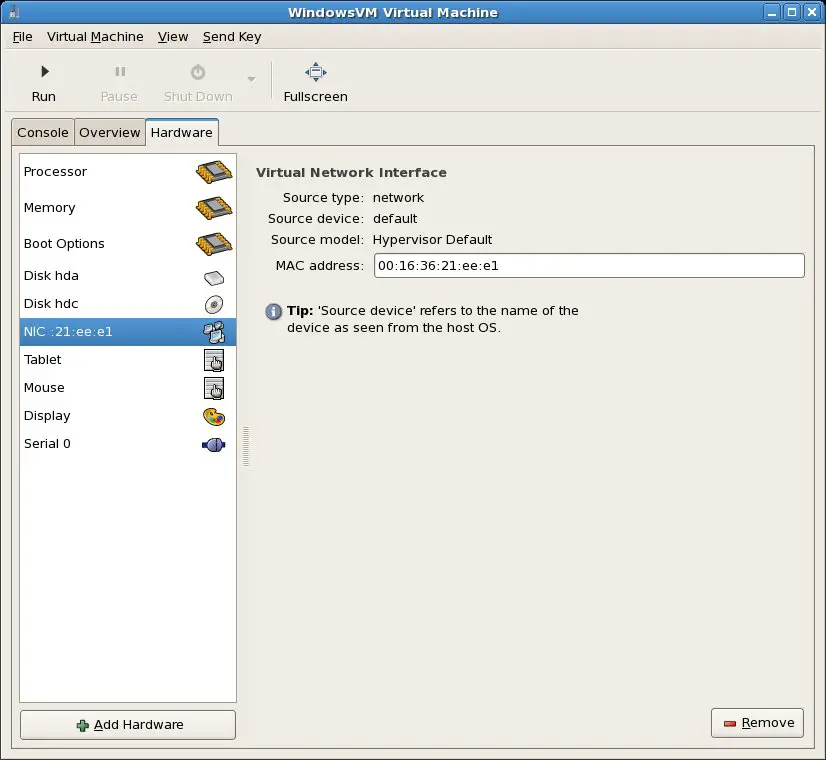
An existing virtual machine may also be configured to use a new virtual network. To make this configuration change, select the virtual machine from the main screen of the virt-manager tool and either click on the Open button or select the Edit -> Virtual machine details menu option. When the virtual machine window appears, click on the Hardware tab to display the current configuration. In the list of hardware categories click on the NIC entry:
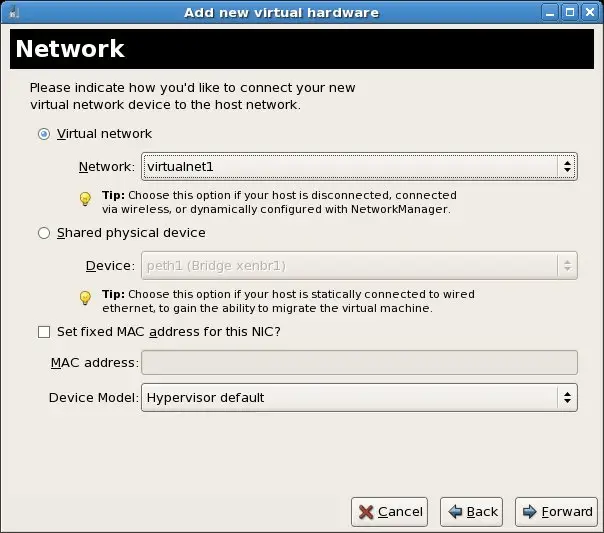
The network interface for the virtual machine currently uses the default virtual network. In order to configure the virtual machine to use the new virtual network it is necessary to first delete this NIC from the configuration by clicking on the Remove button located in the bottom right hand corner of the dialog. Once the old NIC has been deleted, click on the Add Hardware button to display the Add new virtual hardware wizard, select Network from the hardware type menu and click the Forward button. On the resulting network configuration screen, select the Virtual Network option and choose the new network from the menu:
Click the Forward button, review the summary information and click Finish to commit the changes. When the virtual machine is next powered up it will be connected to the new virtual network.
|
You are reading a sample chapter from the CentOS 5 Essentials Essentials book. Purchase a copy of the fully updated CentOS 8 edition in eBook ($24.99) or Print ($36.99) format CentOS 8 Essentials Print and eBook (ePub/PDF/Kindle) editions contain 31 chapters and over 260 pages. Learn more... |
| Previous | Table of Contents | Next |
| Managing and Monitoring CentOS based Xen Guest Systems | Managing Xen on CentOS using the xm and virsh Command-line Tools |


