Difference between revisions of "Creating a Simple iPhone App"
m (Text replacement - "<google>ADSDAQBOX_FLOW</google>" to "<htmlet>adsdaqbox_flow</htmlet>") |
m (Text replacement - "<google>BUY_IOS3</google>" to "<htmlet>ios9_upgrade</htmlet>") |
||
| Line 8: | Line 8: | ||
| − | < | + | <htmlet>ios9_upgrade</htmlet> |
Revision as of 20:52, 1 February 2016
| Previous | Table of Contents | Next |
| Installing Xcode and the iPhone SDK | Testing Apps on the iPhone – Developer Certificates and Provisioning Profiles |
Learn SwiftUI and take your iOS Development to the Next Level |
It is traditional in books covering programming topics to provide a very simple example early on. This practice, though still common, has been maligned by some authors of recent books. Those authors, however, are missing the point of the simple example. One key purpose of such an exercise is to provide a very simple way to verify that your development environment is correctly installed and fully operational before moving on to more complex tasks. A secondary objective is to give the reader a quick success very early in the learning curve to inspire an initial level of confidence. There is very little to be gained by plunging into complex examples that confuse the reader before we have taken time to explain the underlying concepts of the technology.
With this in mind, iPhone App Development Essentials will remain true to tradition and provide a very simple example to get us started. In doing so, we will also be honoring another time honored tradition by providing this example in the form of a simple “Hello World” program. The “Hello World” example was first used in a book called the C Programming Language written the creators of C, Brian Kernighan and Dennis Richie. Given that the origins of Objective-C can be traced back to the C programming language it is only fitting that we use this example for the iPhone.
Starting Xcode
As with all iPhone apps, the development of our example will take place within the Xcode development environment. If you have not already installed this tool together with the iPhone SDK refer first to Installing Xcode and the iPhone SDK. Assuming that the installation is complete, launch Xcode either by clicking on the icon on the dock (assuming you created one) or use the Finder to navigate to Macintosh HD -> Developer -> Applications -> Xcode.
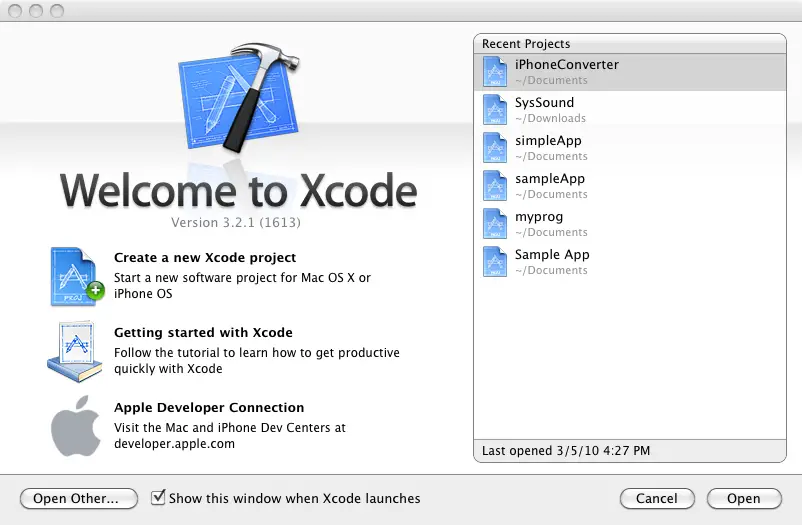
When launched for the first time, and until you turn off the Show this window when Xcode launches toggle, the screen illustrated in the following figure will appear by default:
If you do not see this window simply select the Help -> Welcome to Xcode menu option to display it.
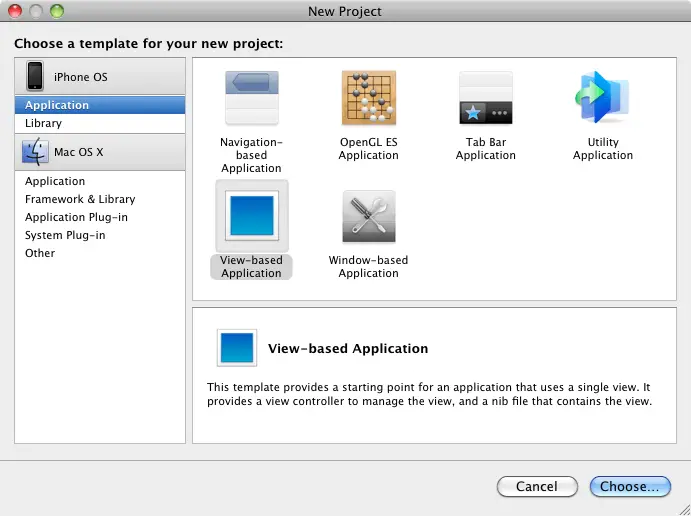
From within this window click on the option to Create a new Xcode project. This will display the New Project window where we are able to select a template matching the type of project we want to develop:
<google>IOSBOX</google> The panel located on the left hand side of the window allows for the selection of the target platform. Depending on the SDK you downloaded with your copy of Xcode, you will see options to develop either for the iPhone or Mac OS X. Begin by making sure that the Application option located beneath iPhone OS is selected. The main panel contains a list of templates available to use as the basis for an application. The options available are as follows:
- Navigation-based Application – Though the name may suggest otherwise, this type of application has nothing to do with maps. In fact it allows you to create a list based application. Selecting an item from a list displays a new view corresponding to the selection. The template then provides a Back button to return to the list. You may have seen a similar technique used for news based applications, whereby selecting an item from a list of headlines displays the content of the corresponding news article.
- Open GL ES Application – As discussed in The iPhone OS Architecture and Frameworks, the OpenGL ES framework provides an API for developing advanced graphics drawing and animation capabilities. The Open GL ES Application template creates a basic application containing an Open GL ES view upon which to draw and manipulate graphics.
- Tab Bar Application – Creates a template application with a tab bar. The tab bar typically appears across the bottom of the iPhone display and can be programmed to contain items which, when selected, change the main display to different views. The iPhone’s built-in Phone user interface, for example, uses a tab bar to allow the user move between favorites, contacts, keypad and voicemail.
- Utility Application – Creates a template consisting of a two sided view. For an example of a utility application in action, load up the standard iPhone weather application. Pressing the blue info button flips the view to the configuration page. Selecting Done rotates the view back to the main screen.
- View-based Application – Creates a basic template for an application containing a single view.
- Window-based Application – The most basic of templates that creates only a window and a delegate. If none of the above templates match your requirements then this is the option to take.
For the purposes of our simple example, we are going to use the View-based Application template. Select this option from the New Project window and click on Choose… to drop down the file selection panel. Enter the project name “HelloWorld” and a suitable folder to hold to the project files (Xcode will default to your Documents folder unless you specify an alternative) and click Save.
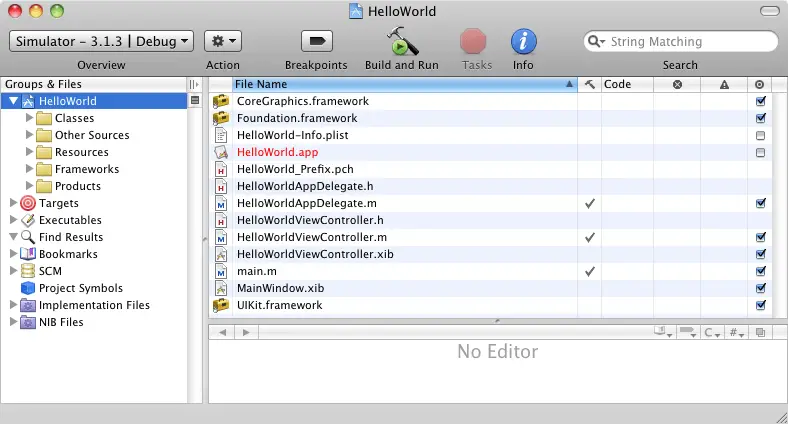
Once the new project has been created the main Xcode window will appear as follows:
Before we proceed we should take some time to look at what Xcode has done for us. Firstly it has created a group of files that we will need to create our application. Some of these are Objective-C source code files (with a .m extension) where we will enter the code to make our application work, others are header files (.h) that are included by the source files and where we will also need to put our own declarations and definitions. In addition, the .xib files are the save files used by the Interface Builder tool to hold the user interface designs we will create. Older versions of Interface Builder saved designs in files with a .nib extension so these files, even today, are called NIB files. Also present will be one or more files with a .plist file extension. These are Property List files that contain key / value pair information. For example, the HelloWorld-info.plist file contains resource settings relating to items such as the language, icon file, executable name and app identifier.
Also listed are some frameworks that Xcode believes we will need during the development of our app. Additional Frameworks can be added to the project by right clicking (or Ctrl-clicking) on the Frameworks folder located in the left hand Groups and Files panel and selecting Add -> Existing Frameworks… from the menu. A list of available frameworks will be displayed from which you may select the framework you need.
When a source file is selected from the list in the main panel, the contents of that file will appear in the panel below where it may then be edited. To open the file in a separate editing window, simply double click on the file in the list.
Creating the App User Interface
Simply by the very nature of the environment in which they run, iPhone apps are typically visually oriented. As such, a key component of just about any app involves a user interface through which the user will interact with the application and receive feedback. Whilst it is possible to develop user interfaces by writing code to create and position items on the screen, this is a complex and error prone process. In recognition of this, Apple provides a tool called Interface Builder that allows a user interface to be visual constructed by dragging and dropping components onto a canvas and setting properties to configure the appearance and behavior of those components. Interface Builder was originally developed some time ago for developing Mac OS X applications, but has now been updated to allow for the design of iPhone app user interfaces.
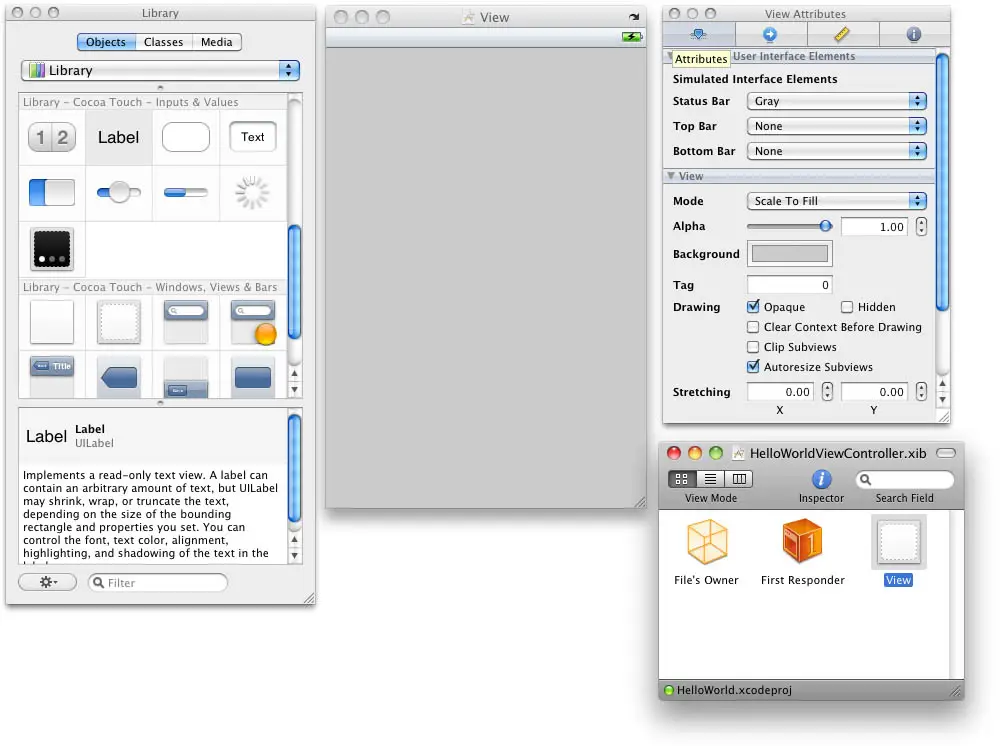
As mentioned in the preceding section, Xcode pre-created a number of files for our project, some of which have a .xib filename extension. These are Interface Builder save files (remember that they are called NIB files, not XIB files). The file we are interested in for our HelloWorld project is called HelloWorldViewController.xib. To load this file into Interface Builder simply double click on the file name in list. Interface Builder will subsequently start up and display a number of windows as shown in the following figure:
The smaller dialog entitled HelloWorldViewController.xib contains the key objects that make up the view controller for our user interface. We will be looking at the other objects in window in later chapters. For now, the item of most interest to us is the View. This corresponds to the view canvas onto which our user interface is going to be constructed and is represented by the gray dialog entitled View. If the view dialog is not visible at any time simply double click on the View icon to display it.
The gray dialog entitled View provides a representation of the UIView object that was added to our design by Xcode when we selected the View-based Application option during the project creation phase. We will construct the user interface for our HelloWorld app by dragging and dropping user interface objects onto this UIView object. The objects available to us as we develop our app are located in the Library window. The objects are categorized into groups and additional information about each object can be obtained by selecting the item and reading the corresponding description.
Finally, the Attribute Inspector dialog allows the properties of the currently selected user interface component to be viewed and configured. The attributes available will change depending on the type of component selected in the View dialog. Presently, the attributes for the UIView object will be displayed since this the only component in our interface design at this point. If the Attribute Inspector dialog is not visible it may be displayed by selecting the Tools -> Attribute Inspector menu option or by pressing Command + 1. The various settings in the inspector are divided into categories (attributes, connections, size and identity) and grouped on different screens. Each screen may be accessed by clicking on the corresponding toolbar button at the top of the Inspector window. Inspector windows with the required category pre-selected may also be opened by making appropriate selections from the Interface Builder Tools menu.
Changing Component Properties
Adding Objects to the User Interface
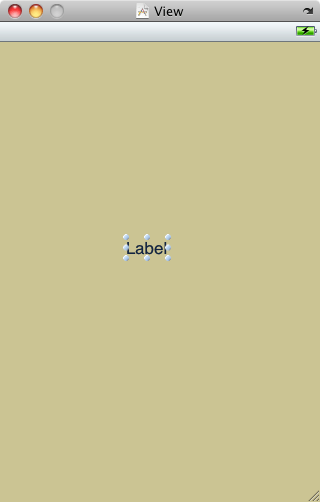
The next step is to add a Label object to our view. To achieve this scroll down the list of objects in the Library window until you reach the Inputs and Values section. Click on the Label object and drag it to the center of the view. Once it is in position release the mouse button to drop it at that location:
Using the blue markers surrounding the label border, stretch first the left and then right side of the label out to the edge of the view until the vertical blue dotted lines marking the recommended border appears of the view. With the Label still selected, click on the centered alignment button in the Layout attribute section of the Attribute Inspector window to center the text in the middle of the screen. Click on the current font attribute setting to choose a larger font setting, for example a Georgia bold typeface with a size of 36.
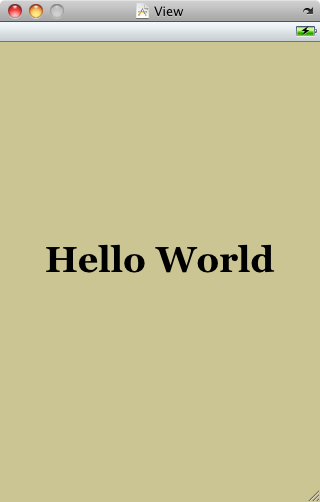
Finally, double click on the text in the label that currently reads “Label” and type in “Hello World”. At this point, your View window will hopefully appear as outlined in the following figure (allowing, of course, for differences in your color and font choices):
Having created our simple user interface design we now need to save it. To achieve this, select File -> Save and then exit via the Interface Builder -> Quit Interface Builder menu option.
Building and Running an App in Xcode
Before an app can be run it must first be compiled. Once successfully compiled it may be run either within a simulator or on a physical iPhone or iPod Touch device. The process for testing an app on a physical device requires some addition steps to be performed involving developer certificates and provisioning profiles and will be covered in detail in Testing Apps on the iPhone – Developer Certificates and Provisioning Profiles. For the purposes of this chapter, however, it is sufficient to run the app in the simulator.
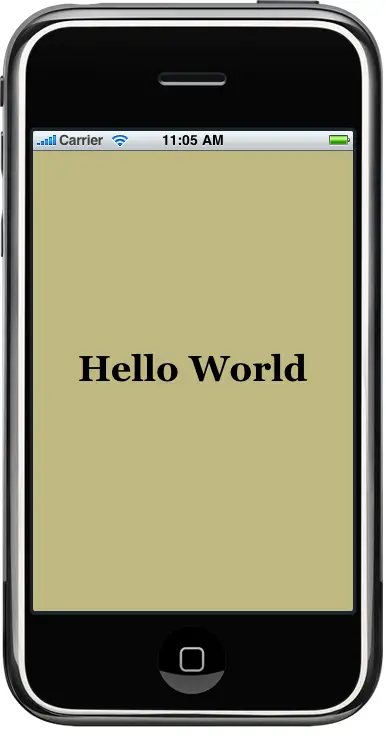
Within the main Xcode project window make sure that the menu located in the top left hand corner of the window has one of the Simulator options selected and then click on the Build and Run toolbar button to compile the code and run the app in the simulator. The gray status bar at the bottom of the Xcode window will report the progress of the build process together with any problems or errors that cause the build process to fail. Once the app is built, the simulator will start and the HelloWorld app will run:
Dealing with Build Errors
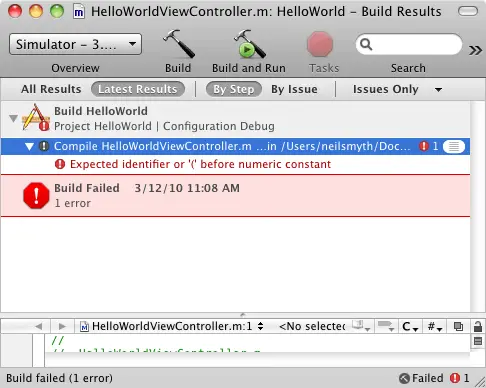
If for any reason the build fails, the status bar at the bottom of the screen will report that an error has been detected by displaying “Build failed” together with the number of errors detected and on the right hand side a “Failed” link. When this link is clicked, Xcode will display the Build Results window providing detailed information on the nature of the problem or problems.
If the problem lies in a line of source code (as is the case in the above screenshot), double clicking on the line reference in the results window will open the editor and take you directly to the offending line so that corrective action can be taken.
<google>BUY_IOS3_BOTTOM</google>
| Previous | Table of Contents | Next |
| Installing Xcode and the iPhone SDK | Testing Apps on the iPhone – Developer Certificates and Provisioning Profiles |


