
With hindsight, it seems hard to believe, but until the introduction of iOS 9, there was no easy way to build stack-based user interface layouts that would adapt automatically to different screen sizes and changes in device orientation. While such results could eventually be achieved with careful use of size classes and Auto Layout, this was far from simple. That changed with the introduction of the UIStackView class in the iOS 9 SDK.
Introducing the UIStackView Class
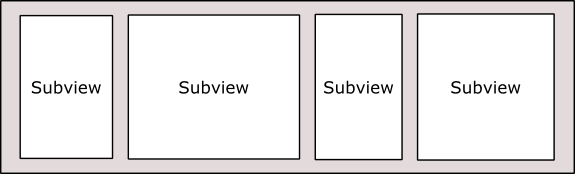
The UIStackView class is a user interface element that allows subviews to be arranged linearly in a column or row orientation. The class extensively uses Auto Layout and automatically sets up many of the Auto Layout constraints needed to provide the required layout behavior. In addition, the class goes beyond simply stacking views, allowing additional Auto Layout constraints to be added to subviews, and providing a range of properties that enable the layout behavior of those subviews to be modified to meet different requirements.
The UIStackView object is available for inclusion within Storyboard scenes simply by dragging and dropping either the Horizontal Stack View or Vertical Stack View from the Library panel onto the scene canvas. Once added to a scene, subviews are added simply by dragging and dropping the required views onto the stack view.
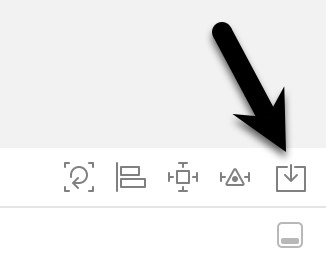
Existing views in a storyboard scene may be wrapped in a stack view simply by Shift-clicking on the views so that they are all selected before clicking on the Embed In button located at the bottom of the Interface Builder panel, as highlighted in Figure 31-1 and selecting the Stack View option. Interface Builder will decide whether to encapsulate the selected views into a horizontal or vertical stack depending on the layout positions of the views:
By default, the stack view will resize to accommodate the subviews as they are added. However, as with any other view type, Auto Layout constraints may be used to constrain and influence the resize behavior of the stack view in relation to the containing view and any other views in the scene layout.
 |
You are reading a sample chapter from Building iOS 17 Apps using Xcode Storyboards.
Buy the full book now in eBook or Print format. The full book contains 96 chapters and 760 pages of in-depth information. |
Once added to a storyboard scene, a range of properties is available within the Attributes Inspector to customize the layout behavior of the object.
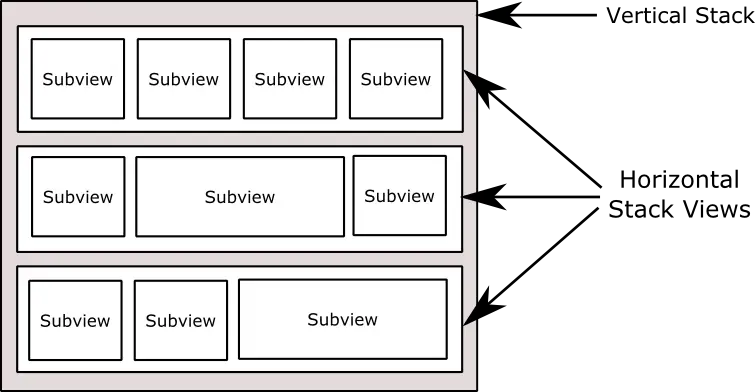
Stack views may be used to create simple column or row-based layouts or nested within each other to create more complex layouts. Figure 31-2, for example, shows an example layout consisting of a vertical stack view containing three horizontal stack views, each containing a variety of subviews:
UIStackView class instances may also be created and managed from within the code of an iOS app. Stack view instances can be created in code and initialized with an array of subviews. Views may also be inserted and removed dynamically from within code, and the attributes of the stack view changed via a range of properties. The subviews of a stack view object are held in an array that can be accessed via the arrangedSubviews property of the stack view instance.
Understanding Subviews and Arranged Subviews
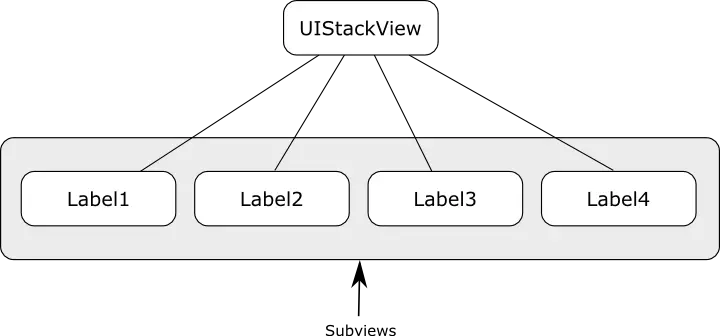
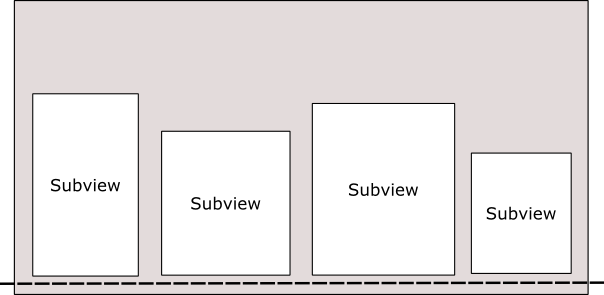
The UIStackView class contains a property named subviews. This is an array containing each of the child views of the stack view object. Figure 31-3, for example, shows the view hierarchy for a stack view with four subviews:
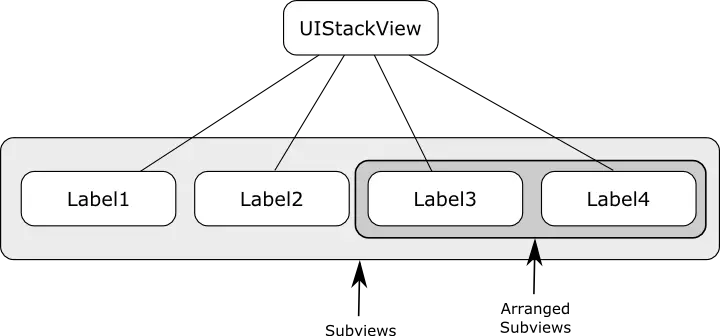
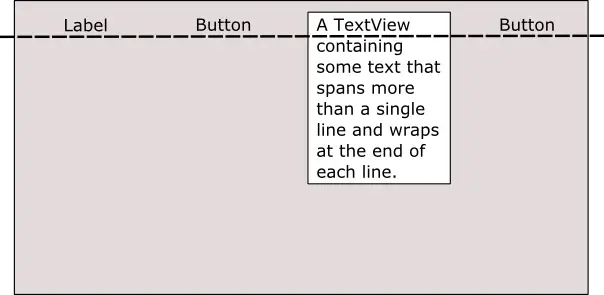
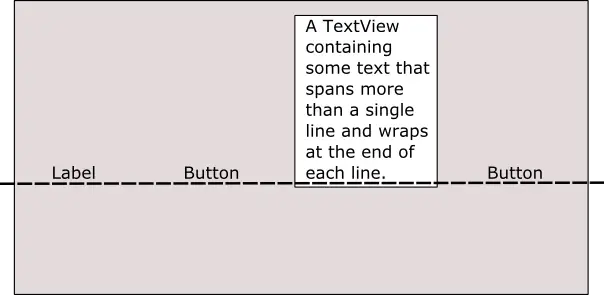
At any particular time, however, the stack view will not necessarily be responsible for arranging the layout and positions of all the subviews it contains. The stack view might, for example, only be configured to arrange the Label3 and Label4 views in the above hierarchy. This means that Label1 and Label2 may still be visible within the user interface but will not be positioned within the stack view. Subviews being arranged by the stack view are contained within a second array accessible via the arrangedSubviews property. Figure 31-4 shows both the subviews and the subset of the subviews which are currently being arranged by the stack view.
|
You are reading a sample chapter from Building iOS 17 Apps using Xcode Storyboards.
Buy the full book now in eBook or Print format. The full book contains 96 chapters and 760 pages of in-depth information. |
As will be outlined later in this chapter, the distinction between subview and arranged subviews is particularly important when removing arranged subviews from a stack view.
StackView Configuration Options
A range of options is available to customize how the stack view arranges its subviews. These properties are available both from within the Interface Builder Attributes Inspector panel at design time and also to be set dynamically from within the code of the app:
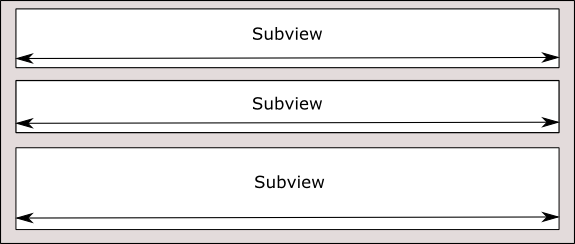
axis
The axis property controls the orientation of the stack in terms of whether the subviews are arranged in a vertical column layout or a horizontal row. When setting this property in code, the axis should be set to UILayoutConstraintAxis.vertical or UILayoutConstraintAxis.horizontal.
distribution
The distribution property dictates how the subviews of the stack view are sized. Options available are as follows:
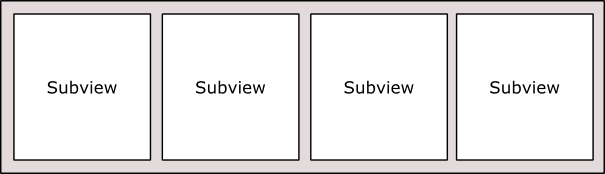
- Fill – The subviews are resized to fill the entire space available along the stack view’s axis. In other words, the height of the subviews will be modified to fill the full height of the stack view in a vertical orientation, while the widths will be changed for a stack view in a horizontal orientation. The amount by which each subview is resized relative to the other views can be controlled via the compression resistance and hugging priorities of the views (details of which were covered in the chapter entitled An Introduction to Auto Layout in iOS 17) and the position of the views in the stack view’s arrangedSubviews array.
- FillEqually – The subviews are resized equally to fill the stack view along the view’s axis. Therefore, all the subviews in a vertical stack will be equal in height, while the subviews in a horizontal axis orientation will be equal in width.
- FillProportionally – In this mode, the subviews are resized proportionally to their intrinsic content size along the axis of the stack view to fill the width or height of the view.
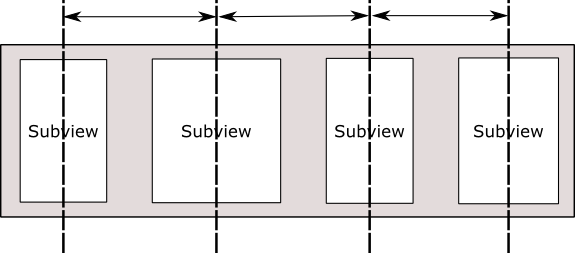
- EqualSpacing – Padding is used to space the subviews equally to fill the stack view along the axis. The size of the subviews will be reduced if necessary to fit within the available space based on the compression resistance priority setting and the position within the arrangedSubviews array.
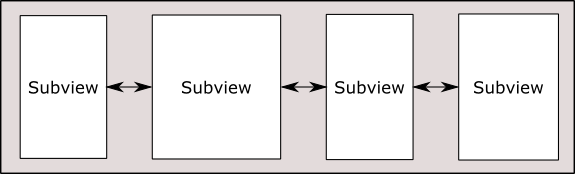
- EqualCentering – This mode positions the subviews along the stack view’s axis with equal center-to-center spacing. The spacing in this mode is influenced by the spacing property (outlined below). Where possible, the stack view will honor the prevailing spacing property value but will reduce this value if necessary. If the views still do not fit, the size of the subviews will be reduced if necessary to fit within the available space based on the compression resistance priority setting and the position within the arrangedSubviews array.
spacing
The spacing property specifies the distance (in points) between the edges of adjacent subviews within a stack view. When the stack view distribution property is set to FillProportionally, the spacing value dictates the spacing between the subviews. In EqualSpacing and EqualCentering modes, the spacing value indicates the minimum allowed spacing between the adjacent edges of the subviews. A negative spacing value causes subviews to overlap.
|
You are reading a sample chapter from Building iOS 17 Apps using Xcode Storyboards.
Buy the full book now in eBook or Print format. The full book contains 96 chapters and 760 pages of in-depth information. |
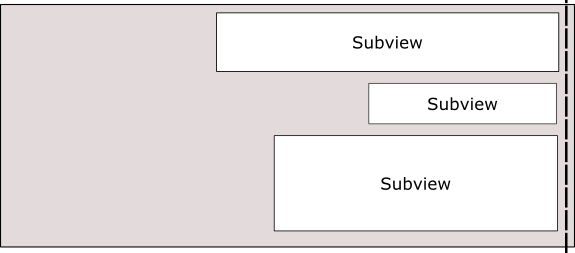
alignment
The alignment property controls the positioning of the subviews perpendicularly to the stack view’s axis. Available alignment options are as follows:
- Fill – In fill mode, the subviews are resized to fill the space perpendicularly to the stack view’s axis. In other words, the widths of the subviews in a vertical stack view are resized to fill the entire width of the stack view.
- Leading – In a vertically oriented stack view, the leading edges of the subviews are aligned with the leading edge of the stack view.
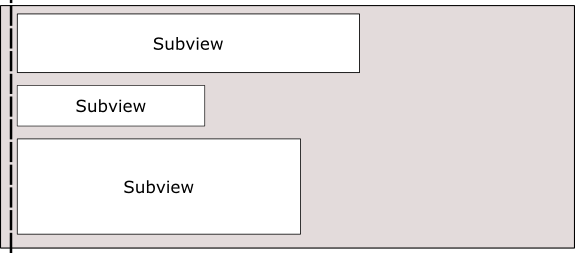
- Trailing – In a vertically oriented stack view, the trailing edges of the subviews are aligned with the trailing edge of the stack view.
- Top – In a horizontally oriented stack view, the top edges of the subviews are aligned with the top edge of the stack view.
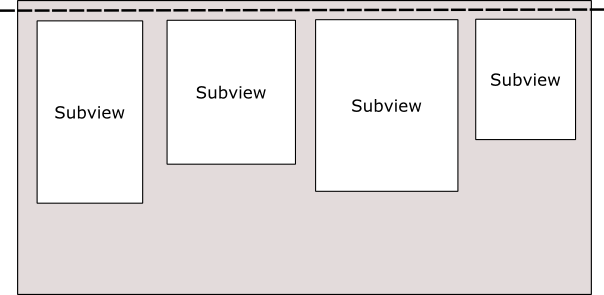
- Bottom – In a horizontally oriented stack view, the bottom edges of the subviews are aligned with the bottom edge of the stack view.
- Center – The centers of the subviews are aligned with the center axis of the stack view.

- FirstBaseline – Used only with horizontal stack views, this mode aligns all subviews with their first baseline. For example, an array of subviews displaying text content would all be aligned based on the vertical position of the first line of text.
- LastBaseline – Similar to FirstBaseline, this mode aligns all subviews with their last baseline. For example, an array of subviews displaying text content would all be aligned based on the vertical position of the last line of text.
baseLineRelativeArrangement
Used only for vertical stack views, this property is a Boolean value that controls whether or not the vertical spacing between subviews is arranged relative to the baseline of the text contained within the views.
layoutMarginsRelativeArrangement
A Boolean value which, if set to true, causes subviews to be arranged relative to the layout margins of the containing stack view. If set to false, the subviews are arranged relative to the edges of the stack view.
Creating a Stack View in Code
UIStackView instances can be created in code by passing through an array object containing the subviews to be arranged by the stack. Once created, all the previously outlined properties may also be set dynamically from within the code. The following Swift code, for example, creates a new stack view object, configures it for horizontal axis orientation with FillEqually distribution, and assigns two Label objects as subviews:
let labelOne = UILabel(frame: CGRect(x: 0, y: 0, width: 200, height: 21))
labelOne.text = "Hello"
labelOne.backgroundColor = UIColor.red

let labelTwo = UILabel(frame: CGRect(x: 0, y: 0, width: 200, height: 21))
labelTwo.text = "There"
labelTwo.backgroundColor = UIColor.blue

let myStack = UIStackView(arrangedSubviews: [labelOne, labelTwo])

myStack.distribution = .fillEqually
myStack.axis = .horizontal
Adding Subviews to an Existing Stack View
Additional subviews may be appended to the end of a stack view’s arrangedSubviews array using the addArrangedSubview method as follows:
|
You are reading a sample chapter from Building iOS 17 Apps using Xcode Storyboards.
Buy the full book now in eBook or Print format. The full book contains 96 chapters and 760 pages of in-depth information. |
myStack.addArrangedSubview(labelThree)
Alternatively, a subview may be inserted into a specific index position within the array of arranged subviews via a call to the insertArrangedSubview:atIndex method. The following line of code, for example, inserts an additional label at index position 0 within the arrangedSubviews array of a stack view:
myStack.insertArrangedSubview(labelZero, atIndex: 0)
Hiding and Removing Subviews
To remove an arranged subview from a stack view, call the removeArrangedSubview method of the stack view object, passing through the view object to be removed.
myStack.removeArrangedSubview(labelOne)
It is essential to be aware that the removeArrangedSubview method only removes the specified view from the arrangedSubviews array of the stack view. The view still exists in the subviews array and will probably still be visible within the user interface layout after removal (typically in the top left-hand corner of the stack view).
An alternative to removing the subview is to simply hide it. This has the advantage of making it easy to display the subview later within the app code. A helpful way to hide a subview is to obtain a reference to the subview to be hidden from within the arrangedSubviews array. For example, the following code identifies and then hides the subview located at index position 1 in the array of arranged subviews:
let subview = myStack.arrangedSubviews[1]
subview.hidden = true
If the subview is not needed again, however, it can be removed entirely by calling the removeFromSuperview method of the subview after it has been removed from the arrangedSubviews array as follows:
|
You are reading a sample chapter from Building iOS 17 Apps using Xcode Storyboards.
Buy the full book now in eBook or Print format. The full book contains 96 chapters and 760 pages of in-depth information. |
myStack.removeArrangedSubview(labelOne)
labelOne.removeFromSuperview()
This approach will remove the view entirely from the view hierarchy.
Summary
The UIStackView class allows user interface views to be arranged in rows or columns. A wide range of configuration options combined with the ability to dynamically create and manage stack views from within code make this a powerful and flexible user interface layout solution.
With the basics of the UIStackView class covered in this chapter, the next chapter will create an example iOS app that uses this class.