
The objective of this chapter is to extend the app created in the previous chapter (entitled Using Xcode Storyboards to Build Dynamic TableViews) and, in so doing, demonstrate the steps involved in implementing table view navigation within a storyboard. In other words, we will modify the attractions example from the previous chapter such that selecting a row from the table view displays a second scene in which a web page providing information about the chosen location will be displayed to the user. As part of this exercise, we will also explore data transfer between different scenes in a storyboard.
Understanding the Navigation Controller
Navigation-based apps present a hierarchical approach to displaying information to the user. Such apps typically take the form of a navigation bar (UINavigationBar) and a series of Table based views (UITableView). Selecting an item from the table list causes the view associated with that selection to be displayed. The navigation bar will display a title corresponding to the currently displayed view and a button that returns the user to the previous view when selected. For an example of this concept in action, spend some time using the iPhone Mail or Music apps.
When developing a navigation-based app, the central component of the architecture is the navigation controller. In addition, each scene has a view and a corresponding view controller. The navigation controller maintains a stack of these view controllers. When a new view is displayed, it is pushed onto the navigation controller’s stack and becomes the currently active controller. The navigation controller automatically displays the navigation bar and the “back” button. When the user selects the button in the navigation bar to move back to the previous level, that view controller is popped off the stack, and the view controller beneath it moves to the top, becoming the currently active controller.
The view controller for the first table view that appears when the app is started is called the root view controller. The root view controller cannot be popped off the navigation controller stack.
Adding the New Scene to the Storyboard
For this example, we will add a new View Controller to our storyboard to act as the second scene. With this in mind, begin by loading the TableViewStory project created in the previous chapter into Xcode.
 |
You are reading a sample chapter from Building iOS 17 Apps using Xcode Storyboards.
Buy the full book now in eBook or Print format. The full book contains 96 chapters and 760 pages of in-depth information. |
Once the project has loaded, we will need to add a new UIViewController subclass to our project files, so select the File -> New -> File… menu item and choose the Cocoa Touch Class option from the iOS category. On the options screen, ensure that the Subclass of menu is set to UIViewController, name the new class AttractionDetailViewController, and make sure that the Also create XIB file option is switched off. Click Next before clicking on Create.
Next, select the Main.storyboard file from the project navigator to make the storyboard canvas visible. Then, select a View Controller from the Library and drag and drop it to the right of the existing table view controller as outlined in Figure 29-1. With the new view controller added, select it, display the Identity inspector, and change the class setting from UIViewController to AttractionDetailViewController.
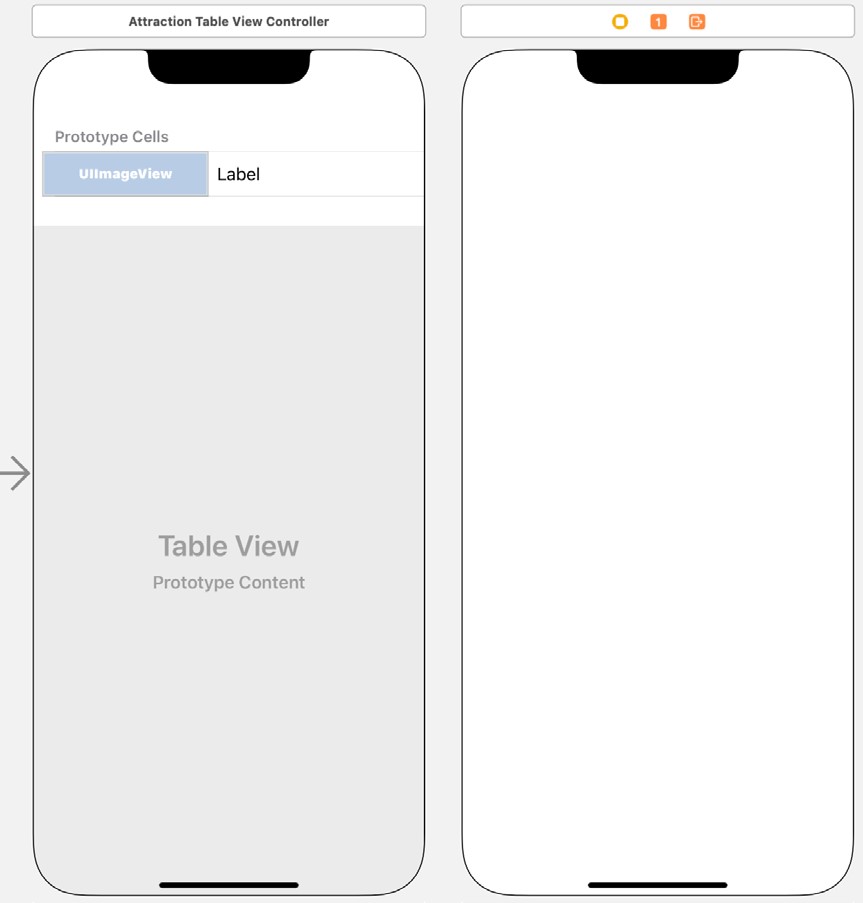
The detail scene has now been added and assigned to the newly created subclass, where code can be added to bring the scene to life.
Adding a Navigation Controller
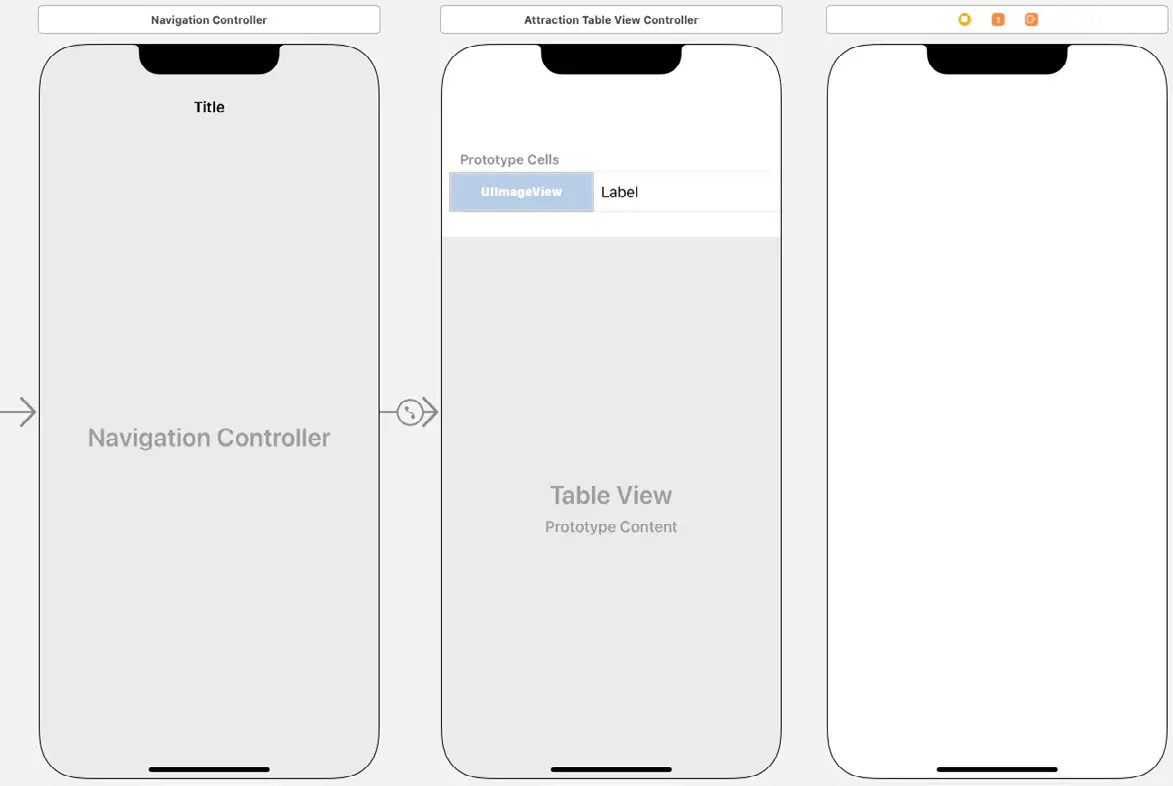
Once the app is completed, selecting a row from the Table View will trigger a segue to display the detail view controller. The detail view will contain a button that, when selected by the user, will navigate back to the table view. This functionality will be made possible by adding a Navigation Controller to the storyboard. This can be added by selecting the Attraction Table View Controller scene in the storyboard so that it highlights in blue and then selecting the Xcode Editor -> Embed In -> Navigation Controller menu option. Once performed, the storyboard will appear as outlined in Figure 29-2:
Establishing the Storyboard Segue
When the user selects a row within the table view, a segue must be triggered to display the attraction detail view controller. To establish this segue, Ctrl-click on the prototype cell in the Attraction Table View Controller scene and drag the resulting line to the Attraction Detail View Controller scene. Upon releasing the line, select the Show option from the Selection Segue section of the resulting menu. The storyboard will update to display a segue connection between the table view cell and the view controller. We will need to reference this segue in code implemented later in this chapter. To do so, it must, therefore, be given an identifier. Click on the segue connection between Attraction Table View Controller and Attraction Detail View Controller, display the Attributes Inspector (View -> Utilities -> Show Attributes Inspector), and change the Identifier value to ShowAttractionDetails.
|
You are reading a sample chapter from Building iOS 17 Apps using Xcode Storyboards.
Buy the full book now in eBook or Print format. The full book contains 96 chapters and 760 pages of in-depth information. |
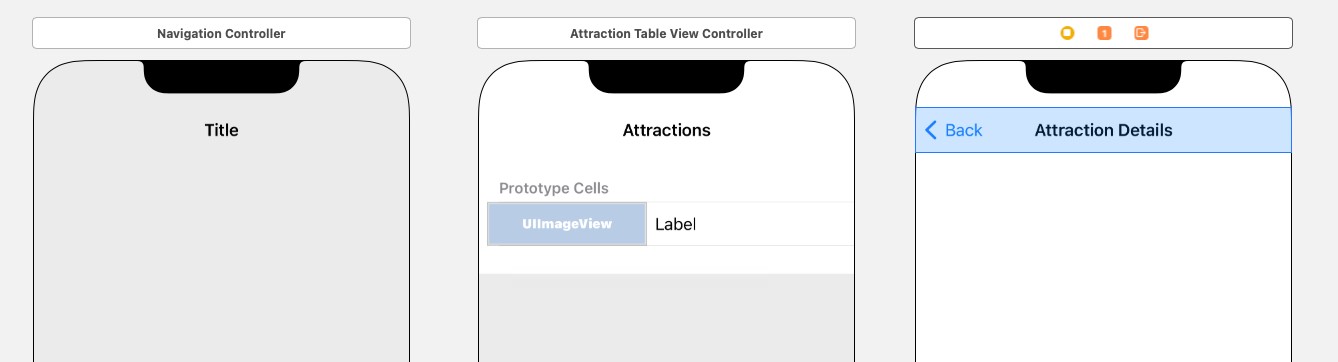
In addition, a toolbar should have appeared in both scenes. Click in the Attraction Table View Controller toolbar area to select the Navigation Item component, display the Attributes inspector panel, and change the title property to “Attractions”. Next, drag a Navigation Item view from the Library and drop it onto the toolbar of the Attraction Detail View Controller. Select the new item and change the title property in the Attributes inspector to “Attraction Details”:
Build and run the app and note that selecting a row in the table view now displays the second view controller, which, in turn, contains a button in the toolbar to return to the “Attractions” table view. Clearly, we need to work on the AttractionDetailViewController class to display information about the selected tourist location in the view.
Modifying the AttractionDetailViewController Class
For this example app, the attraction detail view will display a WebKit View loaded with a web page relating to the selected tourist attraction. To achieve this, the class will need a WKWebView object which will later be added to the view.
In addition to the WebKit View, the class will also need an internal data model that contains the URL of the web page to be displayed. It will be the job of the table view controller to update this variable before the segue occurs to reflect the selected attraction. For the sake of simplicity, the data model will take the form of a String object. Select the AttractionDetailViewController.swift file and modify it as follows to declare this variable and also to import the WebKit framework, which will be used in the next step:
import UIKit
import WebKit

class AttractionDetailViewController: UIViewController {

    var webSite: String?
.
.Code language: Swift (swift)
The next step is to add the WebKit View to the view controller. Select the storyboard file in the Project Navigator, and drag and drop a WebKit View from the Library panel onto the Attraction Detail scene. Resize the view so that it fills the entire scene area, as illustrated in Figure 29-4:
|
You are reading a sample chapter from Building iOS 17 Apps using Xcode Storyboards.
Buy the full book now in eBook or Print format. The full book contains 96 chapters and 760 pages of in-depth information. |
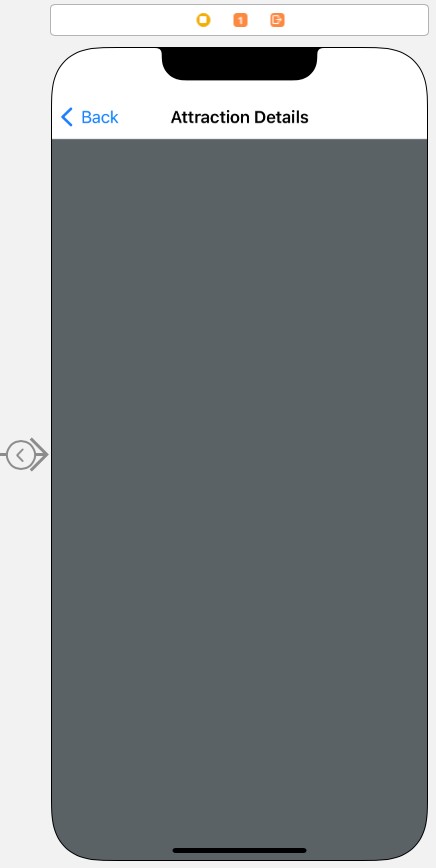
With the WebKit View selected in the storyboard canvas, display the Auto Layout Add New Constraints menu and add Spacing to nearest neighbor constraints on all four sides of the view with the Constrain to margins option disabled.
Display the Assistant Editor panel and verify that the editor is displaying the contents of the AttractionDetailViewController.swift file. Ctrl-click on the WebKit View and drag to a position just below the class declaration line in the Assistant Editor. Release the line, and in the resulting connection dialog, establish an outlet connection named webView.
When the detail view appears, the WebKit View will need to load the web page referenced by the webSite string variable. This can be achieved by adding code to the viewDidLoad method of the AttractionDetailViewController. swift file as follows:
override func viewDidLoad() {
    super.viewDidLoad()

    if let address = webSite,
        let webURL = URL(string: address) {
        let urlRequest = URLRequest(url: webURL)
        webView.load(urlRequest)
    }
}Code language: Swift (swift)
Using prepare(for segue:) to Pass Data between Storyboard Scenes
The last step in the implementation of this project is to add code so that the data model contained within the AttractionDetailViewController class is updated with the URL of the selected attraction when the user touches a table view row. As previously outlined in “Using Xcode 14 Storyboards to Build Dynamic TableViews”, the prepare(for segue:) method on an originating scene is called before a segue is performed. This is the ideal place to add code to pass data between source and destination scenes. The prepare(for segue:) method needs to be added to the AttractionTableViewController.swift file as outlined in the following code fragment:
override func prepare(for segue: UIStoryboardSegue, sender: Any?) {
   if segue.identifier == "ShowAttractionDetails" {

       let detailViewController = segue.destination
            as! AttractionDetailViewController

       let myIndexPath = self.tableView.indexPathForSelectedRow!
       let row = myIndexPath.row
       detailViewController.webSite = webAddresses[row]
    }
}Code language: Swift (swift)
The first task performed by this method is to check that the triggering segue is the ShowAttractionDetails segue we added to the storyboard. Having verified that to be the case, the code then obtains a reference to the view controller of the destination scene (in this case, an instance of our AttractionDetailViewController class). The table view object is then interrogated to find out the index of the selected row, which, in turn, is used to prime the URL string variable in the AttractionDetailViewController instance.
|
You are reading a sample chapter from Building iOS 17 Apps using Xcode Storyboards.
Buy the full book now in eBook or Print format. The full book contains 96 chapters and 760 pages of in-depth information. |
Testing the App
Compile and run the app, click on the run button in the Xcode toolbar, and wait for the app to launch. Select an entry from the table and watch as the second view controller appears and loads the appropriate web page:
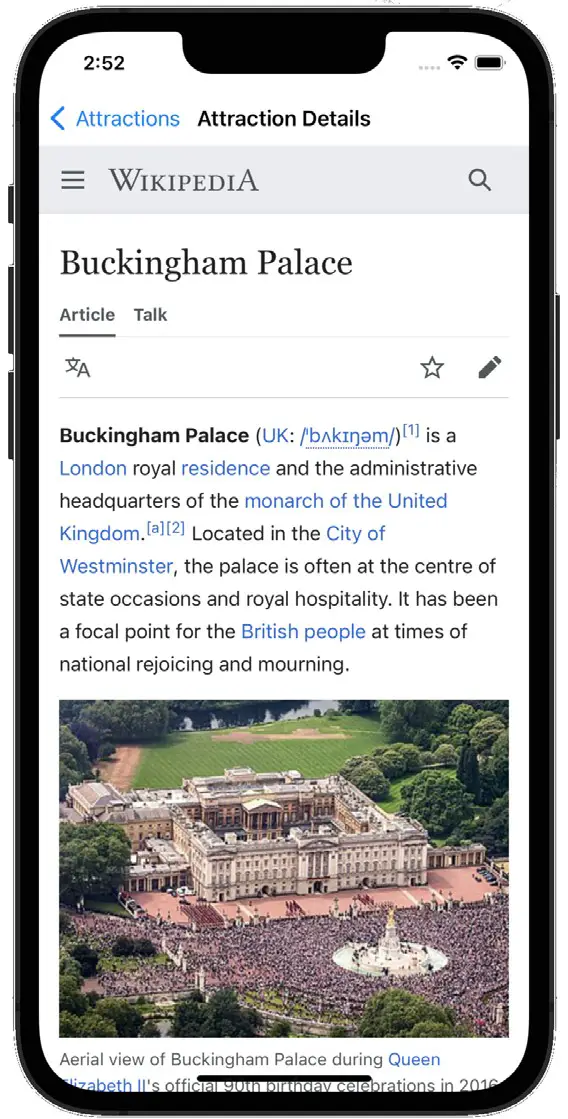
Customizing the Navigation Title Size
Including a navigation controller in this example caused a navigation bar to appear on each scene within the app. By default, this includes a title navigation item and, when necessary, a “back” button to return to the previous view controller. Many of the built-in apps provided with iOS now use a larger text size for these titles. The title text size within the navigation bar can be increased to conform with the general look and feel of the standard iOS apps by setting the prefersLargeTitles property on the navigation bar to true. To see this in action, modify the initialize method within the AttractionTableViewController.swift file to set this property:
func initialize() {
.
.
navigationController?.navigationBar.prefersLargeTitles = true
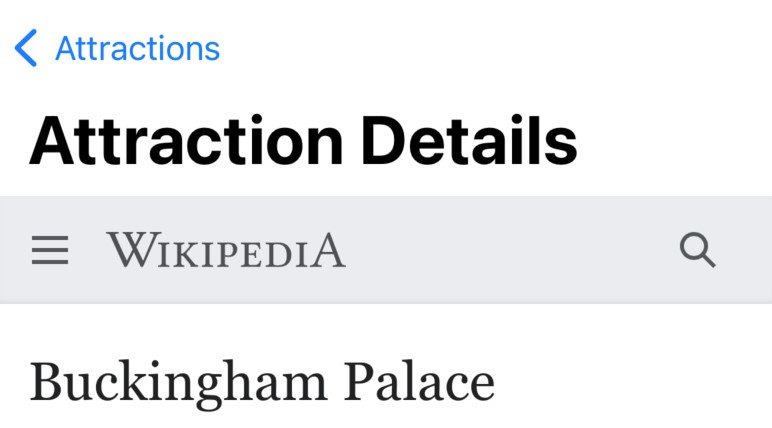
}Code language: Swift (swift)Rerun the app and note that the title now appears in the larger text:

By default, this change will propagate down to any other view controllers displayed by the navigation controller. Selecting an entry from the table, for example, will show that the DetailViewController navigation bar has inherited the larger title property:
To prevent the setting from applying to this view controller, a property is available on the navigation bar’s navigation item, which specifies the display mode for the title. Modify the viewDidLoad method of the AttractionDetailViewController.swift file to set this property so that the larger title is not used on this screen:
|
You are reading a sample chapter from Building iOS 17 Apps using Xcode Storyboards.
Buy the full book now in eBook or Print format. The full book contains 96 chapters and 760 pages of in-depth information. |
override func viewDidLoad() {
    super.viewDidLoad()

    navigationItem.largeTitleDisplayMode = .never
    if let address = webSite {
        let webURL = URL(string: address)
        let urlRequest = URLRequest(url: webURL!)
        webView.load(urlRequest)
    }
}Code language: Swift (swift)
The full range of settings for this property are as follows:
- automatic – The default behavior. This causes the navigation item to inherit the size setting from the previous navigation bar item.
- always – The navigation item title always uses large text. • never – The title always uses smaller text.
Summary
A key component of implementing table view navigation using storyboards involves using segues and transferring data between scenes. In this chapter, we used a segue to display a second scene based on table view row selections. The use of the prepare(for segue:) method as a mechanism for passing data during a segue has also been explored and demonstrated.
When a navigation controller is embedded into a storyboard, a navigation bar appears at the top of each view controller scene. The title size displayed in this navigation bar can be increased by setting a property on the navigation bar. To prevent this larger title from being inherited by other scenes in the navigation stack, change the display mode on the corresponding navigation item.