
The topic of multitasking in iOS on iPad devices was covered in detail in the earlier chapter titled A Guide to iPad Multitasking. A multitasking area mentioned briefly in that chapter was Picture in Picture support. This chapter will provide a more detailed introduction to Picture in Picture multitasking before extending the AVPlayerDemo project created in the previous chapter to include Picture in Picture support.
An Overview of Picture-in-Picture Multitasking
Picture in Picture (PiP) multitasking allows the video playback within an app running on recent iPad models to appear within a floating, movable, and resizable window. Figure 74-1, for example, shows an iPad screen’s upper portion. In the figure, the PiP window is displayed in the top left-hand corner while the user interacts with a Safari browser session. Once displayed, the location of the PiP window can be moved by the user to any other corner of the display:

Video playback within a PiP window may only be initiated via user action. For example, when the user presses the Home button on the iPad device while full-screen video playback is in progress, the video will be transferred to a PiP window. Alternatively, the video playback can be moved to a PiP window using a button that appears in the top left corner of the video player window, as highlighted in Figure 74-2:
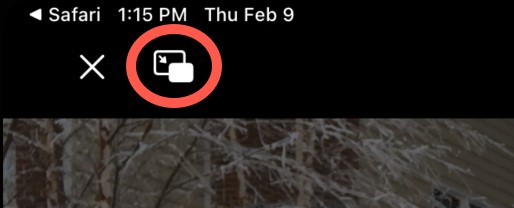
A set of controls is also available from within the PiP window to pause and resume playback, return to fullscreen viewing or exit the playback entirely.
Adding Picture-in-Picture Support to the AVPlayerDemo App
The remainder of this chapter will work through the steps to integrate PiP support into the AVPlayerDemo app created in the previous chapter. The first step is to enable PiP support within the project capabilities.
 |
You are reading a sample chapter from Building iOS 17 Apps using Xcode Storyboards.
Buy the full book now in eBook or Print format. The full book contains 96 chapters and 760 pages of in-depth information. |
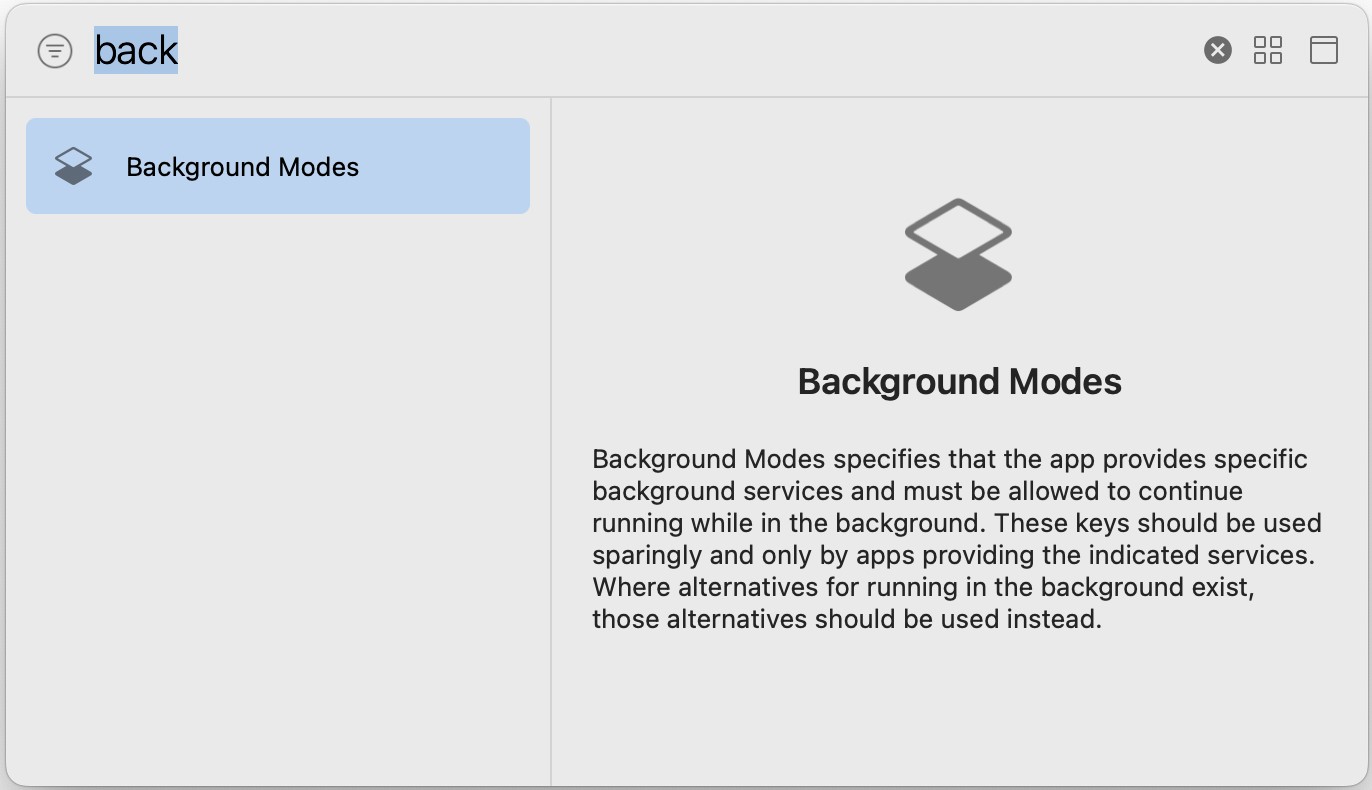
If the project is not already loaded, start Xcode and open the AVPlayerDemo project. Then, in the Project Navigator panel, select the AVPlayerDemo project target at the top of the panel and click on the Signing & Capabilities tab in the main panel. Next, click the “+ Capability” button to display the dialog shown in Figure 74-3. Finally, enter “back” into the filter bar, select the result, and press the keyboard enter key to add the capability to the project:
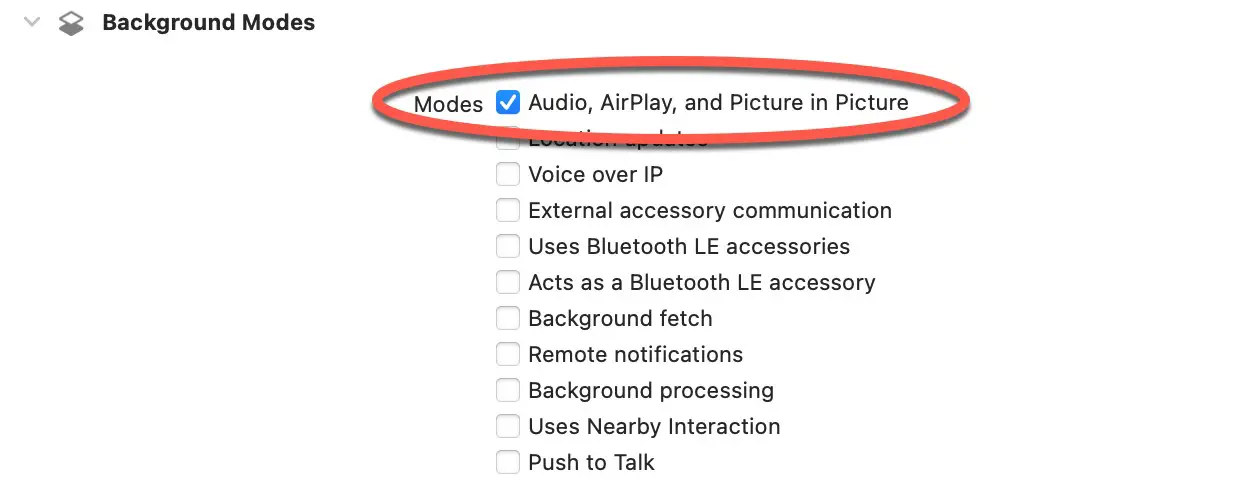
On returning to the capabilities screen, enable the checkbox for the Audio, AirPlay, and Picture in Picture in the Background modes section as highlighted in Figure 74-4:
Adding the Navigation Controller
To better demonstrate the implementation of PiP support within an iOS app, the storyboard for the AVPlayerDemo will be adapted to include a navigation controller so that the user can navigate back to the main view controller scene from the AVKit Player scene. Within the Document outline panel, select the View Controller scene so that it highlights in blue, and choose the Xcode Editor -> Embed In -> Navigation Controller menu option.
Setting the Audio Session Category
The next step is configuring the app to use an appropriate audio session category. For this example, this will be set to AVAudioSession.Category.playback, the code for which should now be added to the didFinishLaunchingWithOptions method located in the AppDelegate.swift file as follows:
import UIKit
import AVFoundation
.
.
func application(_ application: UIApplication, didFinishLaunchingWithOptions launchOptions: [UIApplication.LaunchOptionsKey: Any]?) -> Bool {
let audioSession = AVAudioSession.sharedInstance()
do {
try audioSession.setCategory(AVAudioSession.Category.playback,
mode: .default)
} catch {
print("Unable to set audio session category")
}
return true
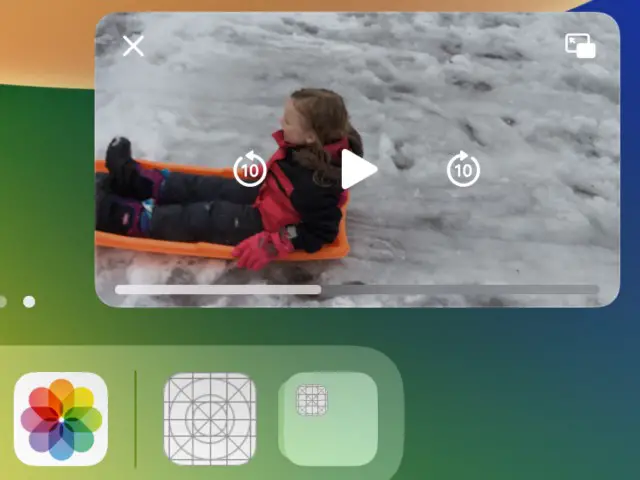
}Code language: Swift (swift)With these steps completed, launch the app on a physical iPad or iOS simulator session (keeping in mind that PiP support is unavailable on the first-generation iPad Mini or any full-size iPad models older than the first iPad Air). Once loaded, tap the Play Movie button and start video playback. Tap the PiP button in the video playback control bar, or use the device Home button and note that video playback is transferred to the PiP window:
|
You are reading a sample chapter from Building iOS 17 Apps using Xcode Storyboards.
Buy the full book now in eBook or Print format. The full book contains 96 chapters and 760 pages of in-depth information. |
With the PiP window visible and the three control buttons displayed, tap the button to toggle back to full-screen playback mode.
PiP support is now implemented except for one important step. To experience the need for this additional step, run the app again, begin movie playback, and switch playback to PiP mode. Then, remaining within the AVPlayerDemo app, tap the Back button in the navigation bar to return to the original view controller scene containing the Play Movie button. Next, tap the PiP button to return the movie playback to full screen, at which point the movie playback window will disappear, leaving just the initial view controller visible. This is because a delegate method must be implemented to present the full-size video playback view controller.
Implementing the Delegate
The AVPlayerViewController class can have assigned to it a delegate object on which methods will be called at various points during the playback of a video. This delegate object must implement the AVPlayerViewControllerDelegate protocol. For this example, the ViewController class will be designated as the delegate object for the class. Select the ViewController.swift file and modify it to declare that it now implements the AVPlayerViewControllerDelegate protocol:
import UIKit
import AVKit
import AVFoundation

class ViewController: UIViewController, AVPlayerViewControllerDelegate {

    override func viewDidLoad() {
        super.viewDidLoad()
        }
.
.
}Code language: Swift (swift)
Having declared that the class implements the protocol, the prepare(for segue:) method now needs to be modified to assign the current instance of the class as the delegate for the player view controller instance:
override func prepare(for segue: UIStoryboardSegue, sender: Any?) {

    let destination = segue.destination as!
                            AVPlayerViewController
    let url = URL(string:
            "https://www.ebookfrenzy.com/ios_book/movie/movie.mov")

    destination.delegate = self

    if let movieURL = url {
        destination.player = AVPlayer(url: movieURL)
    }
}Code language: Swift (swift)
When the user moves back from the PiP window to full-screen playback mode, the restoreUserInterfaceForPictureInPictureStopWithCompletionHandler method is called on the delegate object. This method is passed a reference to the player view controller and a completion handler. This method ensures that the player view controller is presented to the user before calling the completion handler with a Boolean value indicating the success or otherwise of the operation. Remaining within the ViewController.swift file, implement this method as follows:
|
You are reading a sample chapter from Building iOS 17 Apps using Xcode Storyboards.
Buy the full book now in eBook or Print format. The full book contains 96 chapters and 760 pages of in-depth information. |
func playerViewController(_ playerViewController: AVPlayerViewController,
  restoreUserInterfaceForPictureInPictureStopWithCompletionHandler completionHandler: @escaping (Bool) -> Void) {

    let currentViewController =
		navigationController?.visibleViewController

    if currentViewController != playerViewController {
        if let topViewController =
               navigationController?.topViewController {

            topViewController.present(playerViewController,
                  animated: true, completion: {()
                completionHandler(true)
            })
        }
    }
}Code language: Swift (swift)
The delegate method is passed a reference to the player view controller instance and a completion handler. The code added to the method begins by identifying the currently visible view controller and checking if the current view controller matches the playerViewController instance. For example, suppose the current view controller is not the player view controller. In that case, the navigation controller obtains a reference to the top view controller, which, in turn, is used to display the player view controller. The completion handler is then called and passed a true value.
If, on the other hand, the current view controller is the playerViewController, no action needs to be taken since the system will automatically display the player controller to show the movie in full screen. In fact, attempting to present the player view controller when it is already the current view controller will cause the app to crash with an error that reads as follows:
Application tried to present modally an active view controller <AVPlayerViewController>Code language: plaintext (plaintext)Run the app again and verify that the full-screen playback view appears when the full-screen button is tapped in the PiP window after navigating back to the main view controller scene.
Opting Out of Picture-in-Picture Support
The default behavior for the AVPlayerViewController class is to support PiP. To disable PiP support for an AVPlayerViewController instance, set the allowsPictureInPicturePlayback property on the object to false. For example:
playerViewController.allowsPictureInPicturePlayback = falseCode language: Swift (swift)With PiP support disabled, the PiP button will no longer appear in the full-screen view’s playback control panel, and pressing the device Home button during video playback will no longer place the video into a PiP window.
|
You are reading a sample chapter from Building iOS 17 Apps using Xcode Storyboards.
Buy the full book now in eBook or Print format. The full book contains 96 chapters and 760 pages of in-depth information. |
Additional Delegate Methods
Several other methods are supported by the AVPlayerViewControllerDelegate protocol, which, if implemented in the designated delegate, will be called at various points in the life cycle of the video playback:
- pictureInPictureControllerWillStartPictureInPicture – Called before the transition to Picture in Picture mode starts.
- pictureInPictureControllerDidStartPictureInPicture – Called when the Picture in Picture playback has started. This method is passed a reference to the playback view controller object.
- pictureInPictureControllerWillStopPictureInPicture – Called when the Picture in Picture playback is about to stop. This method is passed a reference to the playback view controller object.
- pictureInPictureControllerDidStopPictureInPicture – Called when the Picture in Picture playback has stopped. This method is passed a reference to the playback view controller object.
Summary
Picture in Picture support leverages the multitasking capabilities of iOS to allow video playback to be placed within a floating, movable, and resizable window where it continues to play as the user performs other tasks on the device. This chapter has highlighted the steps in implementing PiP support within an iOS app, including enabling entitlements, configuring the audio session, and implementing delegate methods.