An iPad iOS 4 Gesture Recognition Tutorial (Xcode 4)
| Previous | Table of Contents | Next |
| Identifying iPad Gestures using iOS 4 Gesture Recognizers (Xcode 4) | Drawing iOS 4 iPad 2D Graphics with Quartz (Xcode 4) |
Learn SwiftUI and take your iOS Development to the Next Level |
The previous chapter entitled Identifying iPad Gestures using iOS 4 Gesture Recognizers provided an overview of the capabilities and implementation of gesture recognizers in iPad applications. Having covered the theory of gesture recognizers, the purpose of this chapter is to work through an example application which demonstrates the use of the various UIGestureRecognizer subclasses within an iPad application.
The application created in this chapter will configure recognizers to detect a number of different gestures on the iPad display and update a status label in real-time with information about each recognized gesture.
Creating the Gesture Recognition Project
Begin by invoking Xcode and creating a new iOS iPad application project using the View-based application template and name the project recognizer.
Configuring the Label Outlet
The gesture recognizers that will be created later in this tutorial will be attached to the UIView object created in the project for us by Xcode when we selected the View-based application template. The only other user interface component required is the label used to notify the user of the type of gesture detected. Since the text displayed on this label will need to be updated from within the application code it will need to be connected to an outlet. Within the Xcode Project navigator panel, therefore, select the recognizerViewController.h file and modify it as follows:
#import <UIKit/UIKit.h>

@interface recognizerViewController : UIViewController
{
    UILabel *statusLabel;
}
@property (retain, nonatomic) IBOutlet UILabel *statusLabel;
@end
Next, edit the recognizerViewController.m file and add the @synthesizer directive for the new outlet and also the code to release the memory allocated to this outlet:
#import "recognizerViewController.h"

@implementation recognizerViewController
@synthesize statusLabel;
.
.
- (void)dealloc
{
    [statusLabel release];
    [super dealloc];
}
.
.
- (void)viewDidUnload
{
    [super viewDidUnload];
    // Release any retained subviews of the main view.
    // e.g. self.myOutlet = nil;
    self.statusLabel = nil;
}
.
.
@end
Designing the User Interface
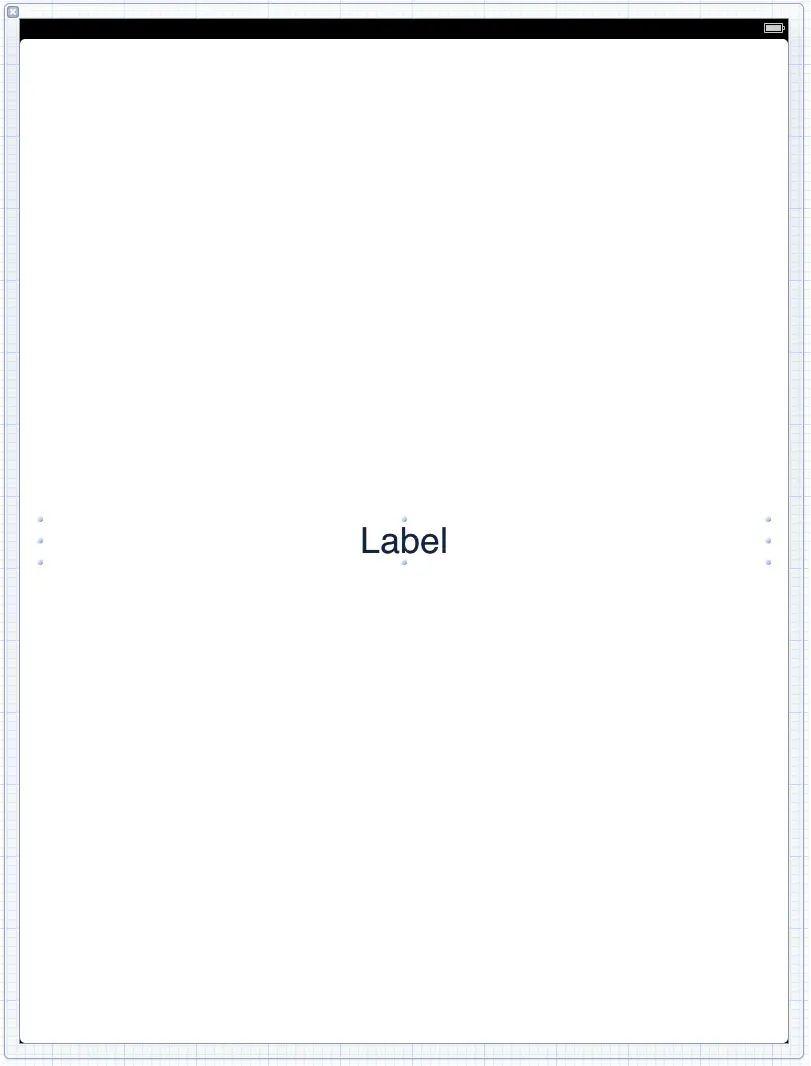
Having declared the outlet for the label the next step is add the actual label object to the user interface. Select the recognizerViewController.xib file to display the interface builder panel and display the Object library (View -> Utilities -> Object Library). Drag a UILabel object from the object library panel to the center of the view in the user interface design area. Once positioned on the view, stretch the label to the outer edges of the view until the blue dotted lines representing the recommended margins appear. Display the attribute inspector (View -> Utilites -> Attribute Inspector) and modify the label properties to center the label text and to use a larger font (for example 36 pt):
Learn SwiftUI and take your iOS Development to the Next Level |
Ctrl+click on the File’s Owner object, drag the blue line to the label object and release. From the resulting menu select the statusLabel outlet.
Configuring the Gesture Recognizers
The application code will need to configure gesture recognizers for taps, swipes, rotations and pinches. Since these recognizers will need to be attached to the view object the ideal place to create them is in the viewDidLoad method of our recognizerViewController class, so select the recognizerViewController.m file and modify this method so that it reads as follows:
- (void)viewDidLoad
{
    UITapGestureRecognizer *doubleTap =
       [[UITapGestureRecognizer alloc]
       initWithTarget:self
       action:@selector(tapDetected:)];
    doubleTap.numberOfTapsRequired = 2;
    [self.view addGestureRecognizer:doubleTap];
    [doubleTap release];

    UIPinchGestureRecognizer *pinchRecognizer =
        [[UIPinchGestureRecognizer alloc]
        initWithTarget:self
        action:@selector(pinchDetected:)];
    [self.view addGestureRecognizer:pinchRecognizer];
    [pinchRecognizer release];

    UIRotationGestureRecognizer *rotationRecognizer =
        [[UIRotationGestureRecognizer alloc]
        initWithTarget:self
        action:@selector(rotationDetected:)];
    [self.view addGestureRecognizer:rotationRecognizer];
    [rotationRecognizer release];

    UISwipeGestureRecognizer *swipeRecognizer =
       [[UISwipeGestureRecognizer alloc]
       initWithTarget:self
       action:@selector(swipeDetected:)];
    swipeRecognizer.direction = UISwipeGestureRecognizerDirectionRight;
    [self.view addGestureRecognizer:swipeRecognizer];
    [swipeRecognizer release];

    UILongPressGestureRecognizer *longPressRecognizer =
         [[UILongPressGestureRecognizer alloc]
         initWithTarget:self
         action:@selector(longPressDetected:)];
    longPressRecognizer.minimumPressDuration = 3;
    longPressRecognizer.numberOfTouchesRequired = 1;
    [self.view addGestureRecognizer:longPressRecognizer];
    [longPressRecognizer release];
    [super viewDidLoad];
}
Adding the Action Methods
Having configured the gesture recognizers, the next step is to write the action methods that will be called by each recognizer when the corresponding gesture is detected. These methods will also reside in the recognizerViewController.m file and will update the status label with information about the detected gesture:
- (IBAction)longPressDetected:(UIGestureRecognizer *)sender {
    statusLabel.text = @"Long Press";
}

- (IBAction)swipeDetected:(UIGestureRecognizer *)sender {
    statusLabel.text = @"Right Swipe";
}

- (IBAction)tapDetected:(UIGestureRecognizer *)sender {
    statusLabel.text = @"Double Tap";
}

- (IBAction)pinchDetected:(UIGestureRecognizer *)sender {

    CGFloat scale =
       [(UIPinchGestureRecognizer *)sender scale];
    CGFloat velocity =
       [(UIPinchGestureRecognizer *)sender velocity];

    NSString *resultString = [[NSString alloc] initWithFormat:
         @"Pinch - scale = %f, velocity = %f",
         scale, velocity];
    statusLabel.text = resultString;
    [resultString release];
}

- (IBAction)rotationDetected:(UIGestureRecognizer *)sender {
    CGFloat radians =
          [(UIRotationGestureRecognizer *)sender rotation];
    CGFloat velocity =
          [(UIRotationGestureRecognizer *)sender velocity];

    NSString *resultString = [[NSString alloc] initWithFormat:
              @"Rotation - Radians = %f, velocity = %f",
              radians, velocity];
    statusLabel.text = resultString;
    [resultString release];
}
Testing the Gesture Recognition Application
The final step is to build and run the application. In order to fully test the pinching and rotation recognition it will be necessary to run the application on a physical device (since it is not possible to emulate two simultaneous touches within the iOS iPad Simulator environment). Assuming provisioned device is attached (see Testing iOS 4 Apps on the iPad – Developer Certificates and Provisioning Profiles for more details) simply click on the Xcode Run button. Once the application loads onto your iPad device, perform the appropriate gestures on the display and watch the status label update accordingly.
Learn SwiftUI and take your iOS Development to the Next Level |
| Previous | Table of Contents | Next |
| Identifying iPad Gestures using iOS 4 Gesture Recognizers (Xcode 4) | Drawing iOS 4 iPad 2D Graphics with Quartz (Xcode 4) |


