
This chapter aims to work through creating an example iOS app that uses reverse geocoding together with the MKPlacemark and MKMapItem classes. The app will consist of a screen into which the user will be required to enter destination address information. Then, when the user selects a button, a map will be launched containing turn-by-turn directions from the user’s current location to the specified destination.
Creating the MapItem Project
Launch Xcode and create a new project using the iOS App template with the Swift and Storyboard options selected, entering MapItem as the product name.
Designing the User Interface
The user interface will consist of four Text Field objects into which the destination address will be entered, together with a Button to launch the map. Select the Main.storyboard file in the project navigator panel and, using the Library palette, design the user interface layout to resemble that of Figure 65-1. Take steps to widen the Text Fields and configure Placeholder text attributes on each one.
If you reside in a country not divided into States and Zip code regions, feel free to adjust the user interface accordingly.
Display the Resolve Auto Layout Issues menu and select the Reset to Suggested Constraints option under All Views in View Controller.
 |
You are reading a sample chapter from Building iOS 17 Apps using Xcode Storyboards.
Buy the full book now in eBook or Print format. The full book contains 96 chapters and 760 pages of in-depth information. |
The next step is to connect the outlets for the text views and declare an action for the button. Next, select the Street address Text Field object, display the Assistant Editor, and ensure that the editor displays the ViewController.swift file.

Ctrl-click on the Street address Text Field object and drag the resulting line to the area immediately beneath the class declaration directive in the Assistant Editor panel. Upon releasing the line, the configuration panel will appear. Configure the connection as an Outlet named address and click on the Connect button. Repeat these steps for the City, State, and Zip text fields, connecting them to outlets named city, state, and zip.
Ctrl-click on the Get Directions button and drag the resulting line to a position beneath the new outlets declared in the Assistant Editor. In the resulting configuration panel, change the Connection type to Action and name the method getDirections. On completion, the beginning of the ViewController.swift file should read as follows:
import UIKit

class ViewController: UIViewController {

    @IBOutlet weak var address: UITextField!
    @IBOutlet weak var city: UITextField!
    @IBOutlet weak var state: UITextField!
    @IBOutlet weak var zip: UITextField!
.
.
    @IBAction func getDirections(_ sender: Any) {
    }
.
.
}Code language: Swift (swift)
Converting the Destination using Forward Geocoding
When the user touches the button in the user interface, the getDirections method can extract the address information from the text fields. The objective will be to create an MKPlacemark object to contain this location. As outlined in Integrating Maps into iOS 17 Apps using MKMapItem, an MKPlacemark instance requires the longitude and latitude of an address before it can be instantiated. Therefore, the first step in the getDirections method is to perform a forward geocode translation of the address. Before doing so, however, it is necessary to declare a property in the ViewController.swift file in which to store these coordinates once they have been calculated. This will, in turn, requires that the CoreLocation framework be imported. Therefore, now is also an opportune time to import the MapKit and Contacts frameworks, both of which will be required later in the chapter:
Next, select the ViewController.swift file, locate the getDirections method stub and modify it to convert the address string to geographical coordinates:
|
You are reading a sample chapter from Building iOS 17 Apps using Xcode Storyboards.
Buy the full book now in eBook or Print format. The full book contains 96 chapters and 760 pages of in-depth information. |
@IBAction func getDirections(_ sender: Any) {

    if let addressString = address.text,
        let cityString = city.text,
        let stateString = state.text,
        let zipString = zip.text {

        let addressString =
            "\(addressString) \(cityString) \(stateString) \(zipString)"

        CLGeocoder().geocodeAddressString(addressString,
                   completionHandler: {(placemarks, error) in

                if error != nil {
                    print("Geocode failed: \(error!.localizedDescription)")
                } else if let marks = placemarks, marks.count > 0 {
                        let placemark = marks[0]
                        if let location = placemark.location {
                        self.coords = location.coordinate
                        self.showMap()
                    }
                }
        })
    }
}Code language: Swift (swift)
The steps used to perform the geocoding translation mirror those outlined in Integrating Maps into iOS 17 Apps using MKMapItem with one difference: a method named showMap is called if a successful translation occurs. All that remains, therefore, is to implement this method.
Launching the Map
With the address string and coordinates obtained, the final task is implementing the showMap method. This method will create a new MKPlacemark instance for the destination address, configure options for the map to request driving directions, and launch the map. Since the map will be launched with a single map item, it will default to providing directions from the current location. With the ViewController.swift file still selected, add the code for the showMap method so that it reads as follows:
func showMap() {

    if let addressString = address.text,
        let cityString = city.text,
        let stateString = state.text,
        let zipString = zip.text,
        let coordinates = coords {

        let addressDict =
            [CNPostalAddressStreetKey: addressString,
             CNPostalAddressCityKey: cityString,
             CNPostalAddressStateKey: stateString,
             CNPostalAddressPostalCodeKey: zipString]

        let place = MKPlacemark(coordinate: coordinates,
                                addressDictionary: addressDict)

        let mapItem = MKMapItem(placemark: place)

        let options = [MKLaunchOptionsDirectionsModeKey:
            MKLaunchOptionsDirectionsModeDriving]

        mapItem.openInMaps(launchOptions: options)
    }
}Code language: Swift (swift)
The method simply creates an NSDictionary containing the contact keys and values for the destination address. It then creates an MKPlacemark instance using the address dictionary and the coordinates from the forward geocoding operation. Next, a new MKMapItem object is created using the placemarker object before another dictionary is created and configured to request driving directions. Finally, the map is launched.
Building and Running the App
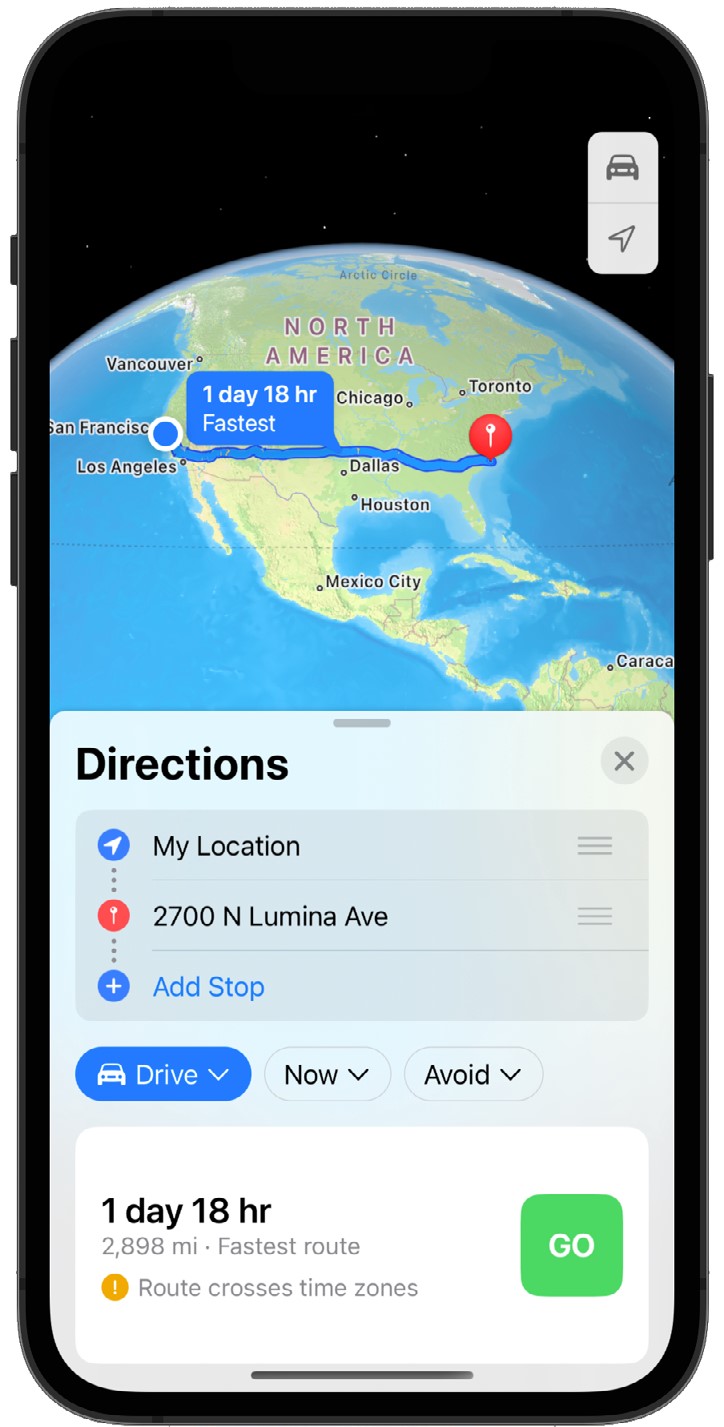
Within the Xcode toolbar, click on the Run button to compile and run the app, either on a physical iOS device or the iOS Simulator. Once loaded, enter an address into the text fields before touching the Get Directions button. The map should subsequently appear with the route between your current location and the destination address. Note that if the app is running in the simulator, the current location will likely default to Apple’s headquarters in California:
Summary
This chapter’s goal has been to create a simple app that uses geocoding and the MKPlacemark and MKMapItem classes. The example app created in this chapter has demonstrated the ease with which maps and directions can be integrated into iOS apps.
|
You are reading a sample chapter from Building iOS 17 Apps using Xcode Storyboards.
Buy the full book now in eBook or Print format. The full book contains 96 chapters and 760 pages of in-depth information. |